Installation and Use of Database Management Tools
12002Course Introduction
This course focuses on the installation and usage of two data management tools: MySQL and Navicat. We will explore the functionalities of these tools and learn how to connect to a MySQL database using Navicat. Additionally, this course will explain the relationship between SQL, MySQL, and Navicat, laying the foundation for further learning.
1. MySQL Software
Introduction to MySQL
MySQL is an open-source relational database management system (RDBMS). The term "relational" means that the data in the database is stored in tables, which can have associations or "relations" with each other. MySQL is based on SQL (Structured Query Language), which is a standard language used for adding, accessing, and manipulating data in a database.
Installation Process (Windows)
- Step 1: Download the MySQL Server Installer for Windows
Open the following link to access the download page:
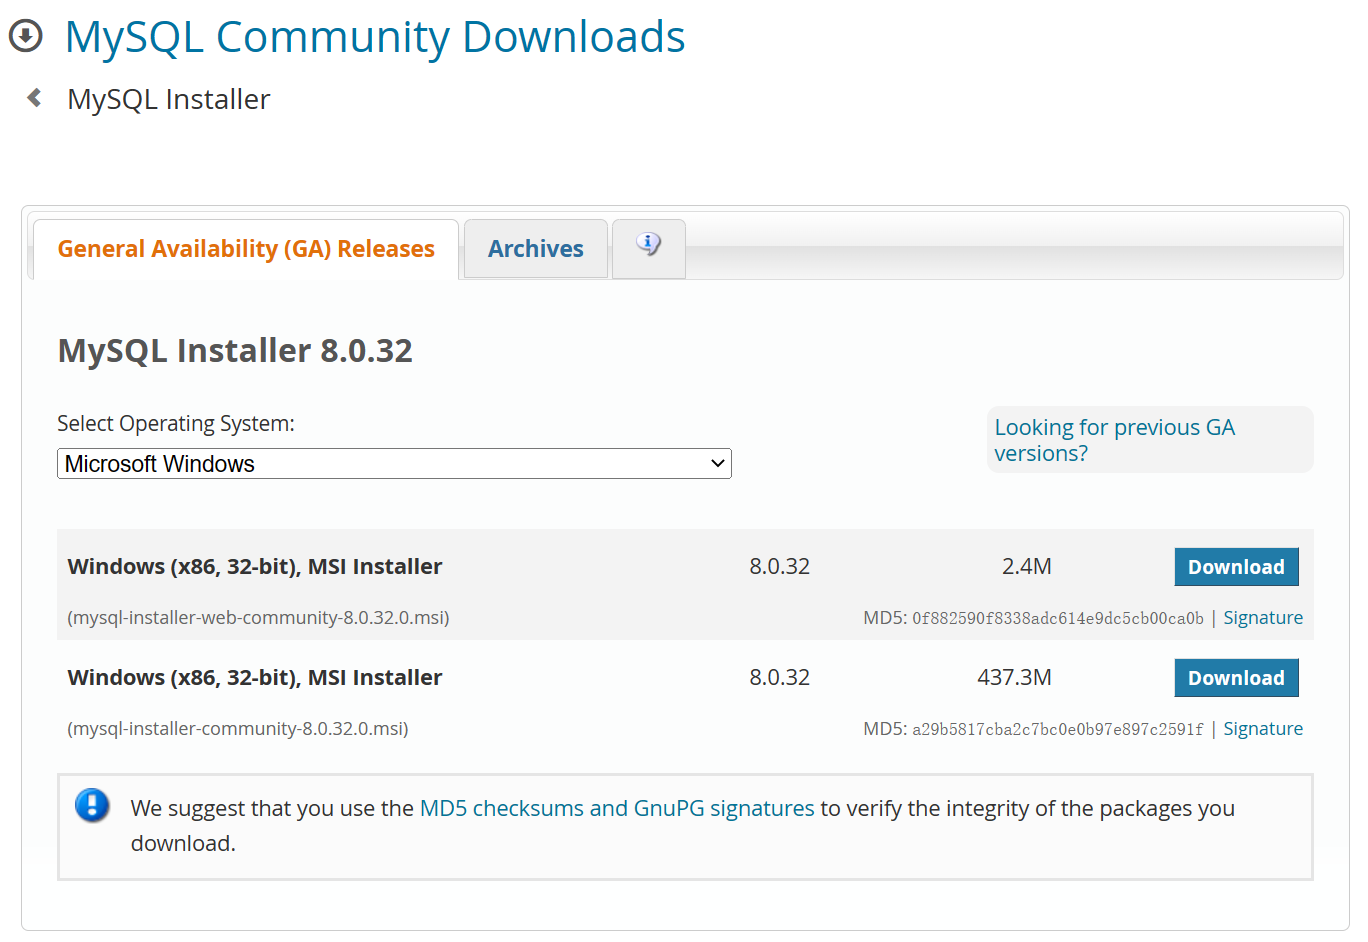
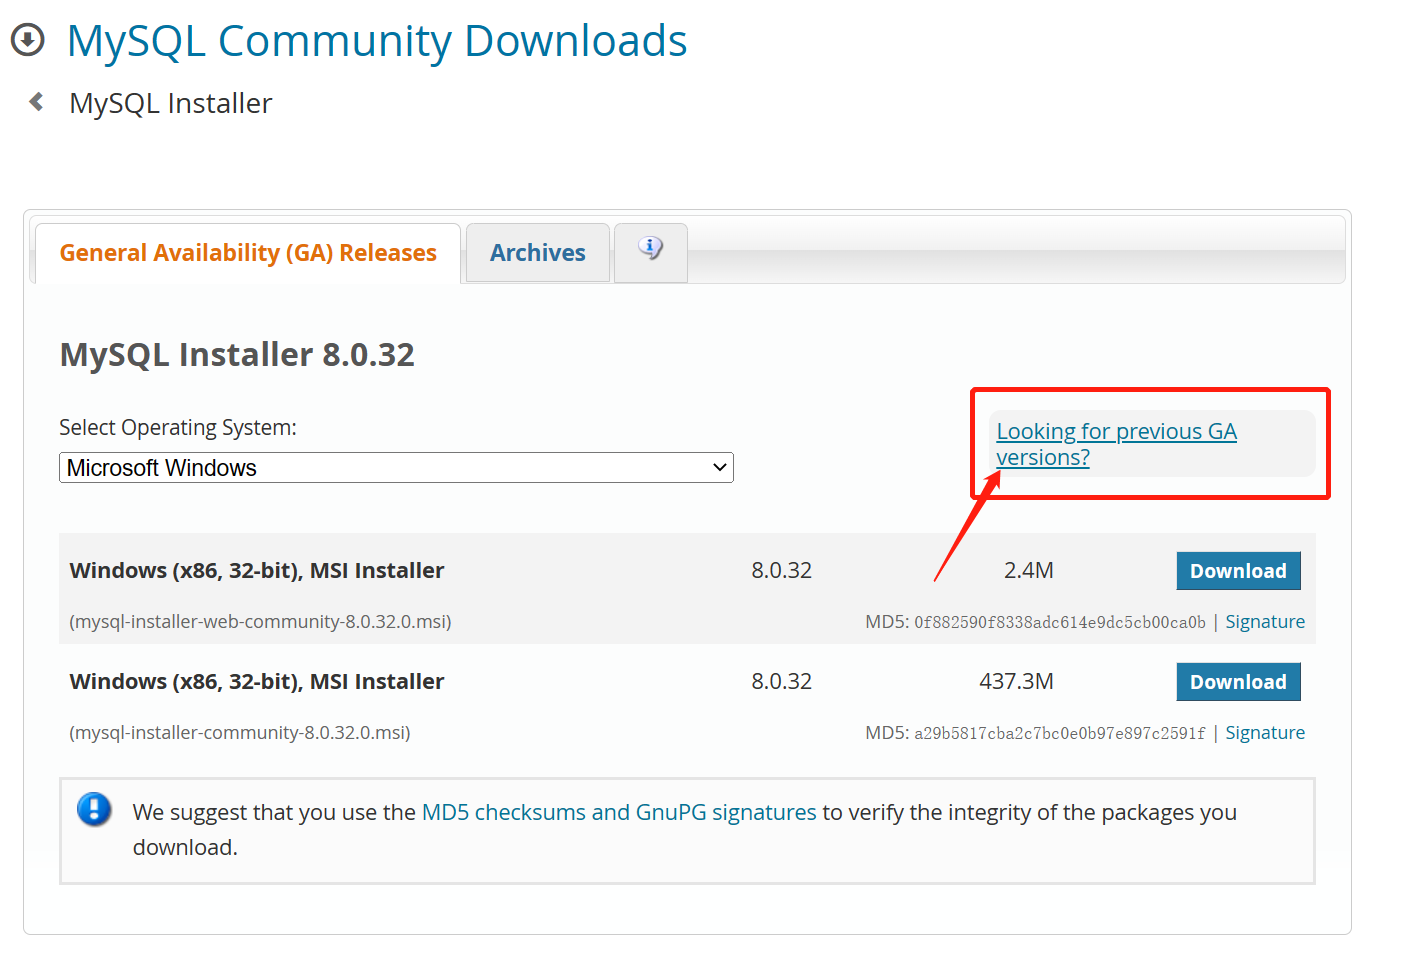
- The version we need to install is MySQL 5.7.x (minimum version 5.7); click on "Looking for previous GA versions?" on the page to select the MySQL version to download.
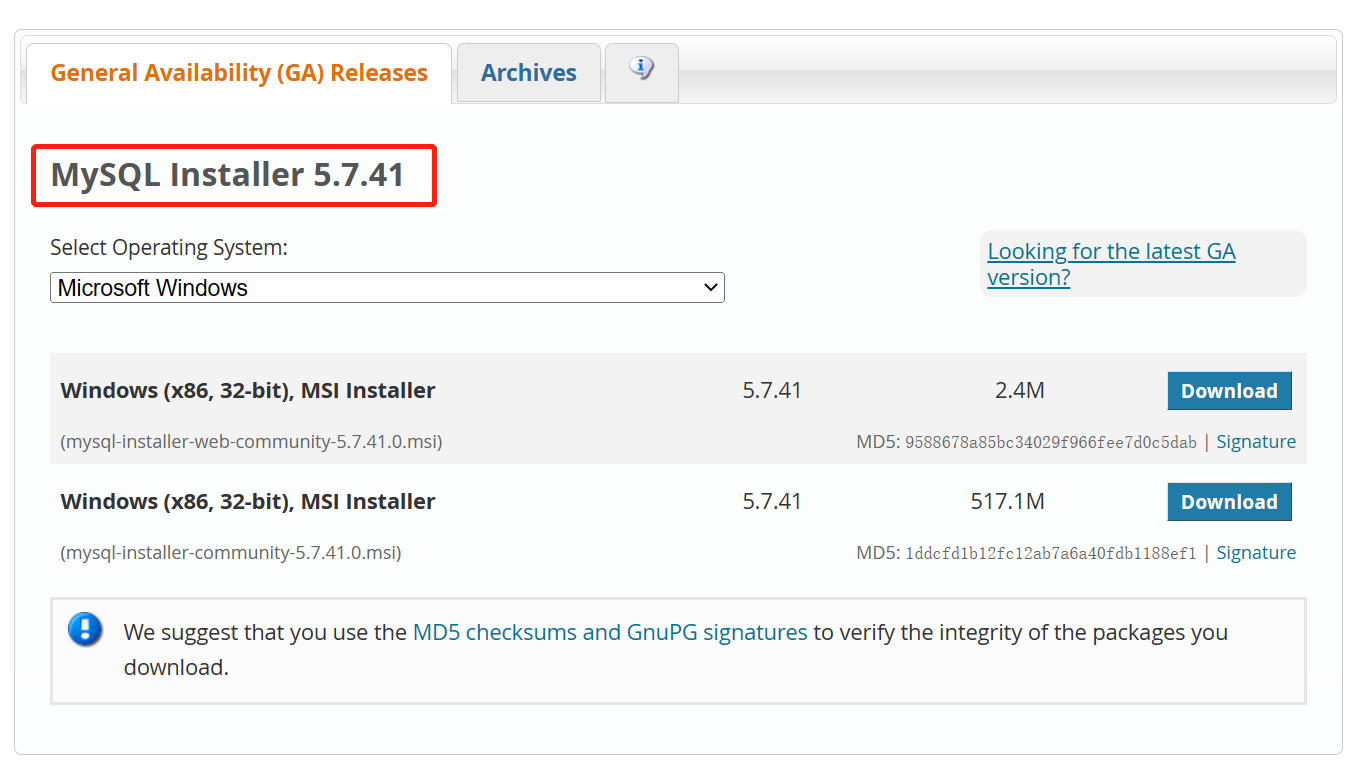
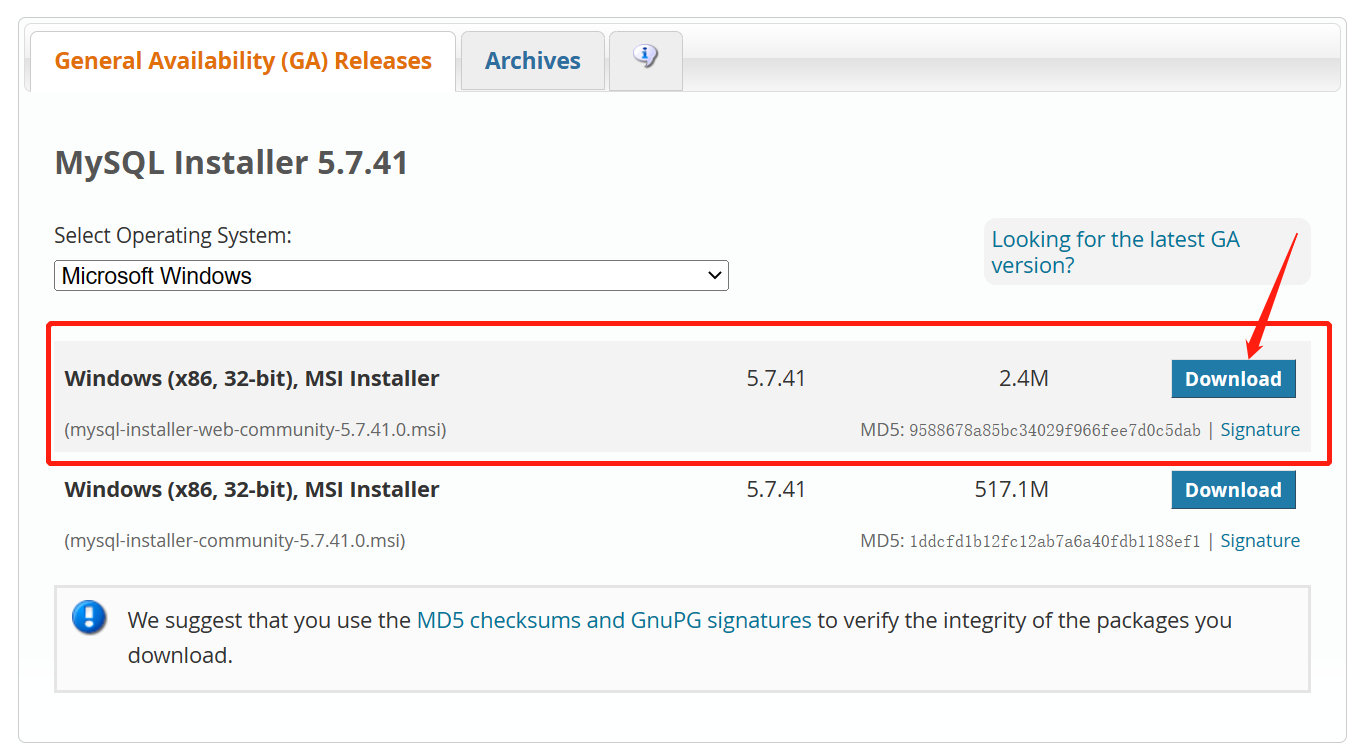
- Click the first "Download" button to go to the download page.
- Click "No thanks, just start my download." to begin the download.

- Step 2: Install MySQL Server
- Double-click the downloaded software mysql-installer-web-community-5.7.41.0.msi to start the installation. The software may take some time to open, please wait.
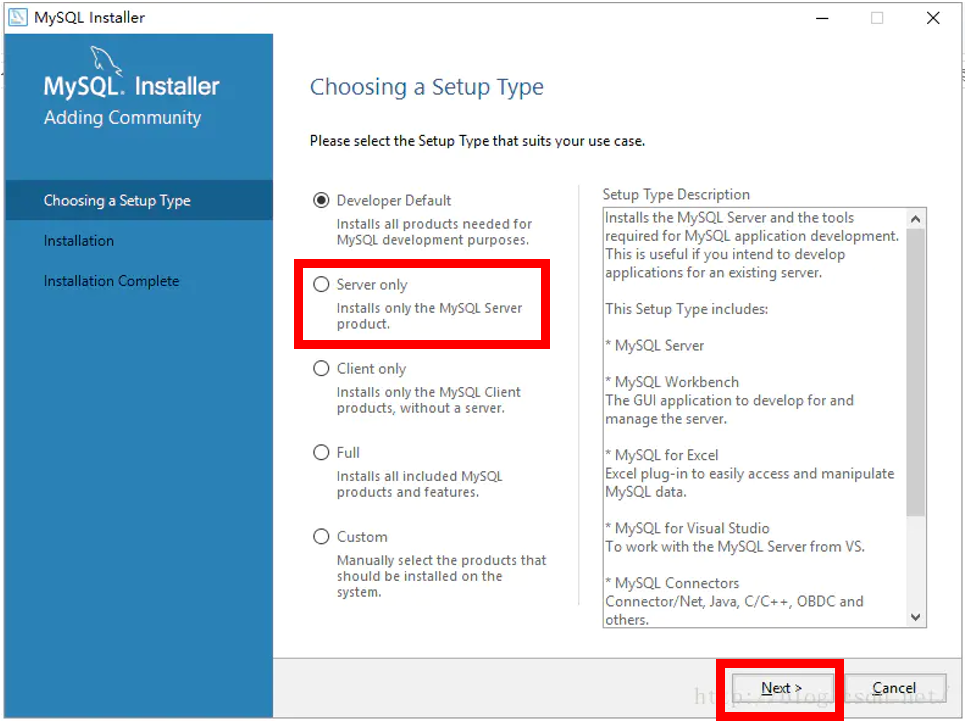
- Choose the installation type: select "Server only" and then click "Next".
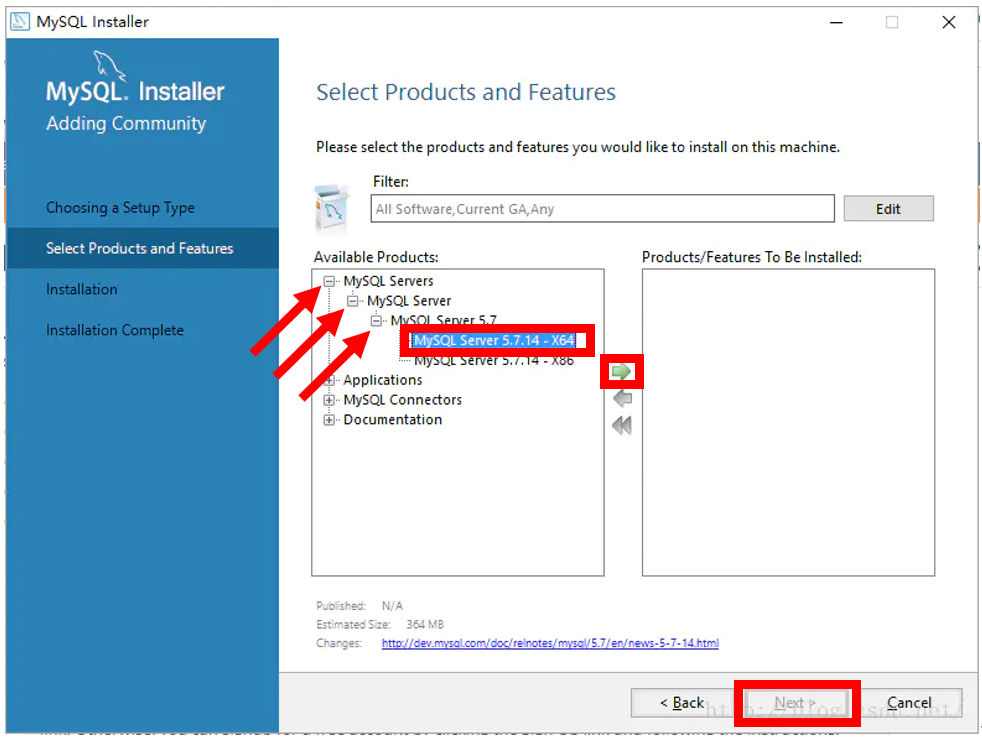
- Select the server version: click the "+" sign to expand the software list and select "MySQL Server 5.7.41 – X64". Click the green right arrow to add the selected software to the installation list. Then click "Next" to proceed.
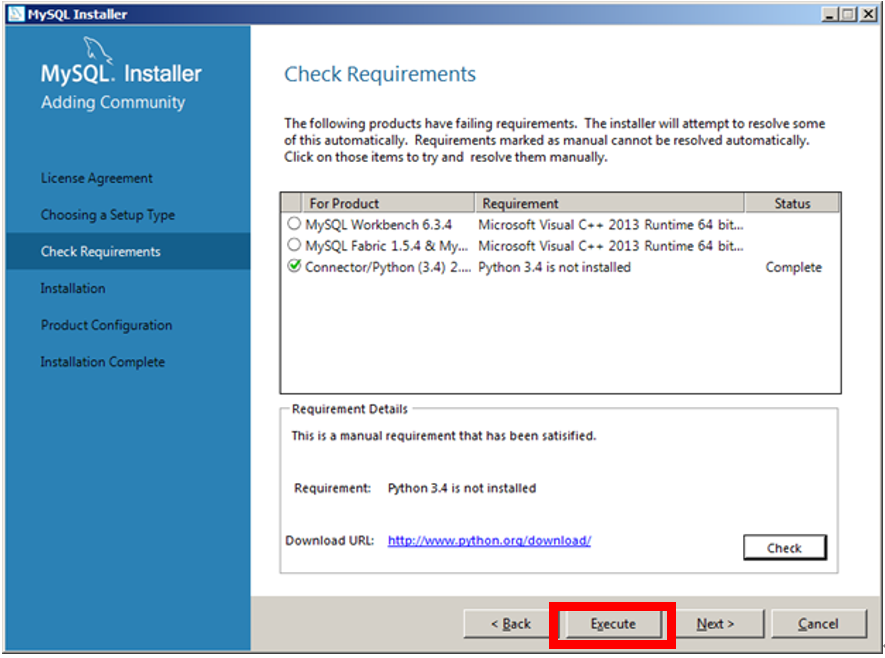
- The installer will automatically check if your computer is missing any required software. If you see this screen, click "Execute" below:
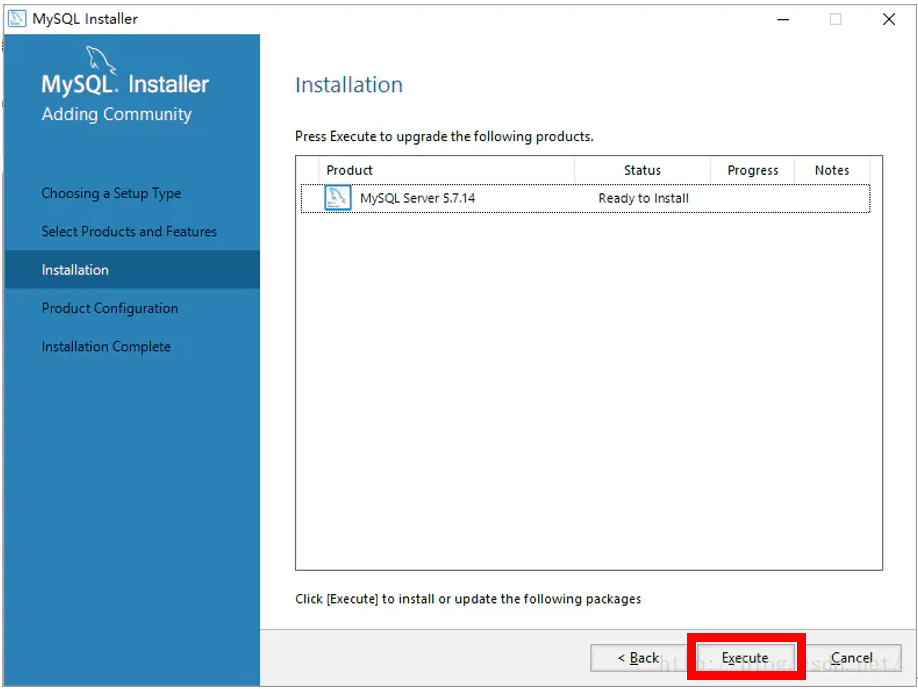
- Official installation: Once all required software is installed, you can install MySQL Server. Click "Execute" to start the installation:
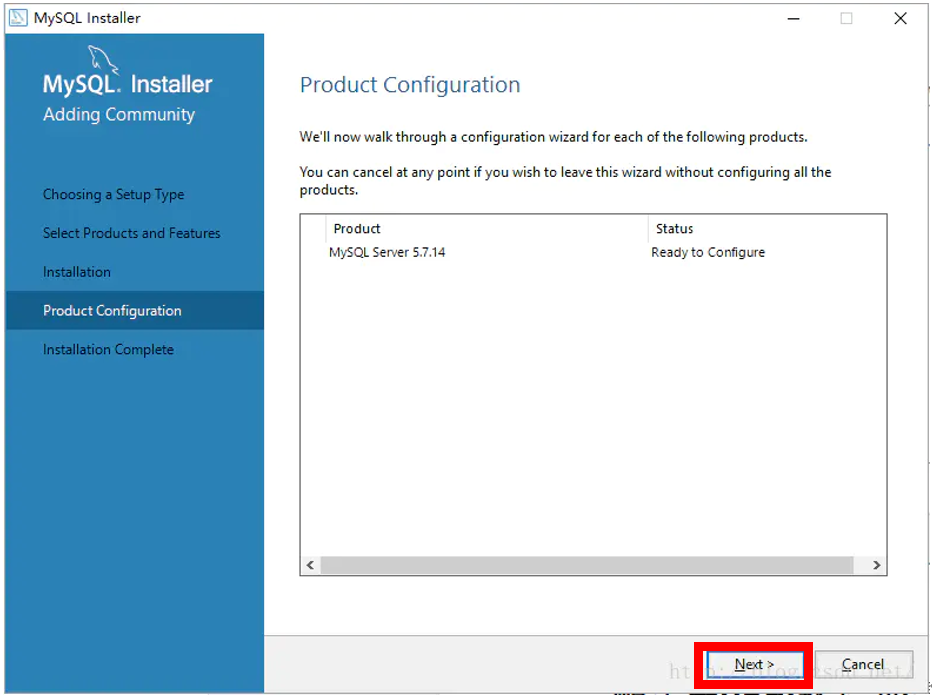
- After waiting for the installation to complete, the Status bar will show Complete, and a green checkmark will appear next to the MySQL icon. Then click the "Next" button to enter the product configuration interface.
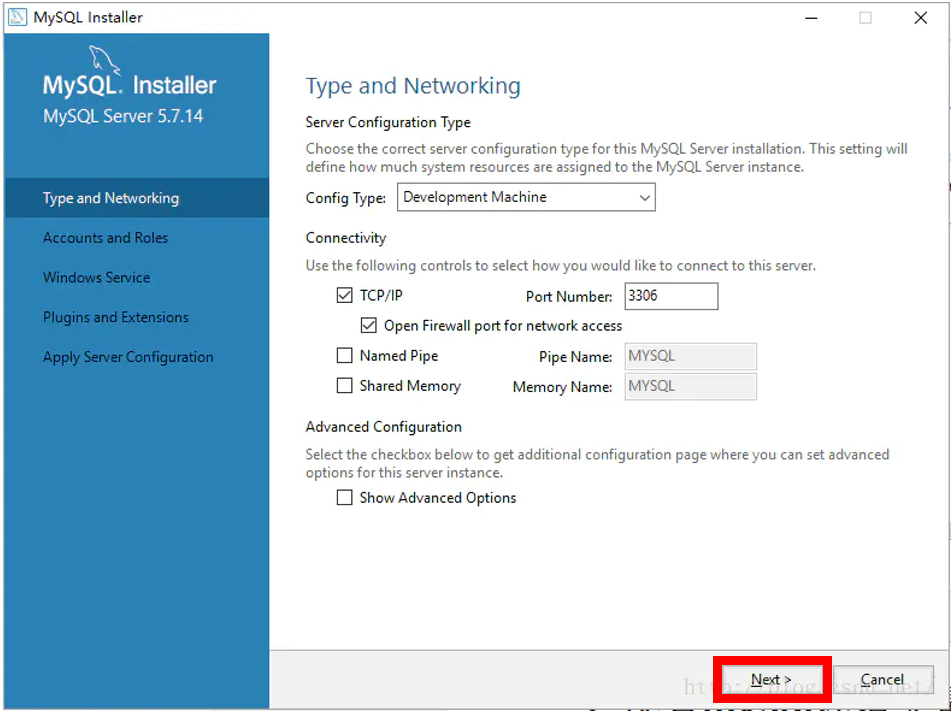
- Step 3: MySQL Server Configuration
The most important step in this phase is to set a password for your MySQL; please set this password to 123456.
- Click the "Next" button to enter the MySQL Server configuration:
- Choose the configuration type; no changes are needed here, just click "Next" to proceed.
- Set the MySQL password: please set this password to 123456.

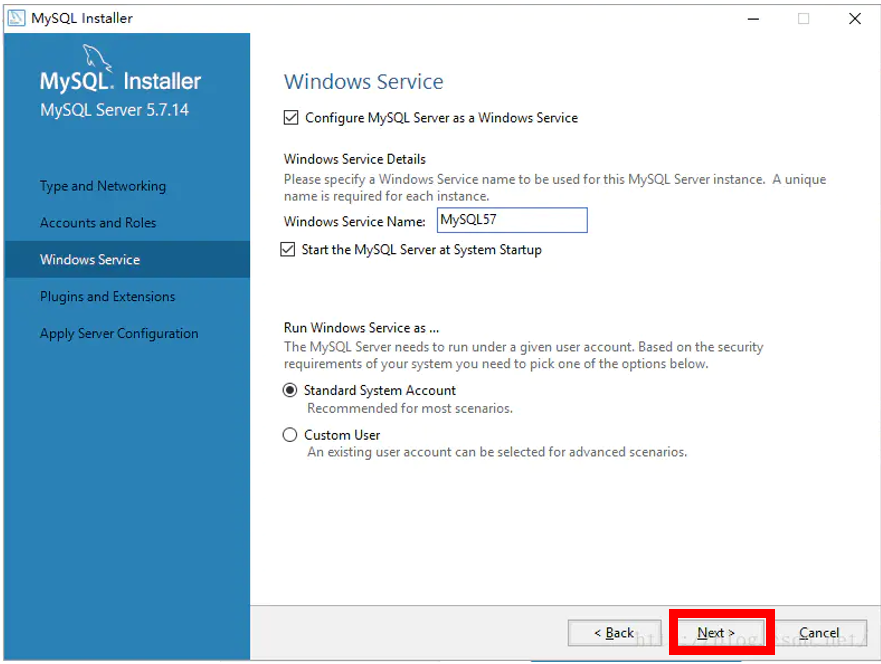
- Set the MySQL service; no changes are needed here, just click "Next" to proceed.
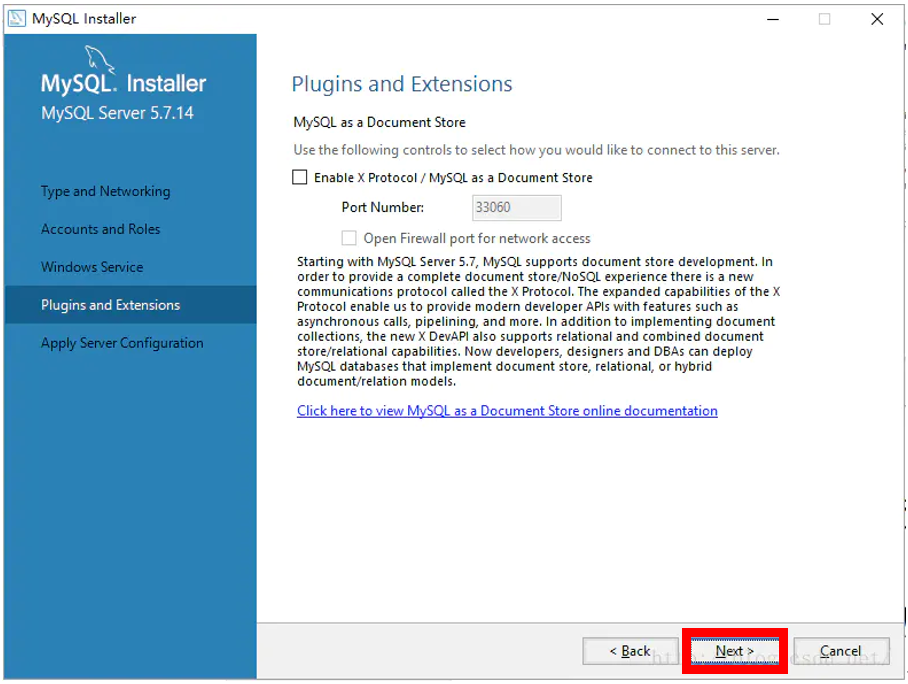
- No changes are needed here, just click "Next" to proceed.
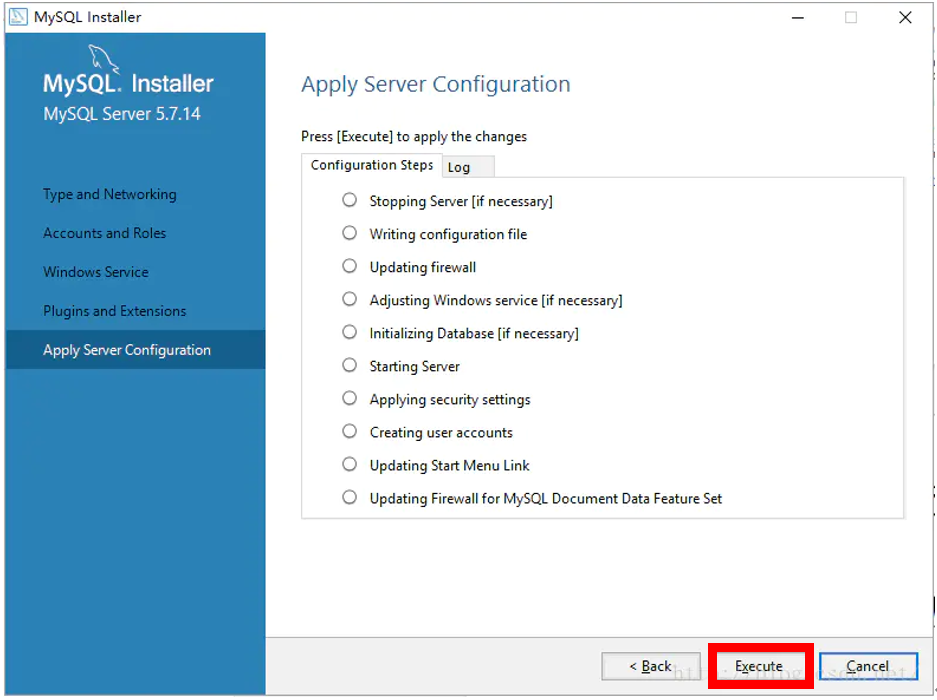
- This interface applies the previously set configuration to our MySQL server; click "Execute" and wait for it to complete.
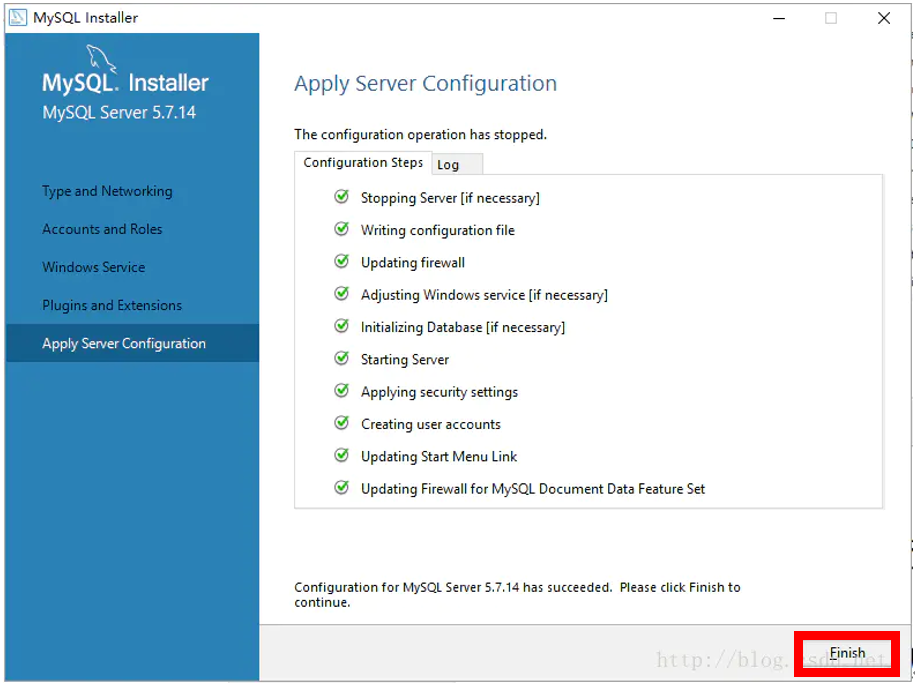
- Configuration complete, click "Finish" to complete the configuration phase.
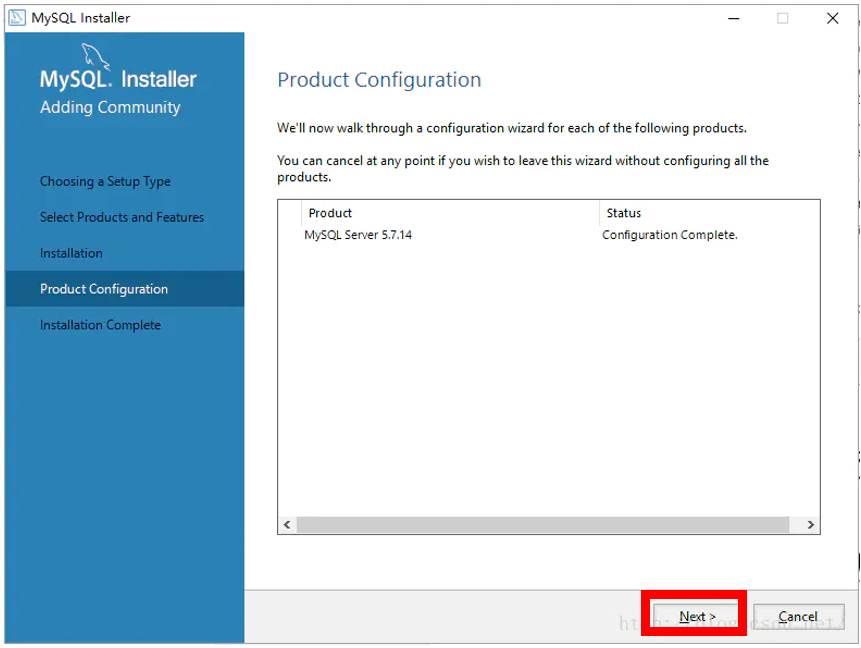
- After configuration is complete, you will return to the installer; click "Next" to continue.
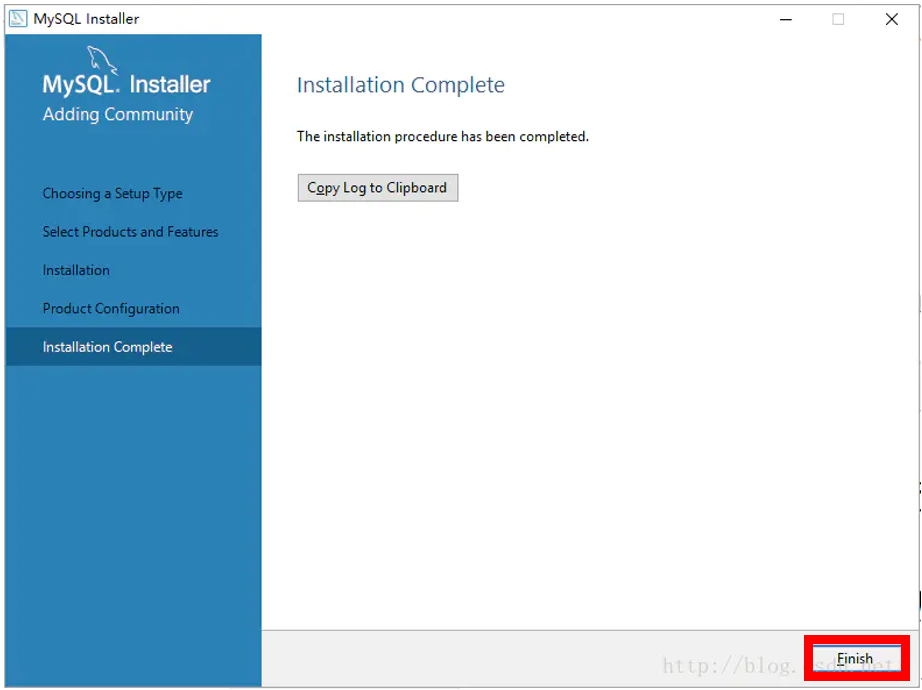
- It will prompt that the installation is complete; click "Finish". MySQL is now installed.
2. Navicat Software
Introduction to Navicat
Navicat is a database management tool that provides a visual user interface, making it easier for users to manage and operate databases. Navicat can connect to various types of databases, including MySQL, PostgreSQL, Oracle, etc. Using Navicat allows for convenient database creation, management, and maintenance, as well as executing SQL queries and other operations.
Navicat is a paid software; if you do not need to purchase it temporarily, you can choose to try the 14-day version. If you wish to continue using Navicat, it is recommended to purchase a license from the Navicat official website to ensure legal use of the software.
Installation Process (Windows)
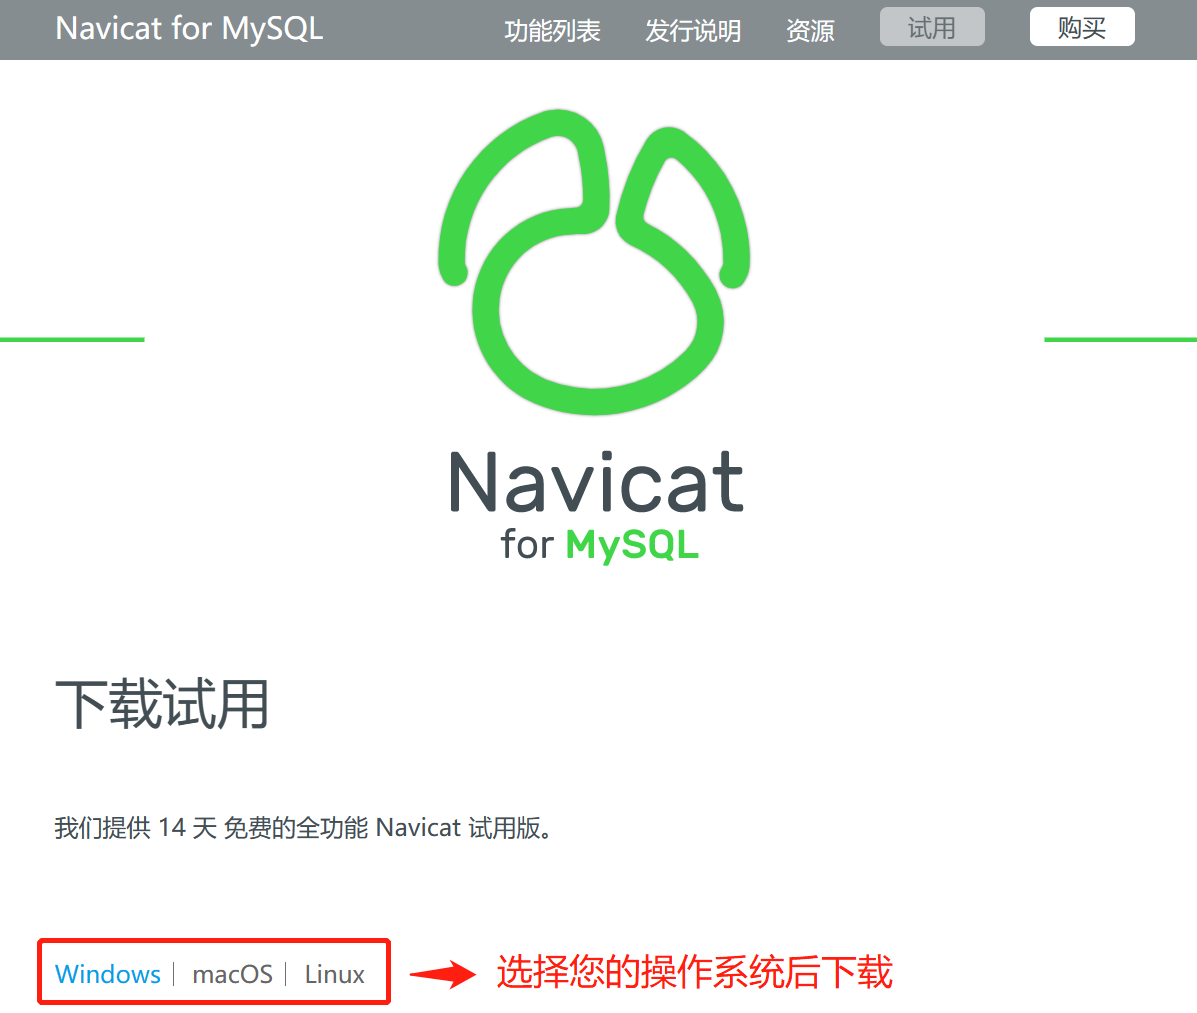
- Step 1: Download the Installer
Click the following link to access the download page:
- Select the Navicat 16 version suitable for your operating system and click the corresponding link to start the download.
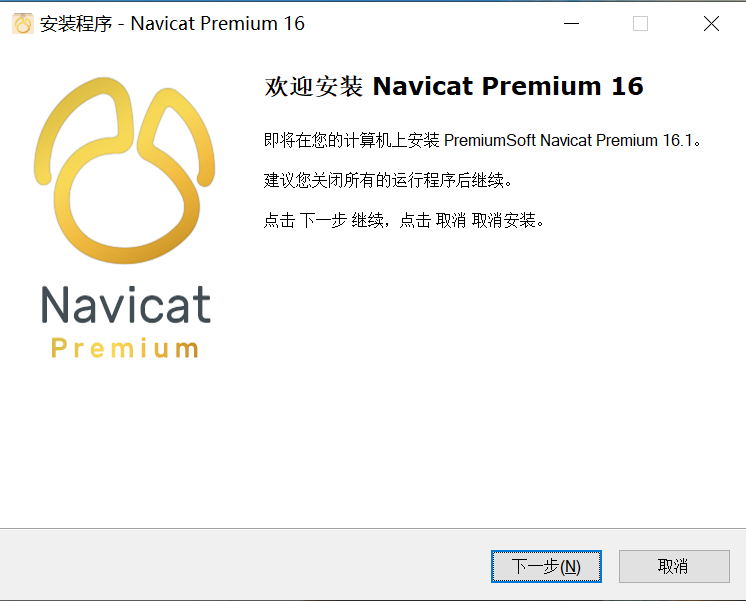
- Step 2: Installation
- Double-click the downloaded file to start the installation. Follow the prompts in the installation dialog.
- After installation is complete, search for Navicat 16 in the start menu and click the icon to open Navicat.

- Step 3: Use Navicat to Connect to Your Computer's MySQL Program
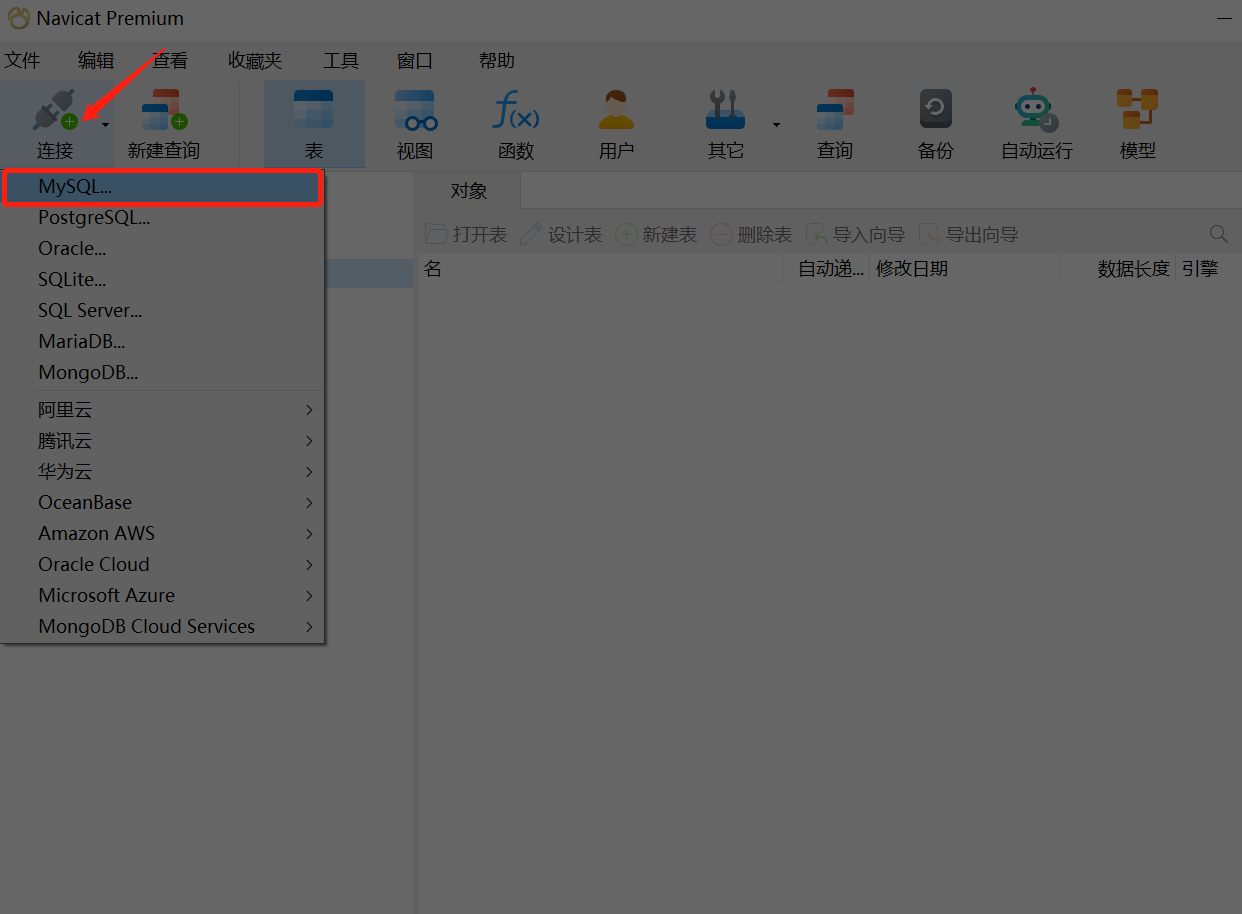
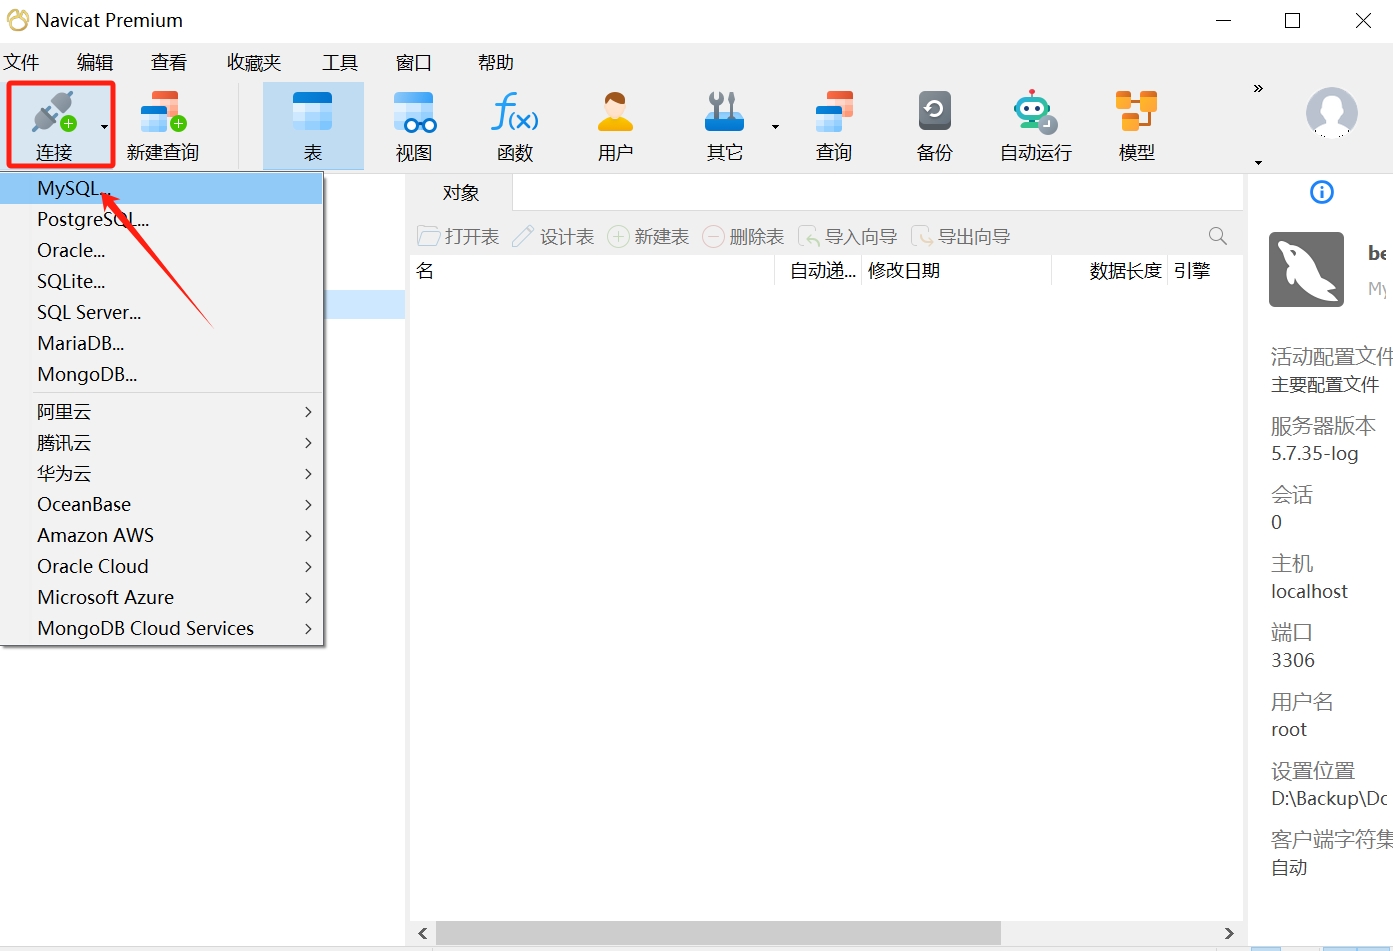
- After starting Navicat 16, click the "Connection" button at the top of the window and select "MySQL..."
- In the pop-up dialog, enter the connection name and password (123456); no need to modify the host, port, and username. Click "Test Connection" to test.
- If the connection test is successful, click "OK". Navicat can now connect to the MySQL program on your computer.
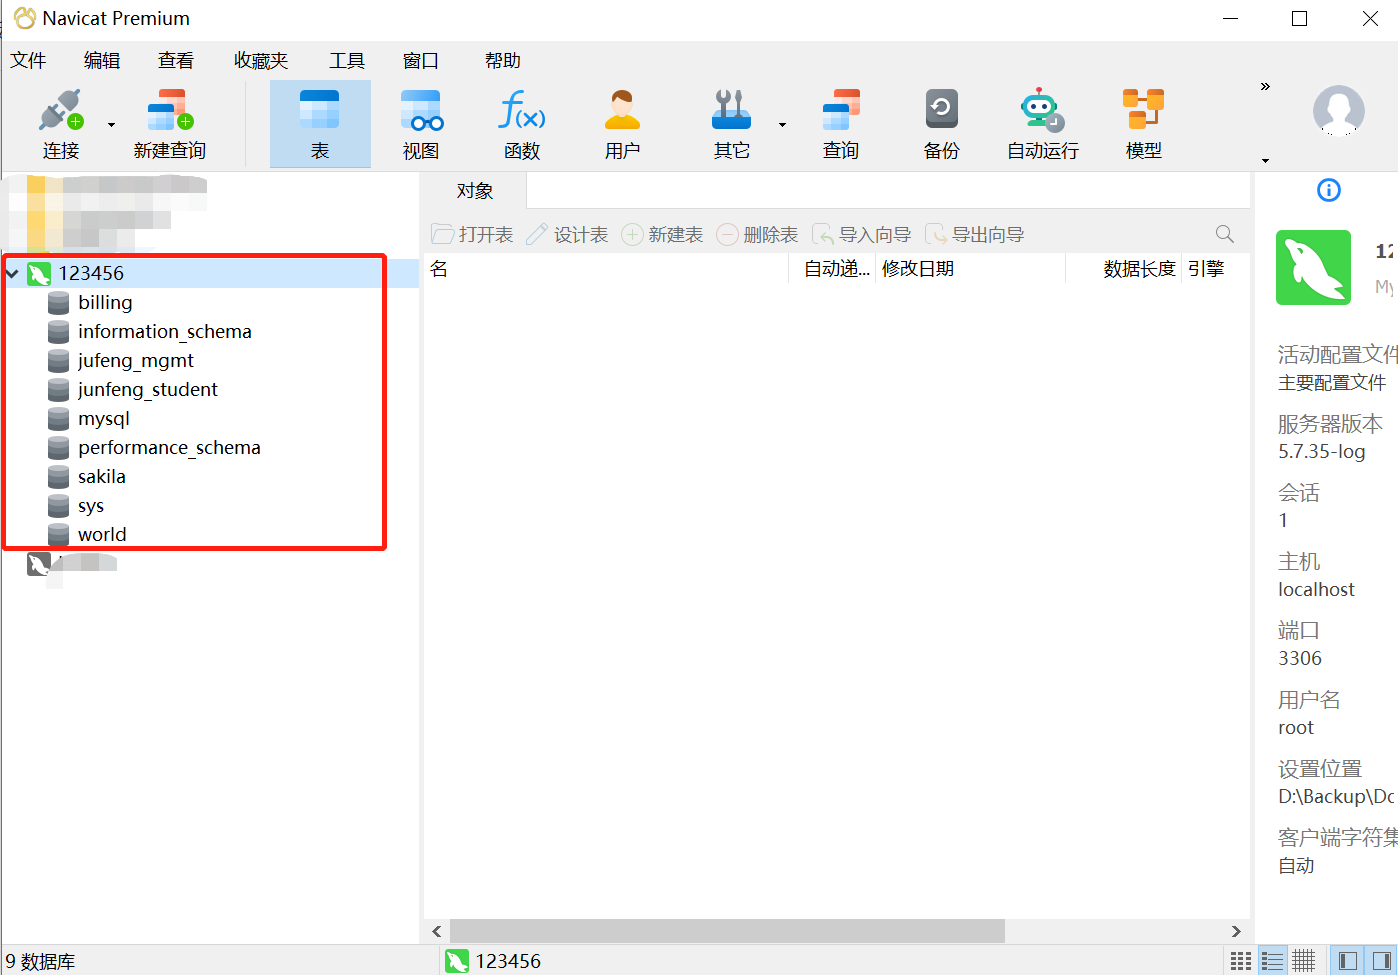
- In the left menu bar, double-click the MySQL connection you just created to see the databases in your MySQL program.
3. Connecting to MySQL Database in Navicat
After installing MySQL and Navicat, you can use Navicat to connect to the MySQL database. The purpose of connecting to the MySQL database through Navicat is to facilitate the management and operation of the MySQL database. To connect to the MySQL database, please follow these steps:
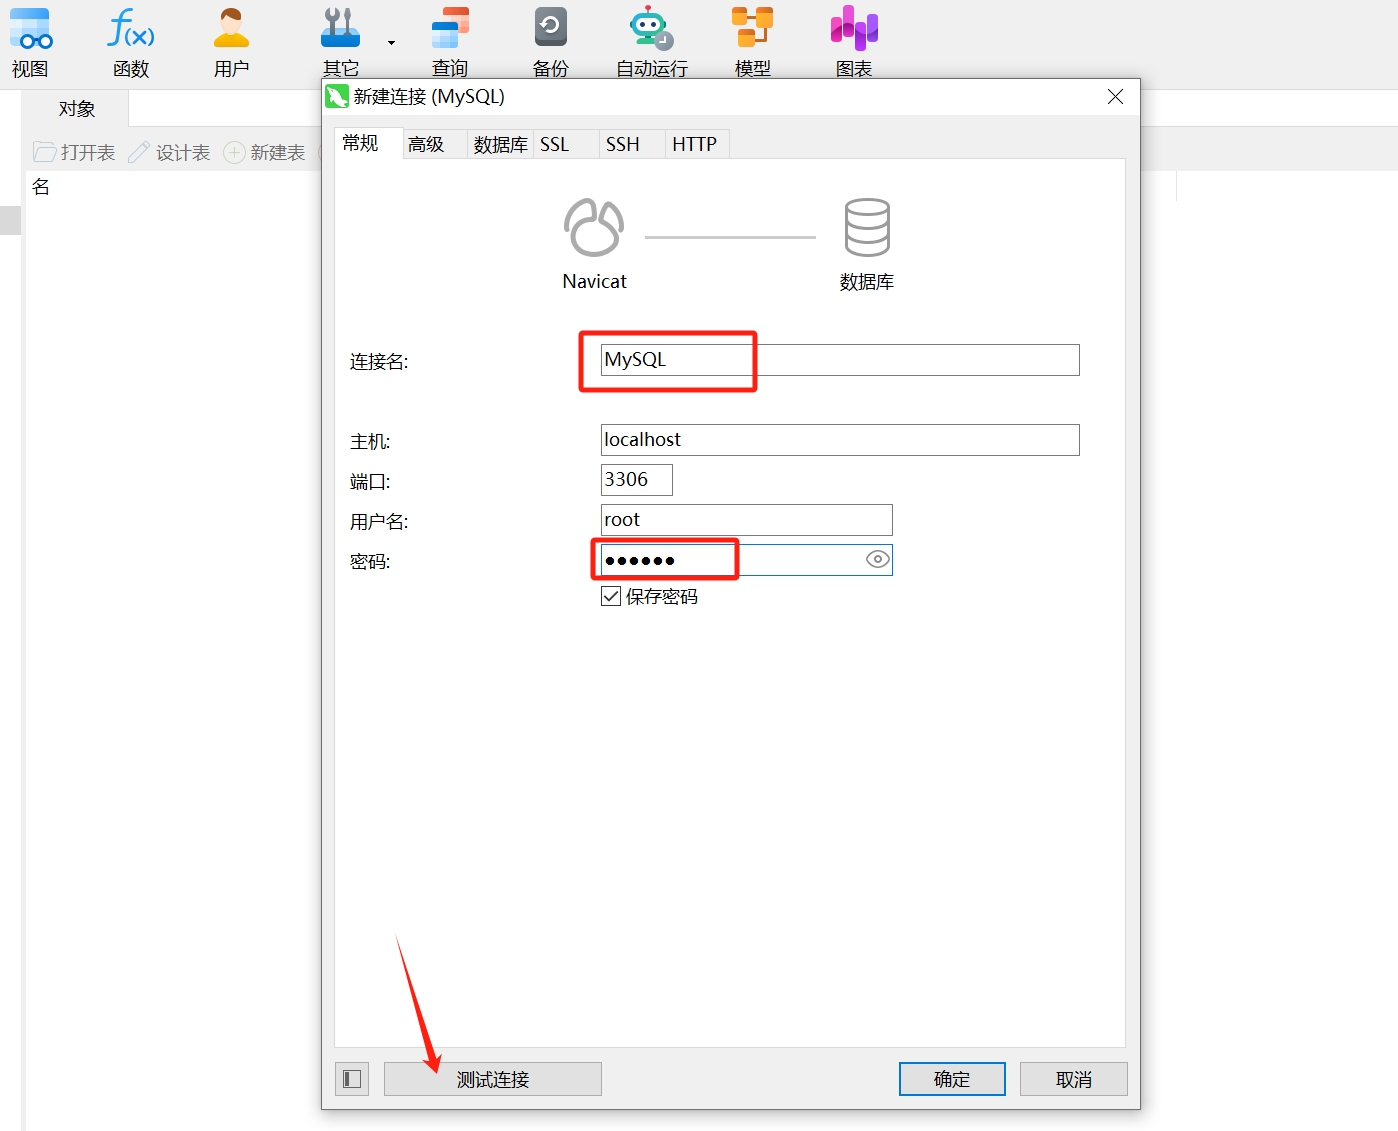
- Open the Navicat software, click the "Connection" button in the upper left corner, and select "MySQL".
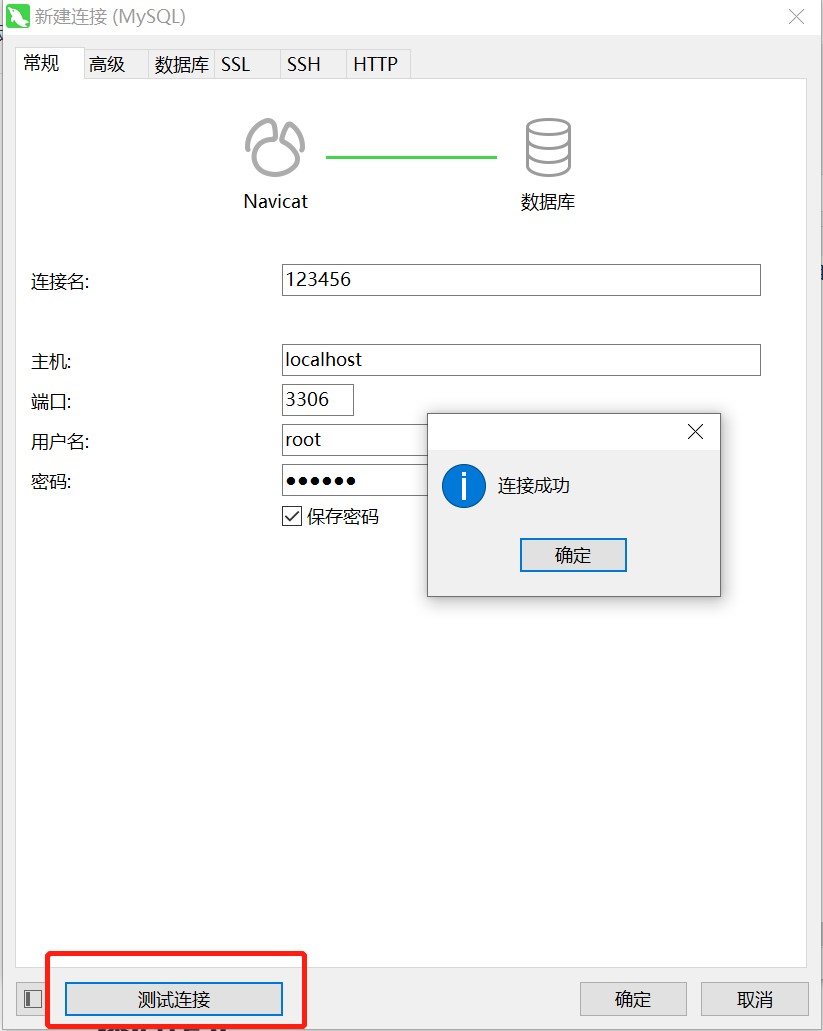
- In the pop-up "New Connection (MySQL)" window, enter a suitable connection name, such as "MySQL", to identify this database connection; the MySQL database server is running locally, so the host is the default value "localhost", the port number is the default "3306", and the username is the default "root". Just enter the password
123456required to connect to the MySQL database (you can choose the "Save Password" option to automatically fill in the password for the next connection); finally, click the "Test Connection" button, and Navicat will attempt to connect to the MySQL database server and validate the provided connection information.
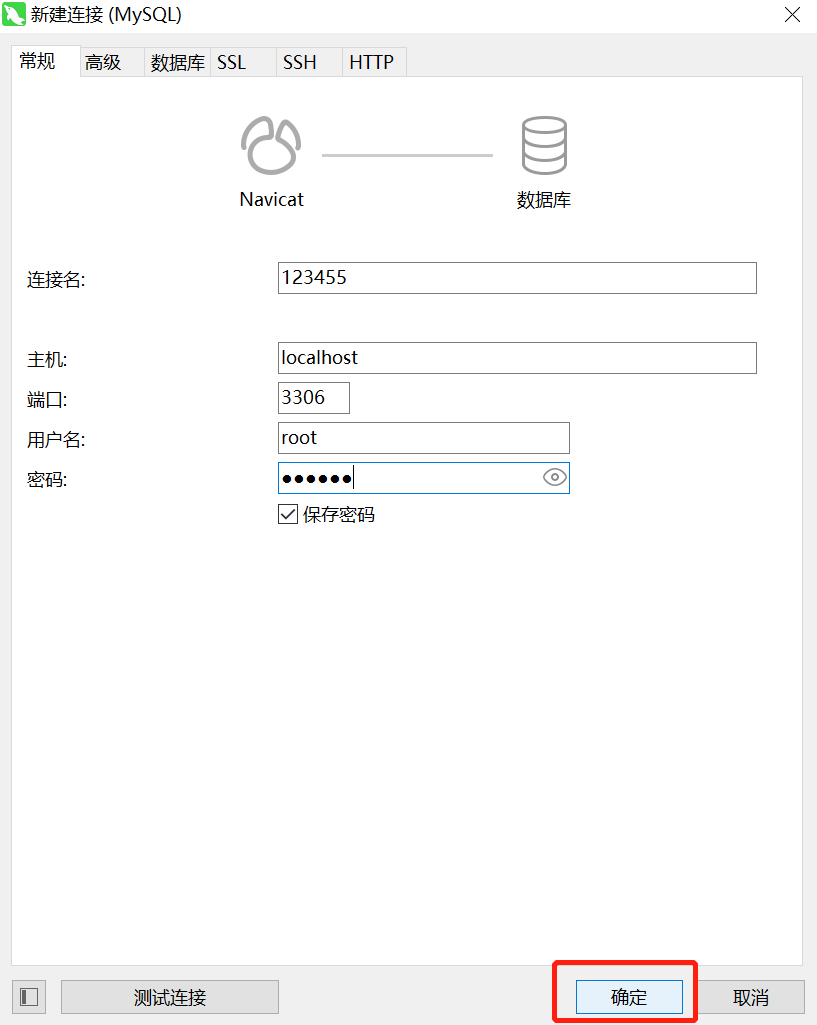
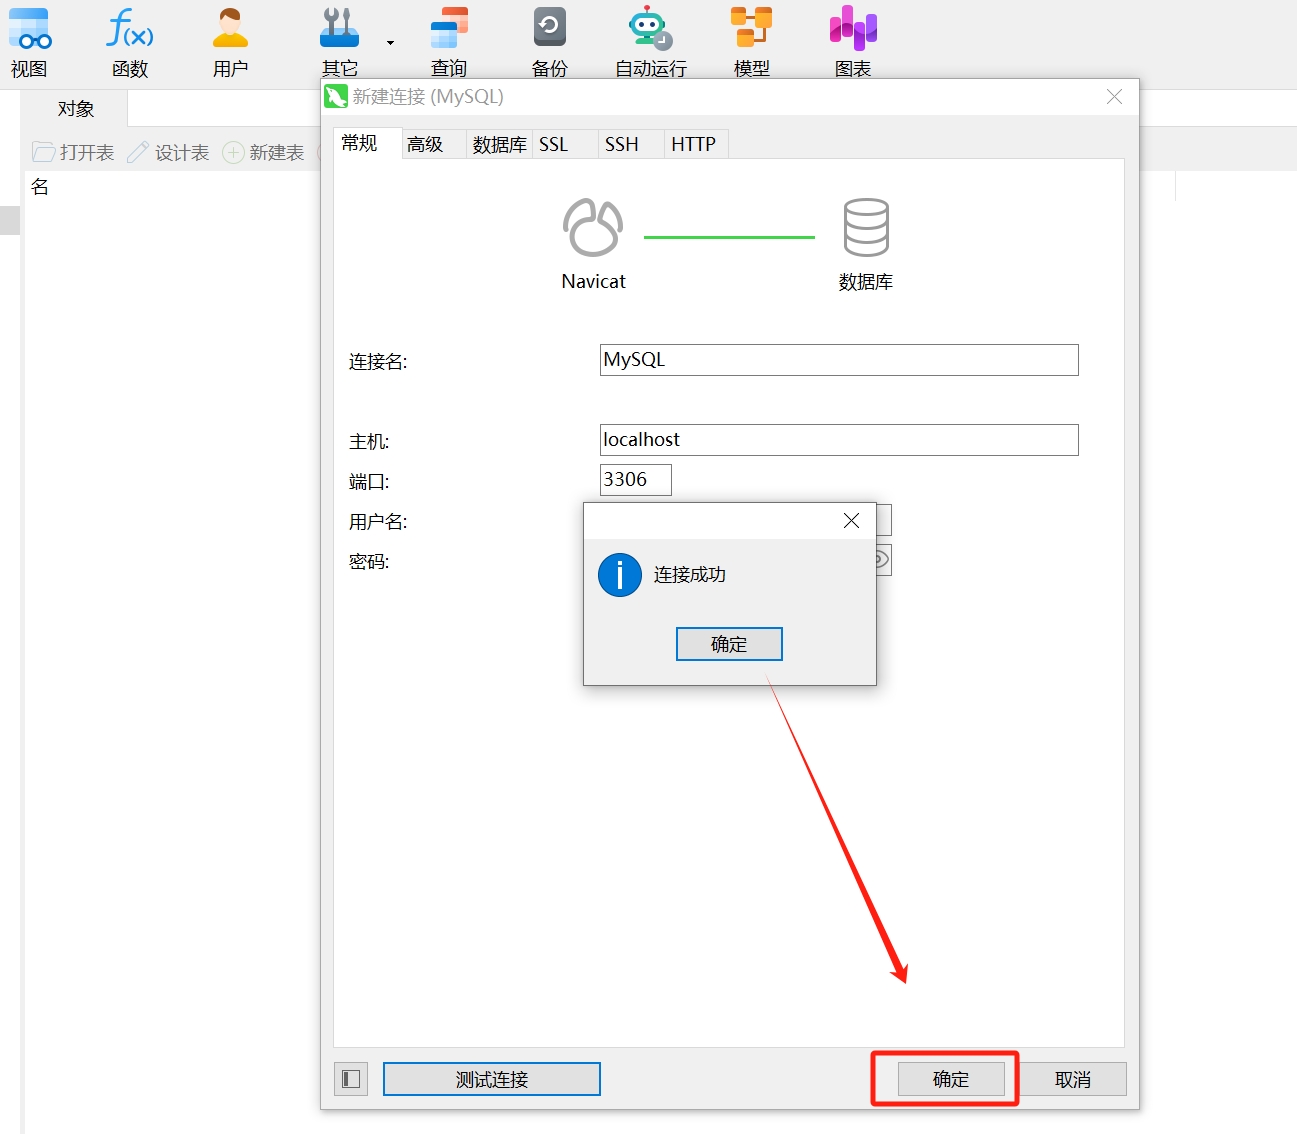
- If the connection is successful, a success message will be displayed. Click the "OK" button to save the connection configuration.
- You can see the connection you just created on the main interface of Navicat; double-click the connection name to open the connection.
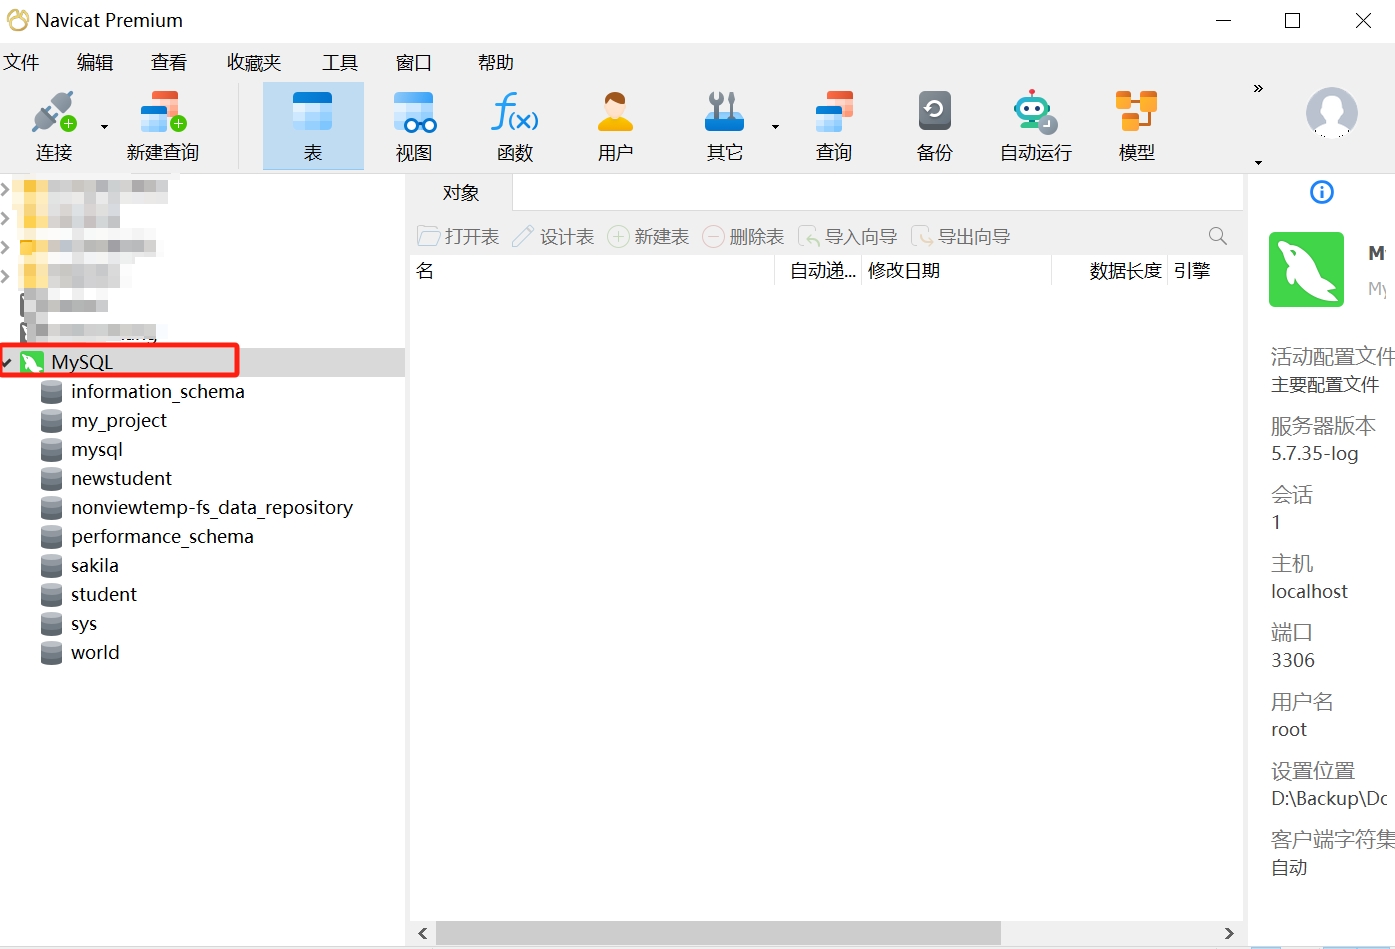
Now, you have connected to the MySQL database in Navicat and can further operate on the database.
Note: Please ensure that the provided connection information is accurate, including the correct hostname, port number, username, and password. If the connection fails, please check whether this information is correct and ensure that the MySQL server is running.
4. The Relationship Between SQL, MySQL, and Navicat
Now that you have completed the installation and connection of the tools used in this course: MySQL and Navicat, we will continue to learn related operations in data management using these two tools. Before using them, you need to clarify the relationship between SQL, MySQL, and Navicat through concepts:
SQL (Structured Query Language) is a standardized language that provides a rich set of commands and syntax for adding, deleting, modifying, and querying data in a database.
MySQL is a relational database used to store and process data, and we can use SQL statements to operate on the MySQL database.
Navicat is a powerful database management tool that provides a graphical interface and rich features for connecting, managing, and operating various types of databases, including MySQL databases.
In summary, Navicat provides us with a visual interface that allows us to connect to the MySQL database and manage the database by operating the Navicat interface to view the data in the database; additionally, Navicat also provides an SQL editor, making it convenient for us to write and execute SQL statements for adding, deleting, modifying, and querying operations on the database.
5. Homework
- Read the MySQL Official Documentation & Rookie Tutorial MySQL Tutorial to understand the basic concepts and operations of MySQL.
- Preview the common operations of Navicat, including connecting to databases, creating tables, inserting data, querying data, modifying data, and deleting data.