Exporting and Importing Data
12002Course Introduction
In this course, we will focus on practical operations to quickly familiarize ourselves with the methods related to exporting and importing data. Through these operations, we will further understand the importance of data export and import in data management, especially in application scenarios such as data backup and recovery, data replication, and data format conversion. Mastering the skills of data export and import is essential to ensure the security and integrity of data.
1. Application Scenarios for Data Export and Import
In data management, data export and import are crucial operations. They are commonly used in the following application scenarios:
Data Backup and Recovery: Data export is used to create data backups to prevent data loss or corruption, allowing for quick data recovery when needed.
Data Migration and Replication: During system migration, upgrades, or mergers, data export and import help transfer data from one system to another, ensuring data integrity and consistency.
Data Format Conversion: Converting data from one format to another, such as importing data from an Excel file into a database or exporting data from a database to a CSV file.
For example, during the application development phase, data export and import can be used to prepare business data that meets development logic and ensure data version updates; during the application production phase, it ensures that data is not lost; during application upgrades, it ensures that the data structure is correctly adjusted; and in system operation and maintenance, it ensures the completeness of data backups.
Next, we will introduce some common operations for data export and import.
2. Data Export
Dumping SQL Files
We typically use the database management tool Navicat to export data as SQL files. This method is straightforward, allowing you to export an entire database or a specific data table. The specific steps are as follows:
- Open Navicat, select the database "mystudent," right-click and choose "Dump SQL File." You will see two dump options: Structure and Data, and Structure Only.
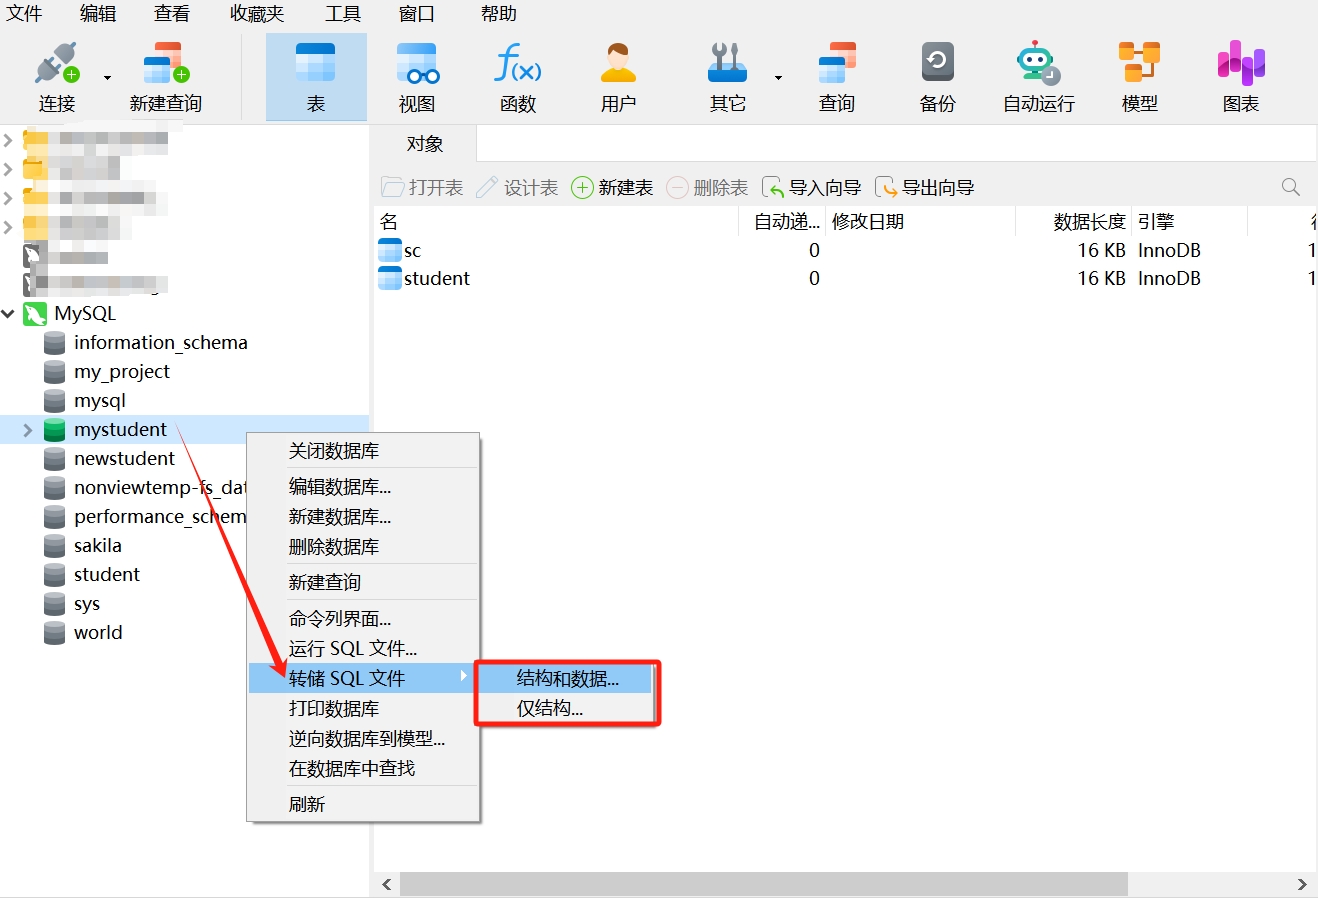
These two dump SQL file options cater to different needs:
Structure and Data: This option exports everything, including the table structure and the data within the table. The exported file contains SQL statements for creating tables (CREATE TABLE) and inserting data (INSERT). It is suitable for situations where a complete backup of the database table is needed, including both the table structure and data, to allow for full restoration of the database when necessary.
Structure Only: This option only exports the structure of the table, excluding the actual data within the table. The exported file contains only the SQL statement for creating the table (CREATE TABLE) and does not include the SQL statement for inserting data. It is suitable for situations where the table structure needs to be copied without the data, such as when creating a new table that retains the structure of the original table but does not require its data.
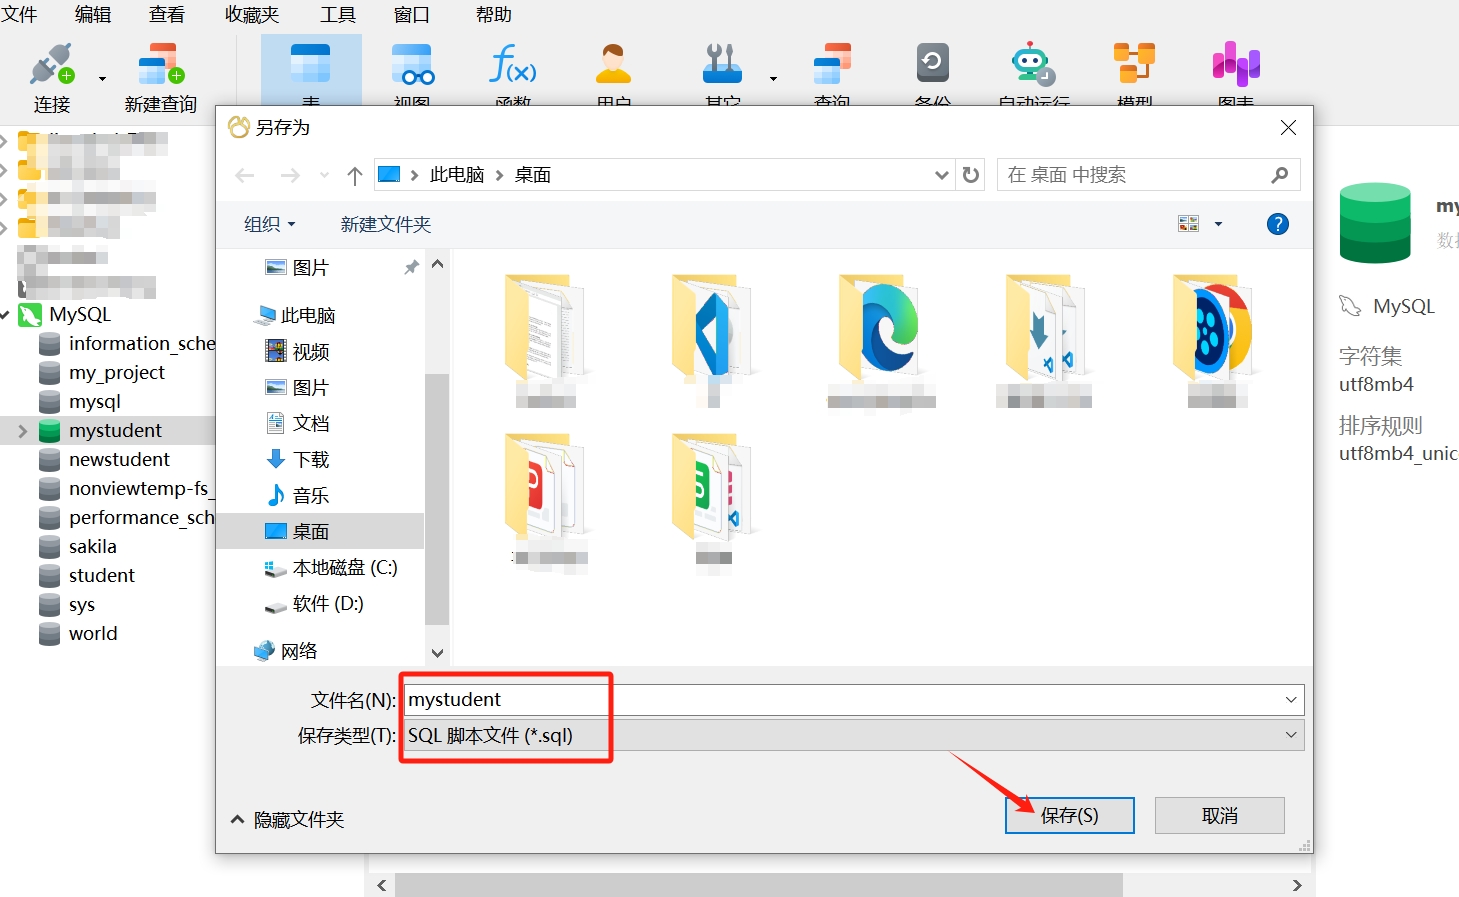
- Here, we will take the "Structure and Data" option as an example to export the database. After selecting it, you need to choose the path to save the file (make sure to remember this path), and then name the file. Note that the SQL file should be saved with the type
*.sql.
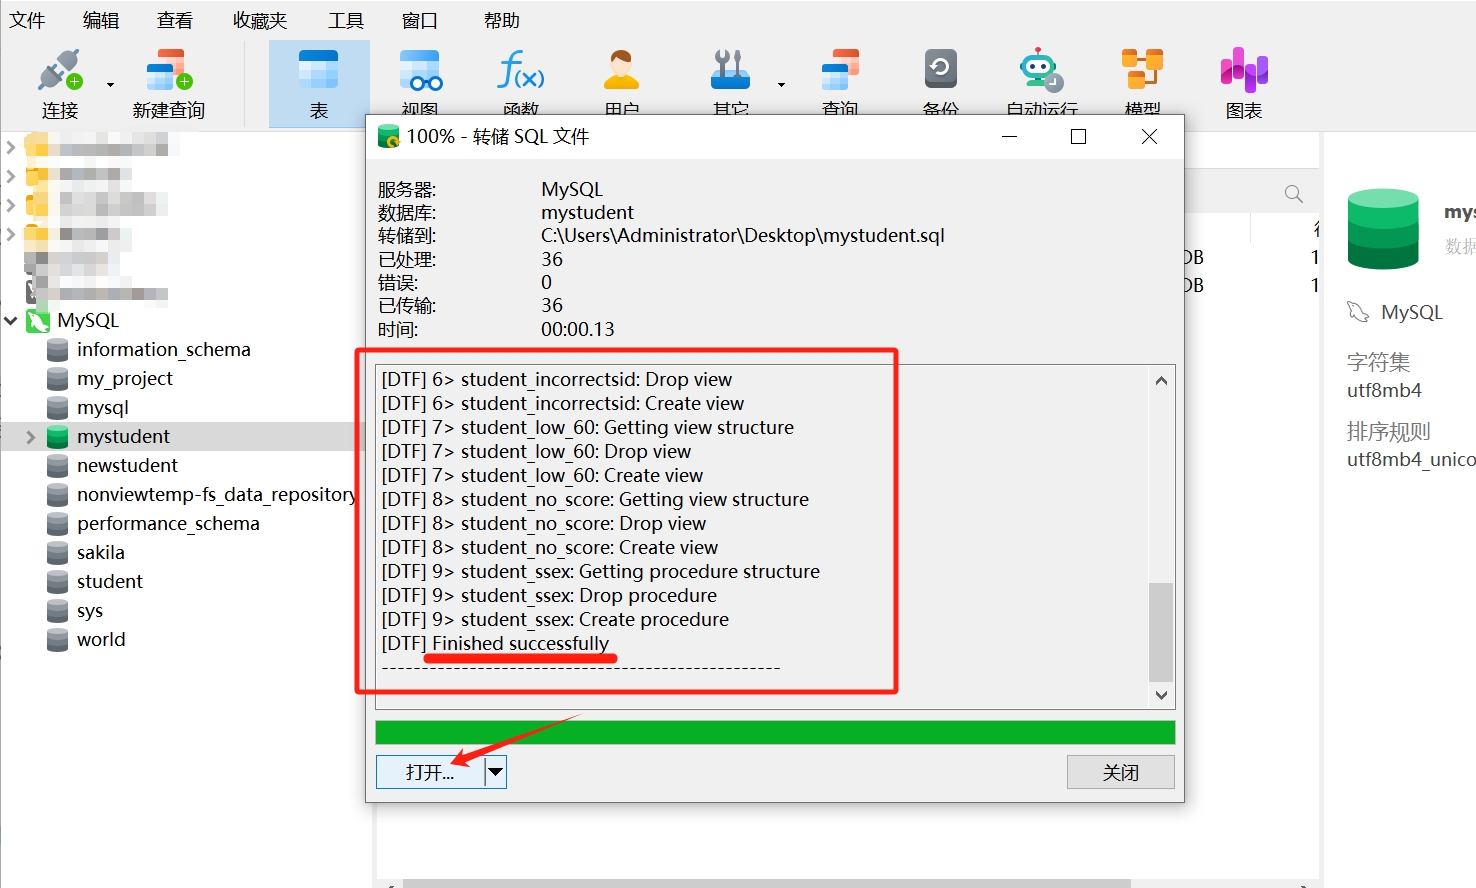
- After saving, the SQL dump operation will begin. Once completed, you will see a prompt like the one below, then click "Open."
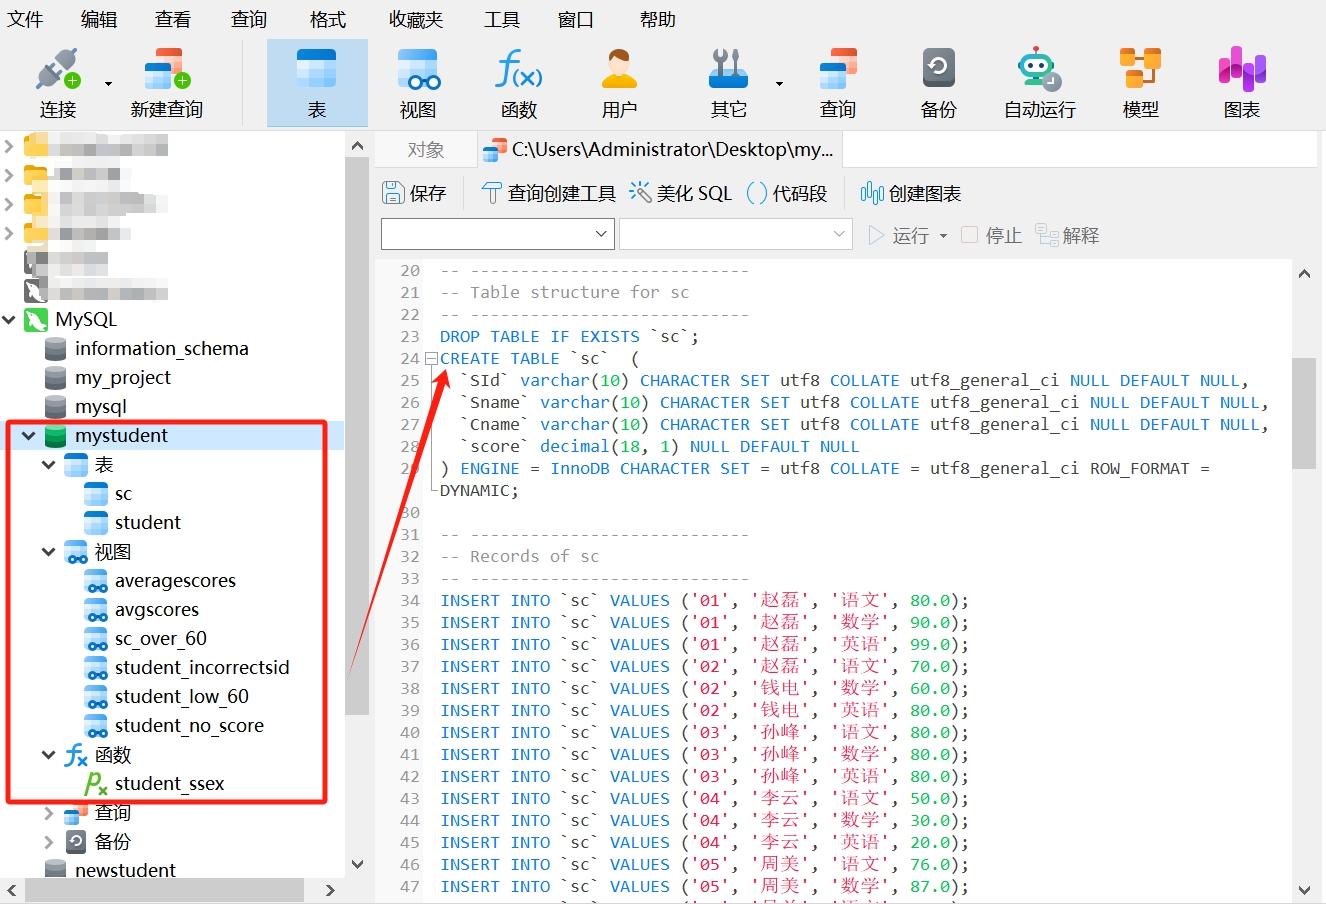
- Upon opening, you will see the SQL statements for each data table, view, and MySQL stored procedure in the database. Save this SQL dump file; you can execute this statement in any newly created database as a means of data recovery.
Similarly, you can also dump a specific data table as an SQL file by following the steps above to select the data table you want to dump. Note that you should choose either Structure and Data or Structure Only based on actual needs.
Copying Table Structure and Data
If you need to copy the structure and data of a table to another database, you can use SQL statements or Navicat.
- Using SQL Statements
To create a new table and copy the structure and data from the original table, you can use the CREATE TABLE ... SELECT statement, with the following syntax:
CREATE TABLE new_table AS
SELECT * FROM old_table;
This will create a new table named new_table with the same structure as old_table and copy all data from old_table into new_table.
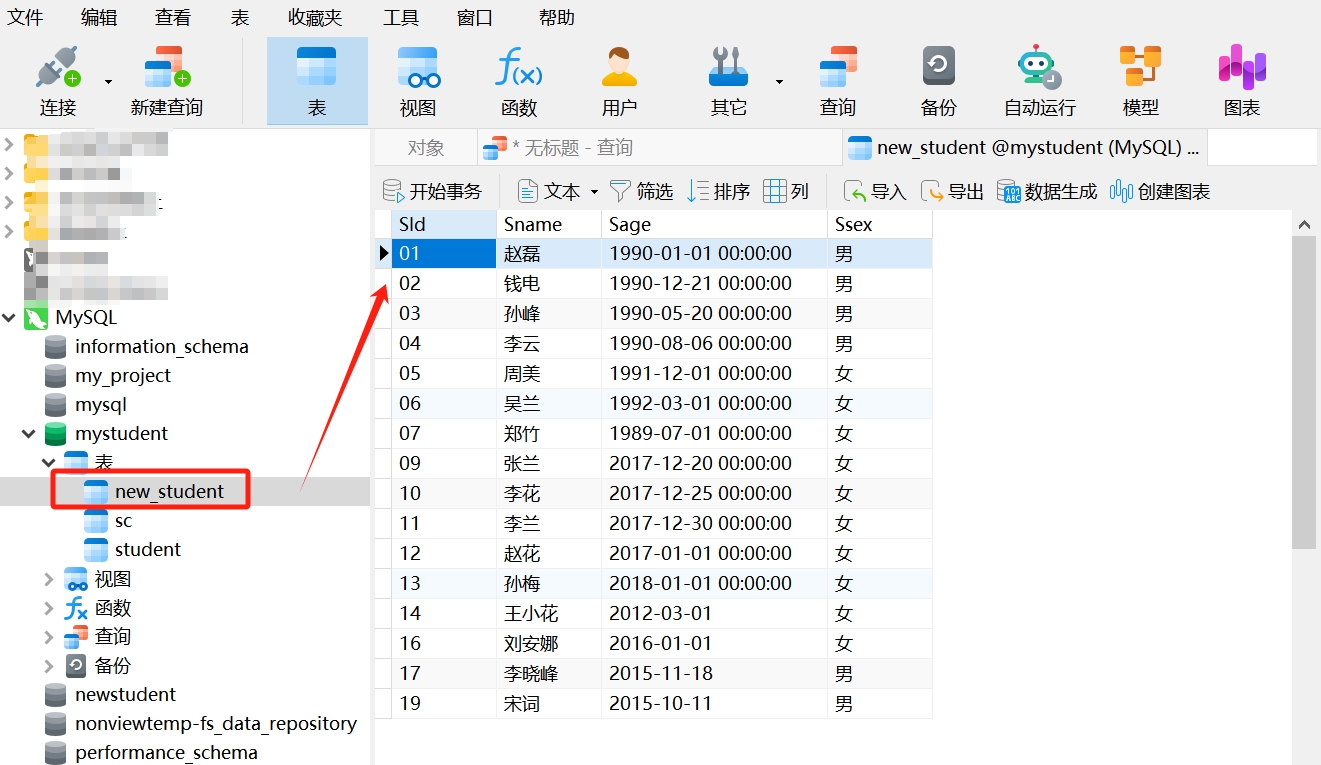
For example, to copy the "student" table as "new_student," you can do the following:
- Copy the statement below and run it in a new query in Navicat:
CREATE TABLE new_student AS
SELECT * FROM student;- Refresh the "Tables" in the database, and you will see the newly copied table "new_student," which has the same structure and data as the old table "student."
- Using Navicat
- In Navicat, find the table you want to copy, right-click and select "Copy Table." You will see two options: Structure and Data, and Structure Only.
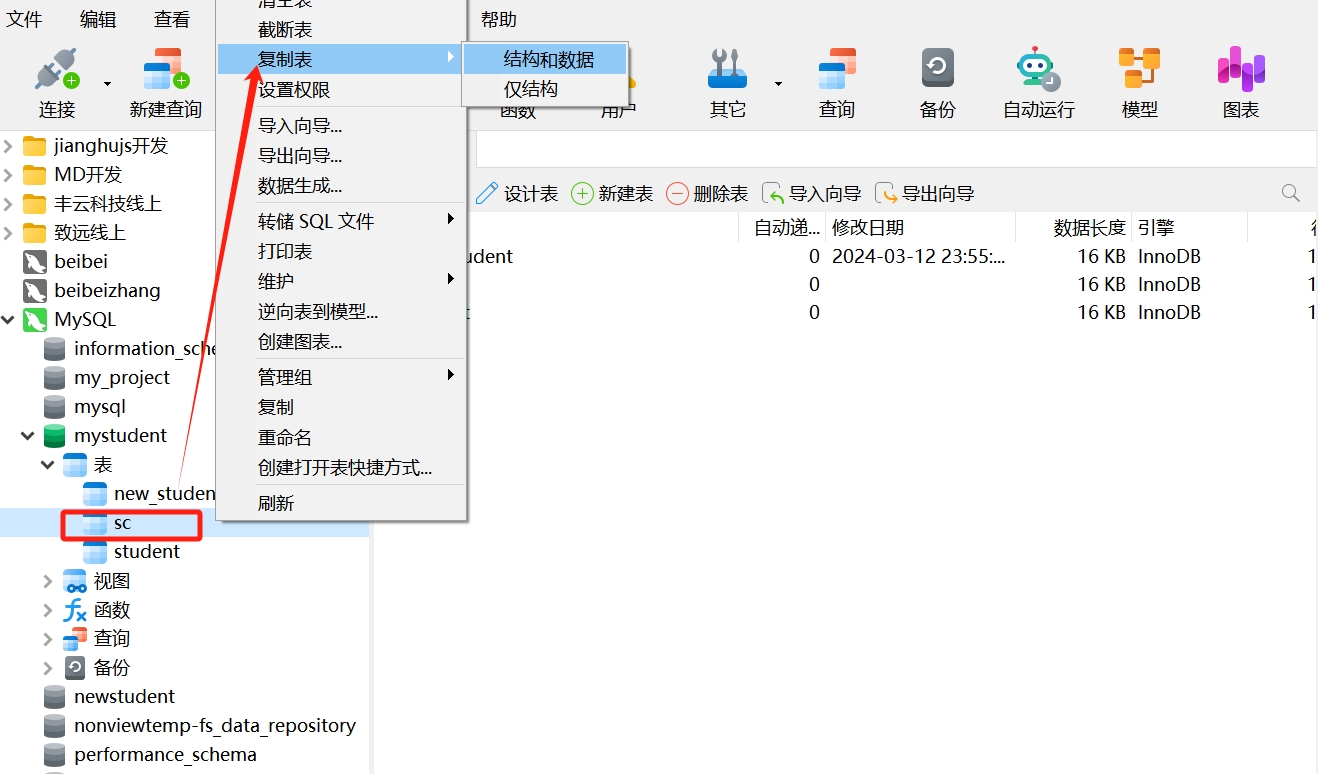
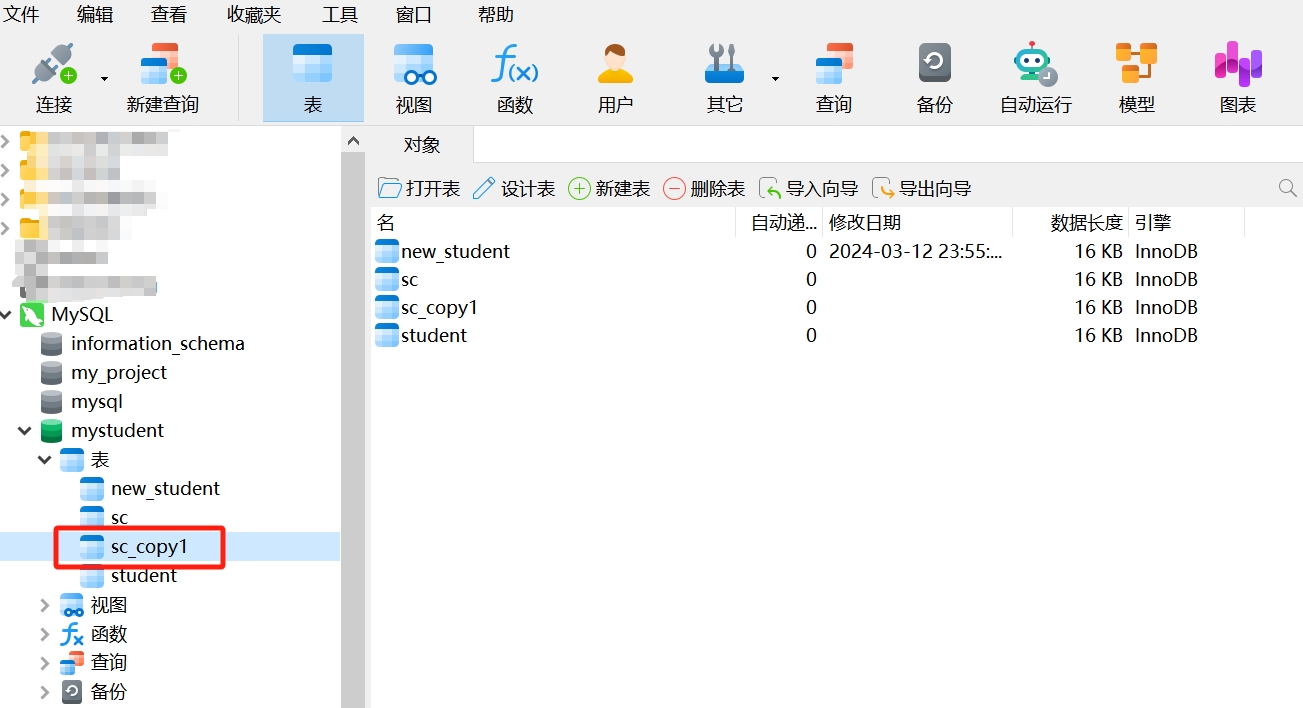
- We choose "Structure Only," and you will see a new table "sc_copy1" appear in the database.
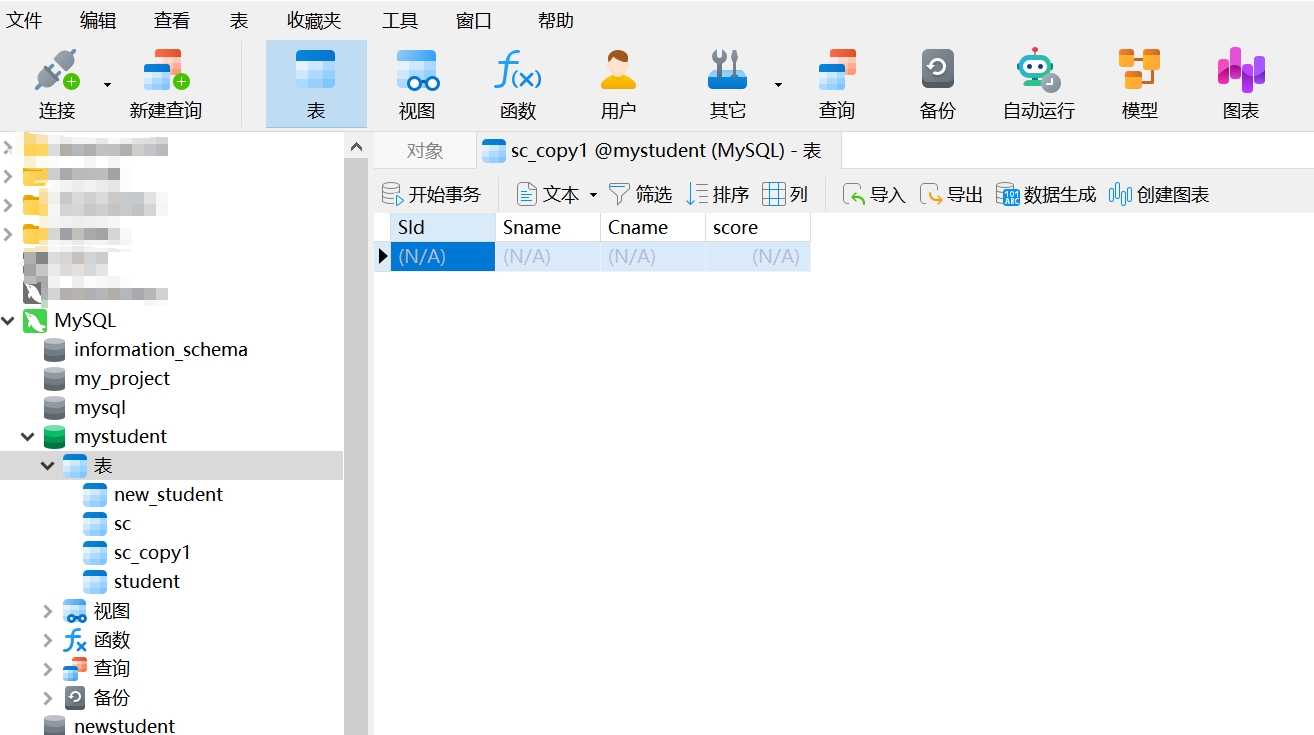
- Open this table, and you will see it only has the data structure, without any data.
In data export, copying table structure and data is a common operation in database management, useful for reusing table structures in other application developments, as well as for data backup recovery, data migration, and various other scenarios, providing flexible data management and operational methods.
Data Format Conversion
Typically, we need to export data tables from the database to other formats to meet different requirements. A common practice is to export data tables from the database to Excel format, which facilitates data viewing, editing, and sharing. Next, we will take Excel as an example to see how to operate:
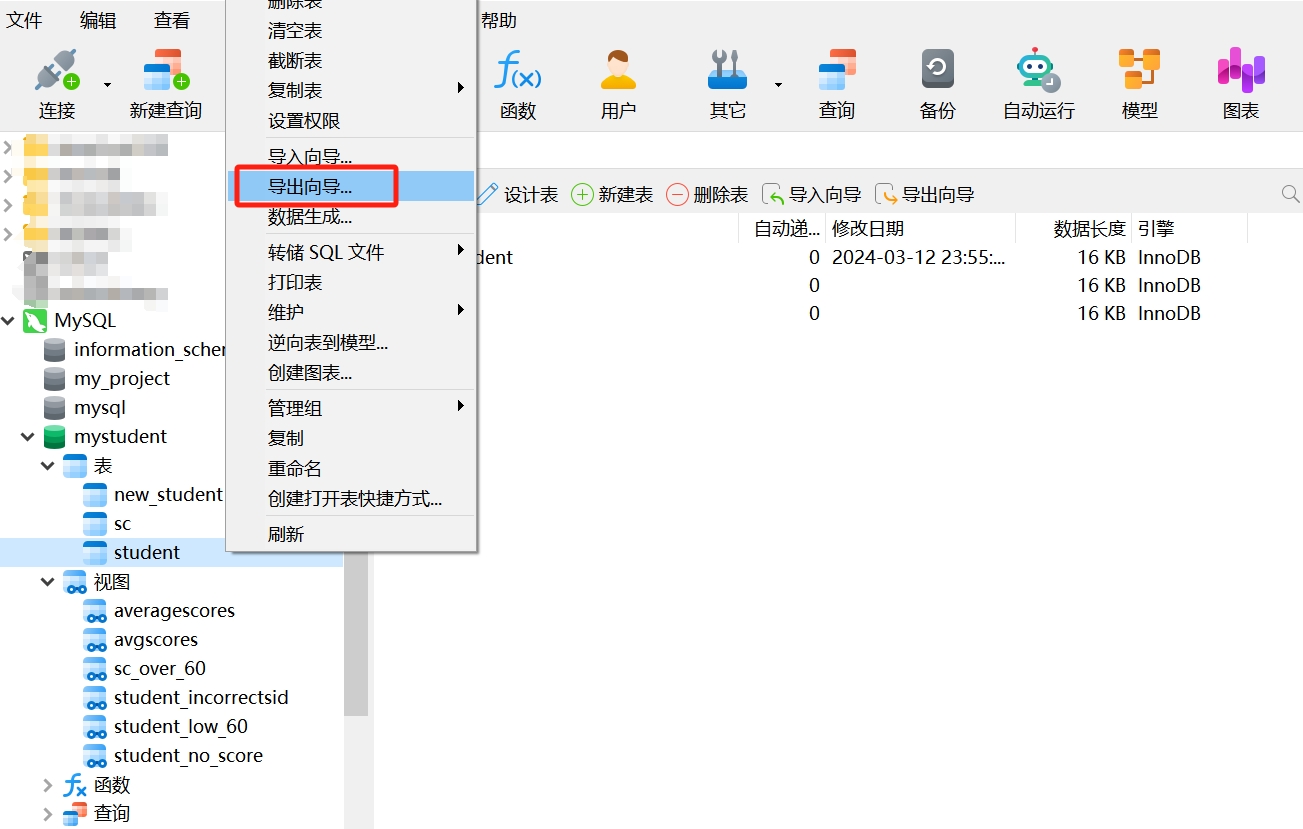
- In Navicat, find the data table you want to convert, right-click and select "Export Wizard."
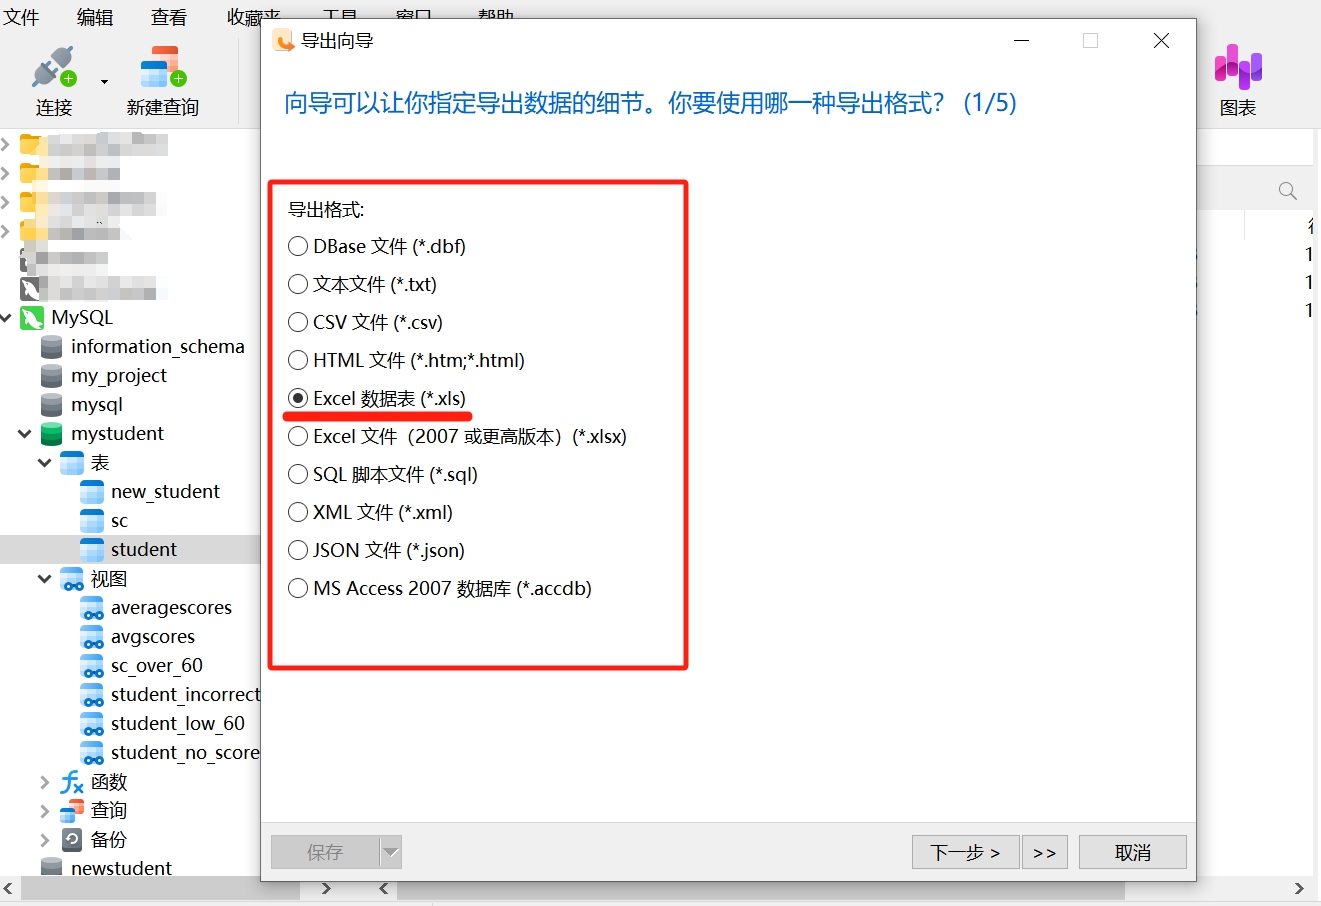
- Then, you need to select the format for exporting the data table; here we choose Excel data table.
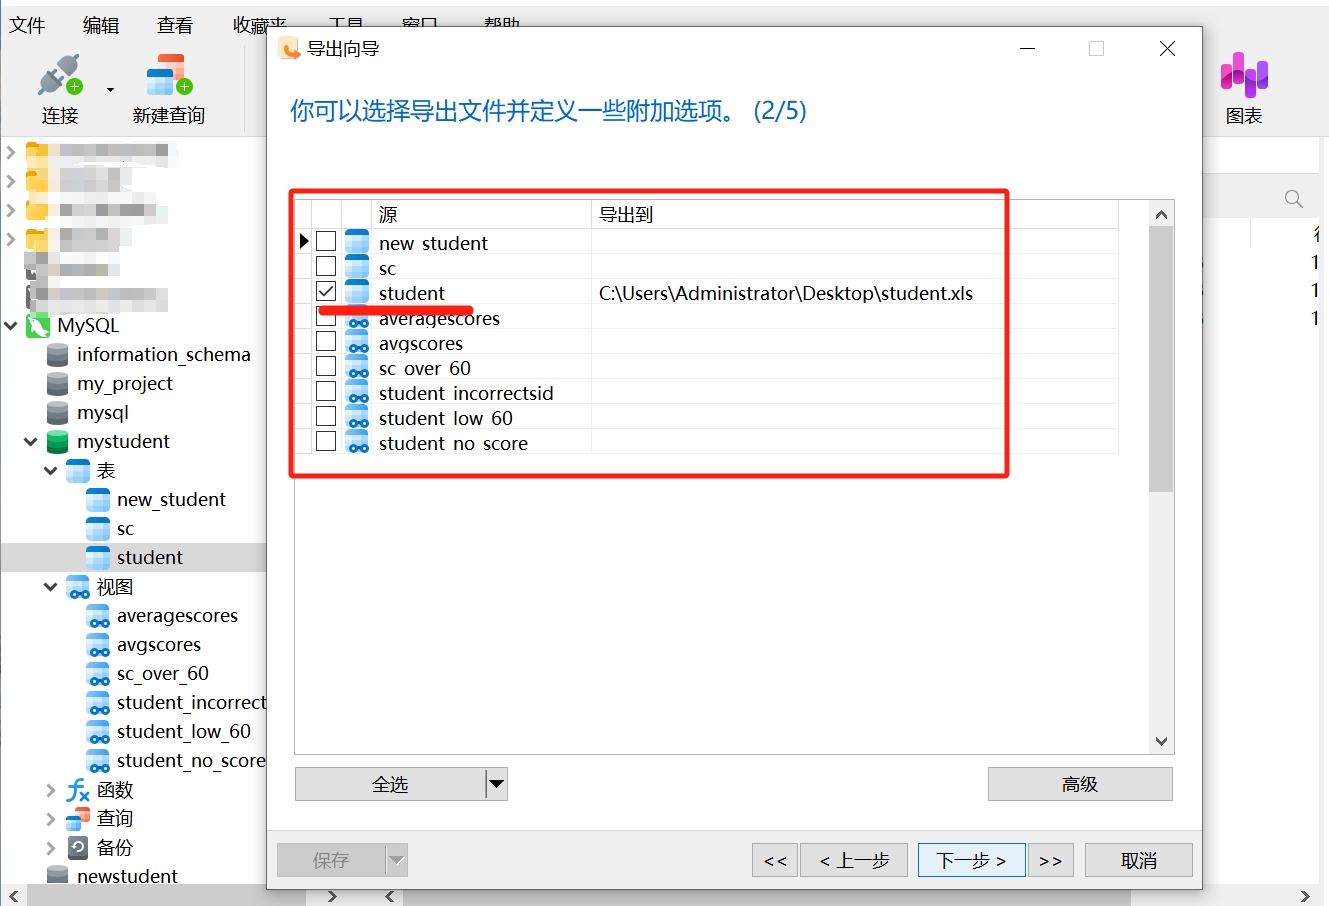
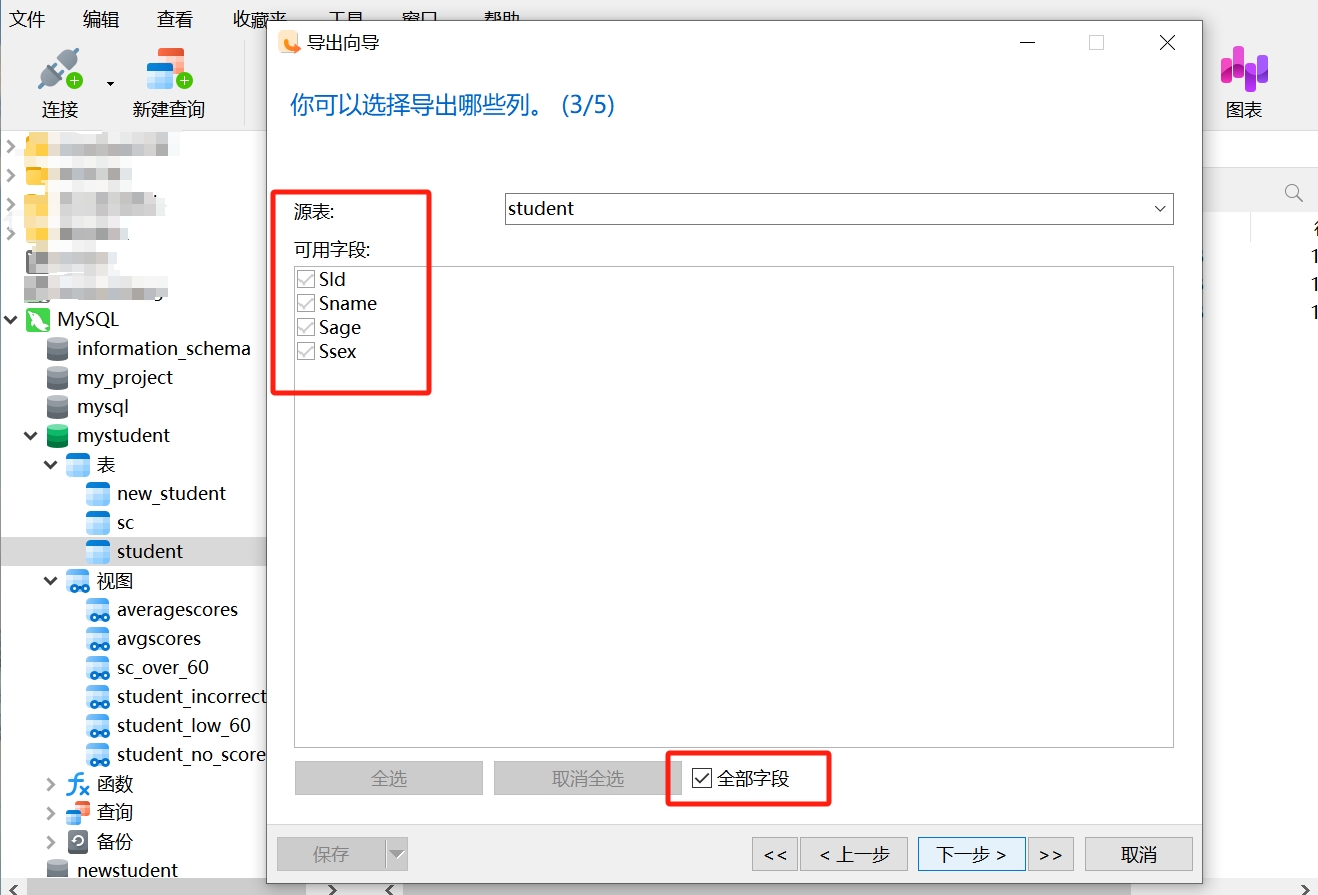
- Confirm the data table you want to export and the fields to be exported as shown below, then click "Next."

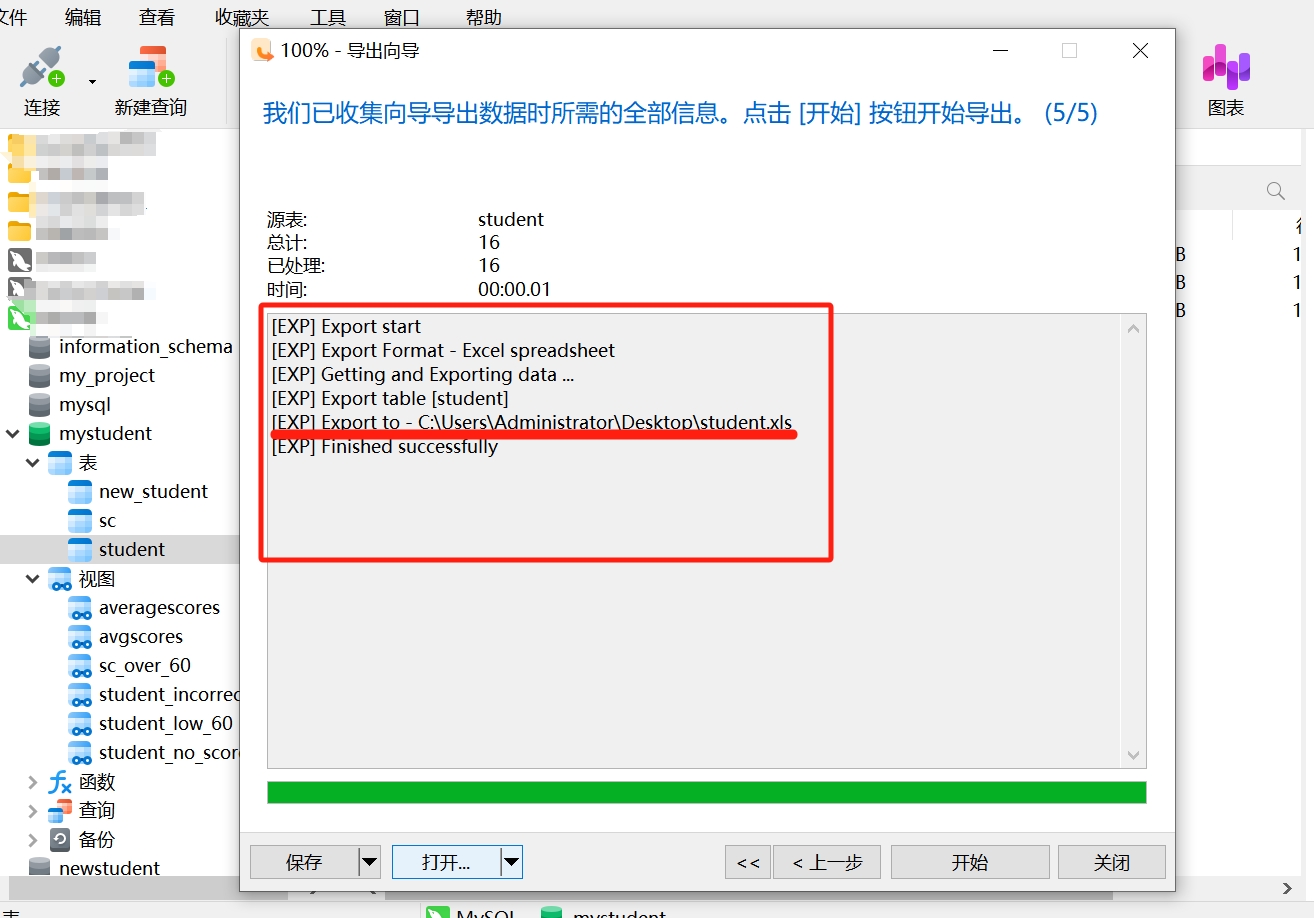
- Click "Start."

- After successful export, please note the path of the exported file, then click "Open," and you will see the exported data table in Excel format as shown below.

There are various format options for data export, commonly including Excel, CSV, JSON, XML, etc. You can choose the most suitable format for data export according to your needs. Different formats are suitable for different scenarios; for example, Excel is suitable for data viewing and editing, CSV is suitable for data exchange and import/export, and JSON and XML are suitable for data exchange and storage in web applications. Choosing the appropriate data format based on specific needs can better meet data processing and sharing requirements.
3. Data Import
Importing SQL Files into a New Database
Data export and import are corresponding operations. The operation corresponding to dumping SQL files is importing SQL files into a new database. We will again use the database management tool Navicat to import SQL files, which can import an entire database or a specific data table. The specific steps are as follows:
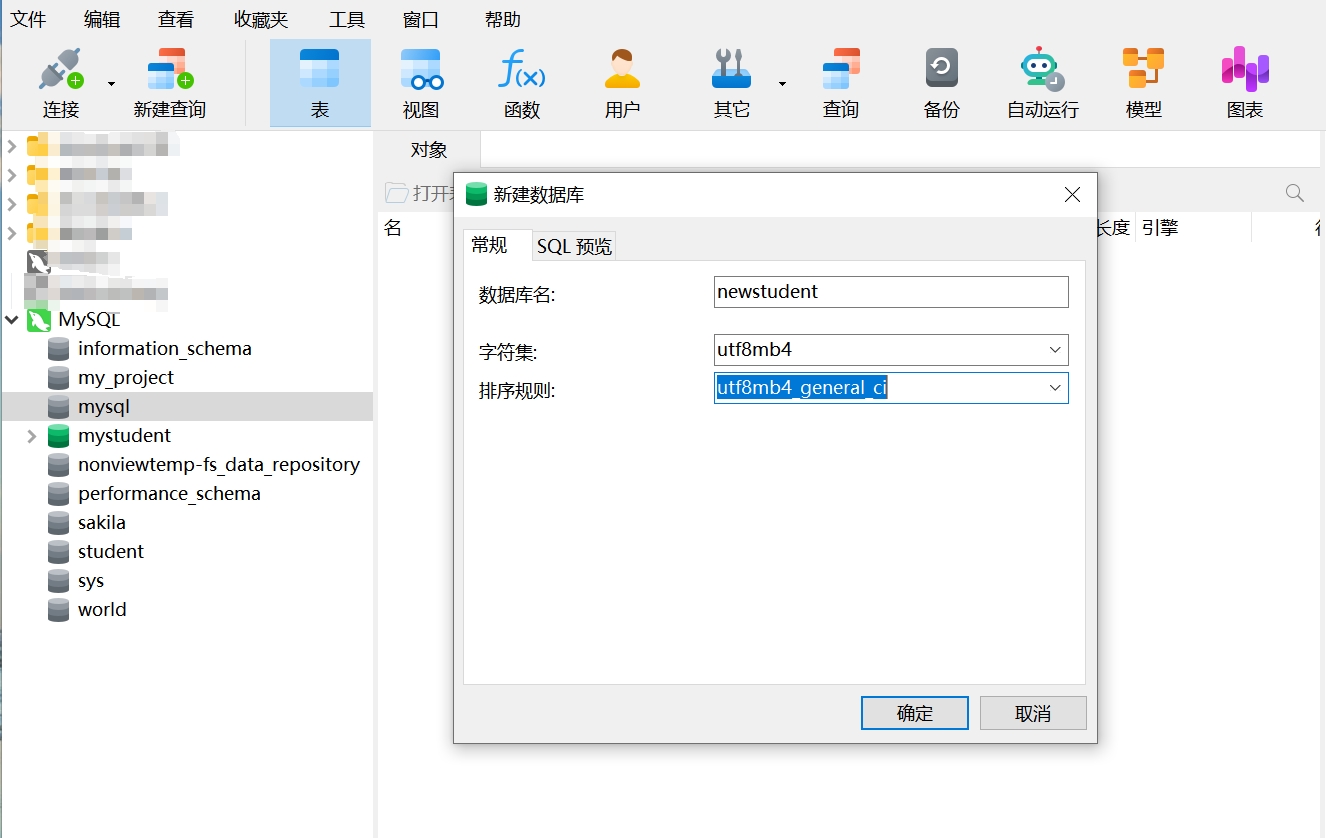
- In the MySQL connection, create a new database "newstudent."
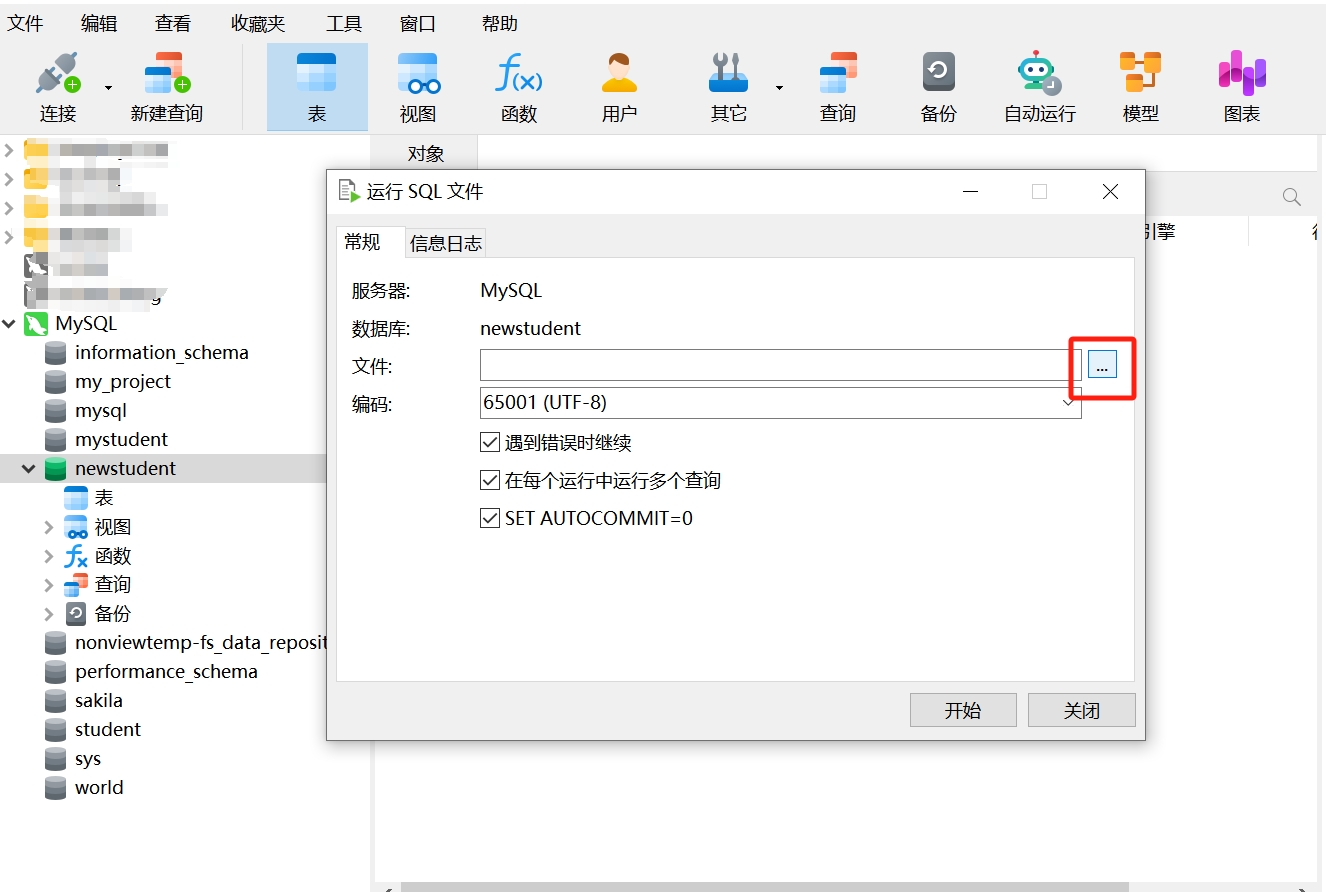
- Select the database "newstudent," right-click and choose "Run SQL File."

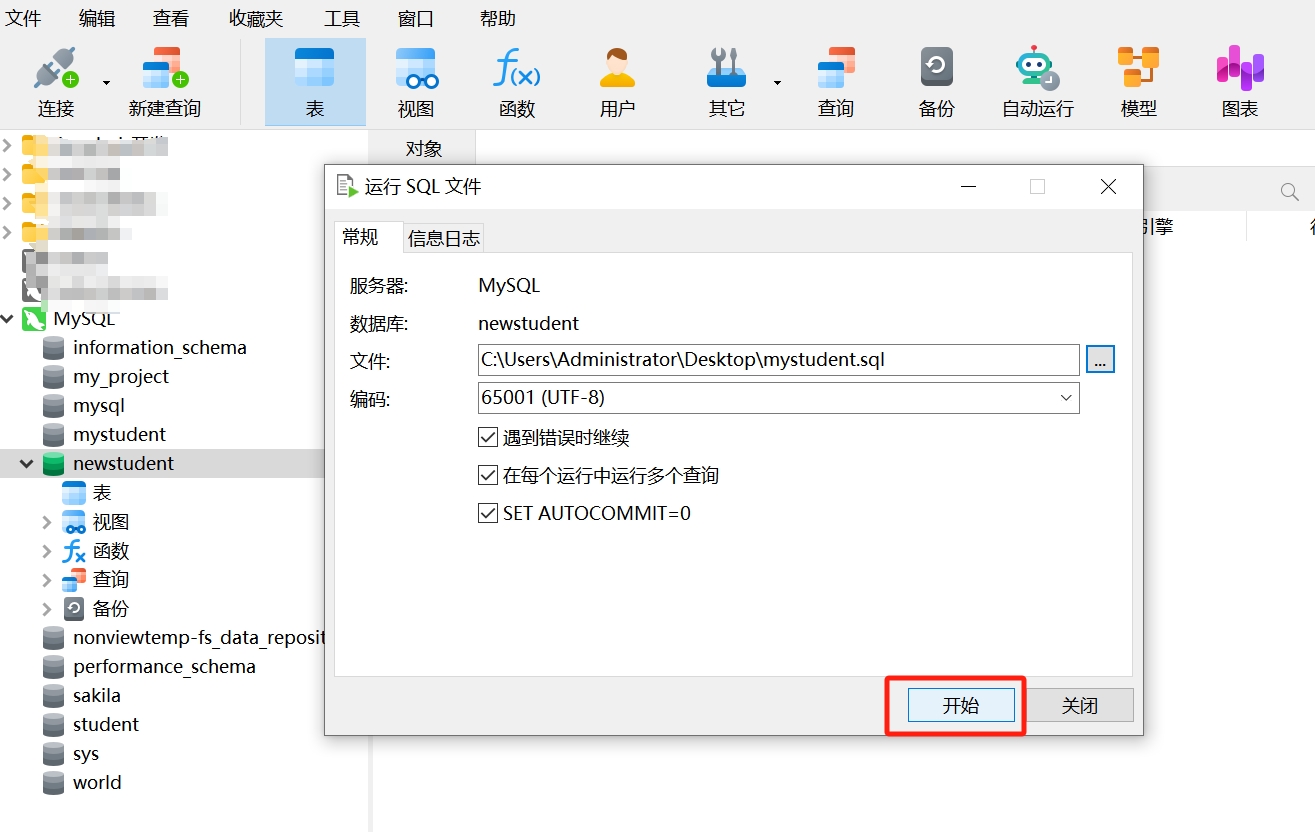
- Select the previously exported SQL file and open it.

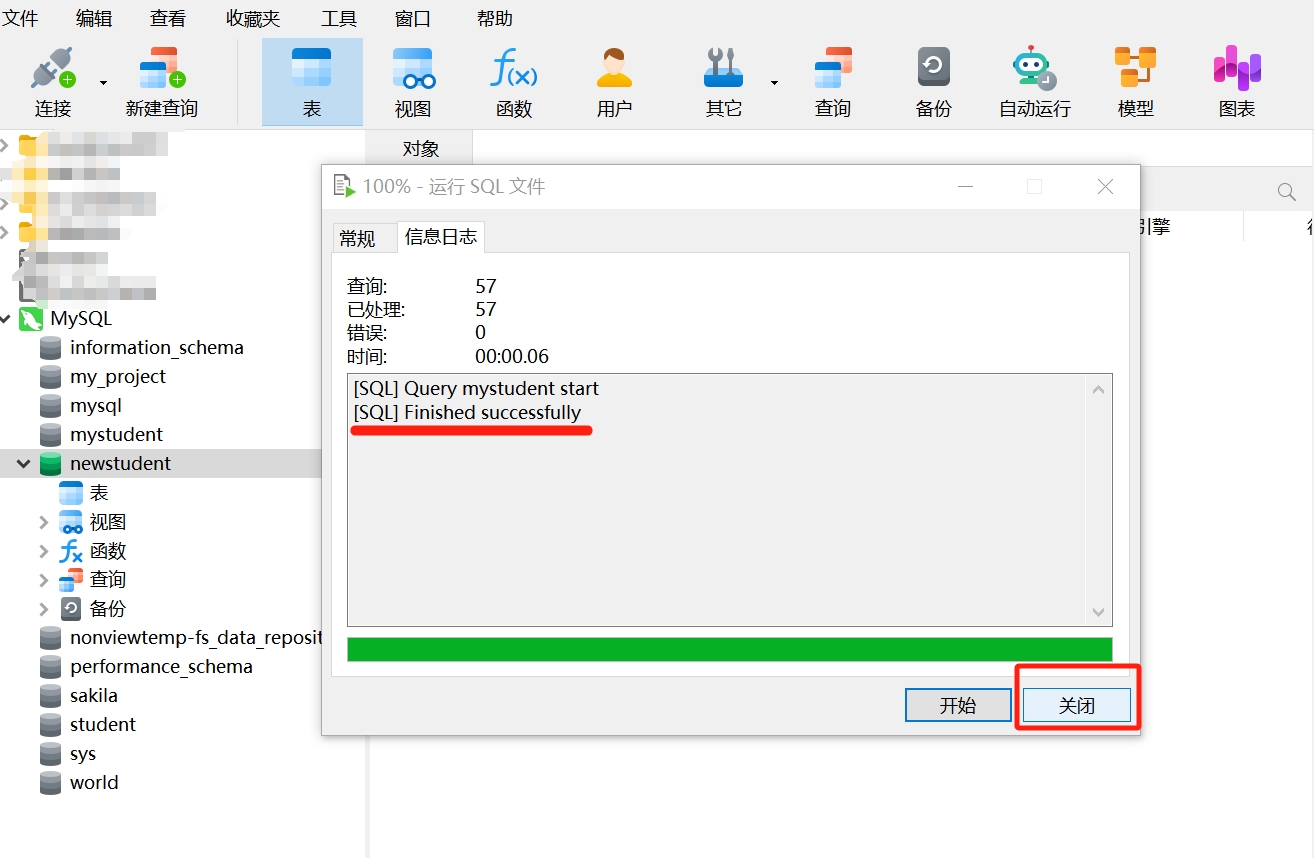
- Click "Start," and after successful execution, select "Close."
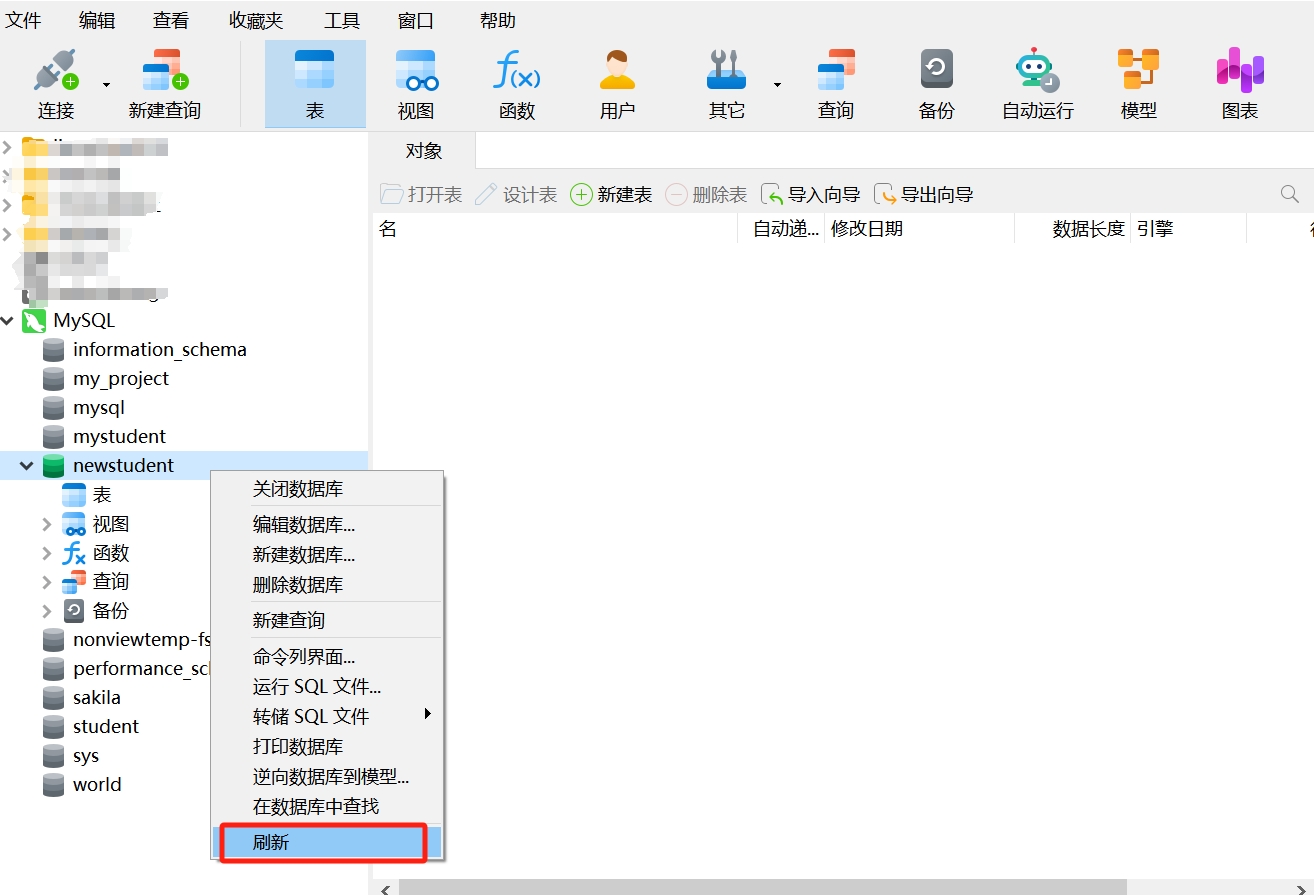
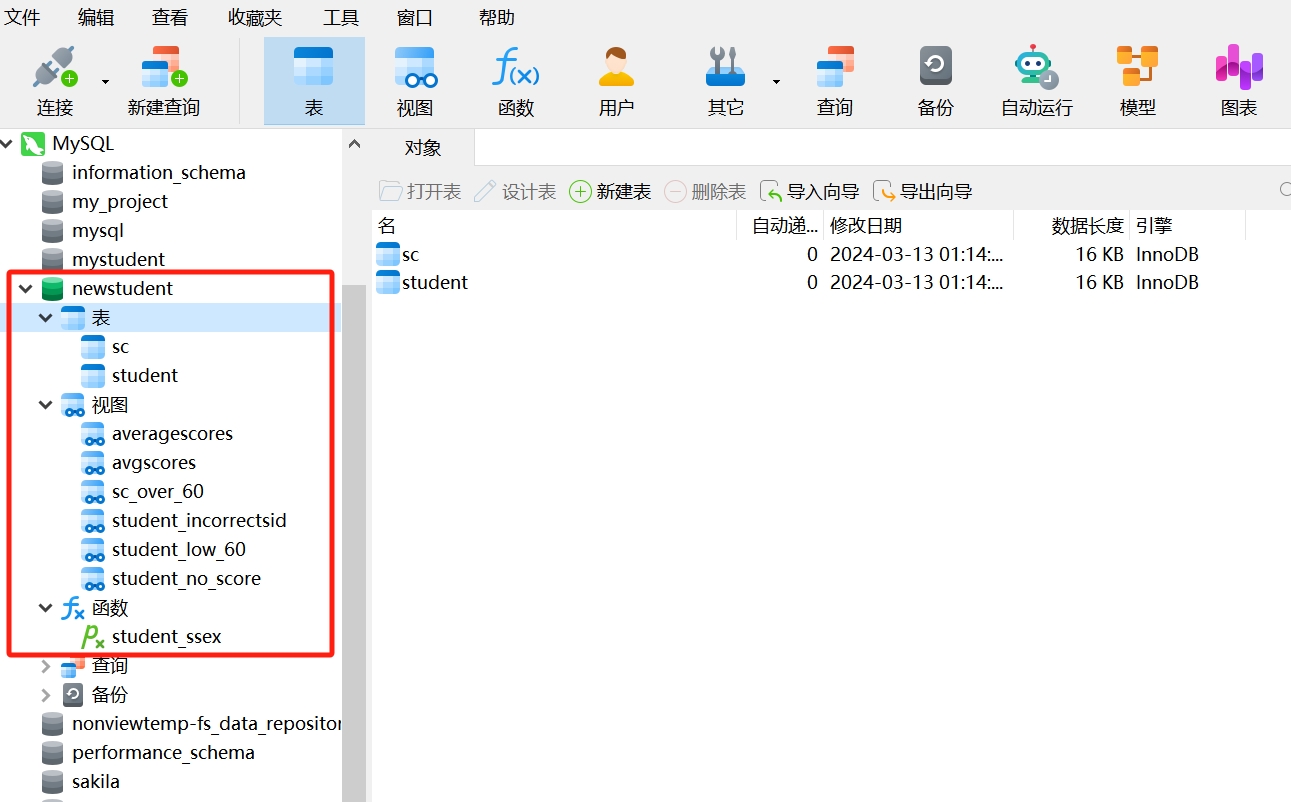
- Select the database "newstudent," right-click and choose "Refresh." You will see that the data tables, views, and MySQL stored procedures in this database are consistent with the dumped old database "mystudent."
Similarly, you can import the SQL dump file of a specific data table into the database by following the steps above.
Importing Excel Files into the Database
Before importing Excel data into the database, ensure that the fields in the imported data table are consistent with the fields in the target table. When the fields in the imported data table match those in the target table, it is usually used for data update operations. The update operation can update existing records in the database table based on the content of the imported data or insert new records, achieving data synchronization and updates.
Let’s look at a simple example of how to import data from an Excel file into the database:
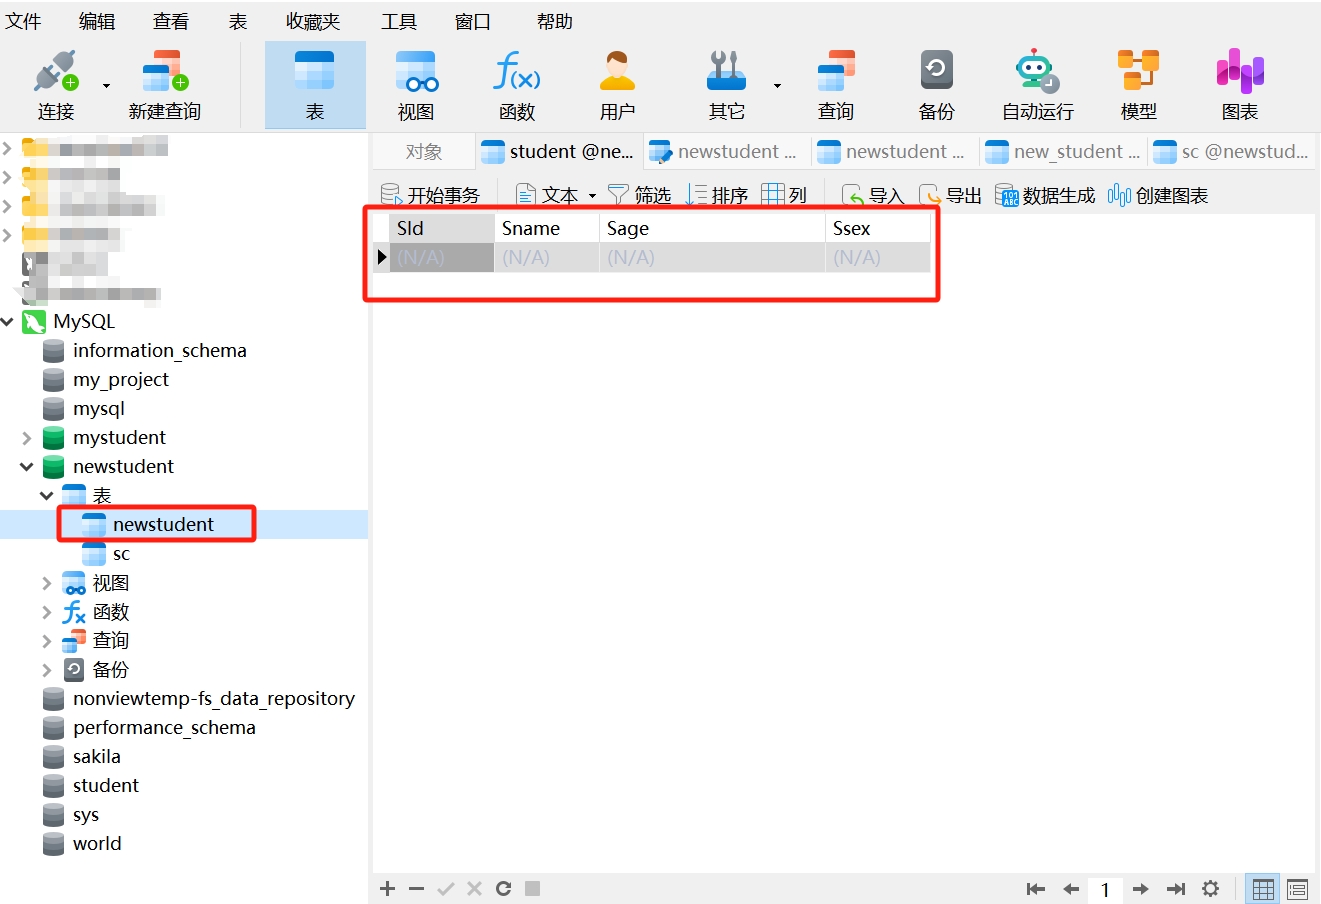
- First, create a new data table "newstudent," ensuring its fields are consistent with "student."
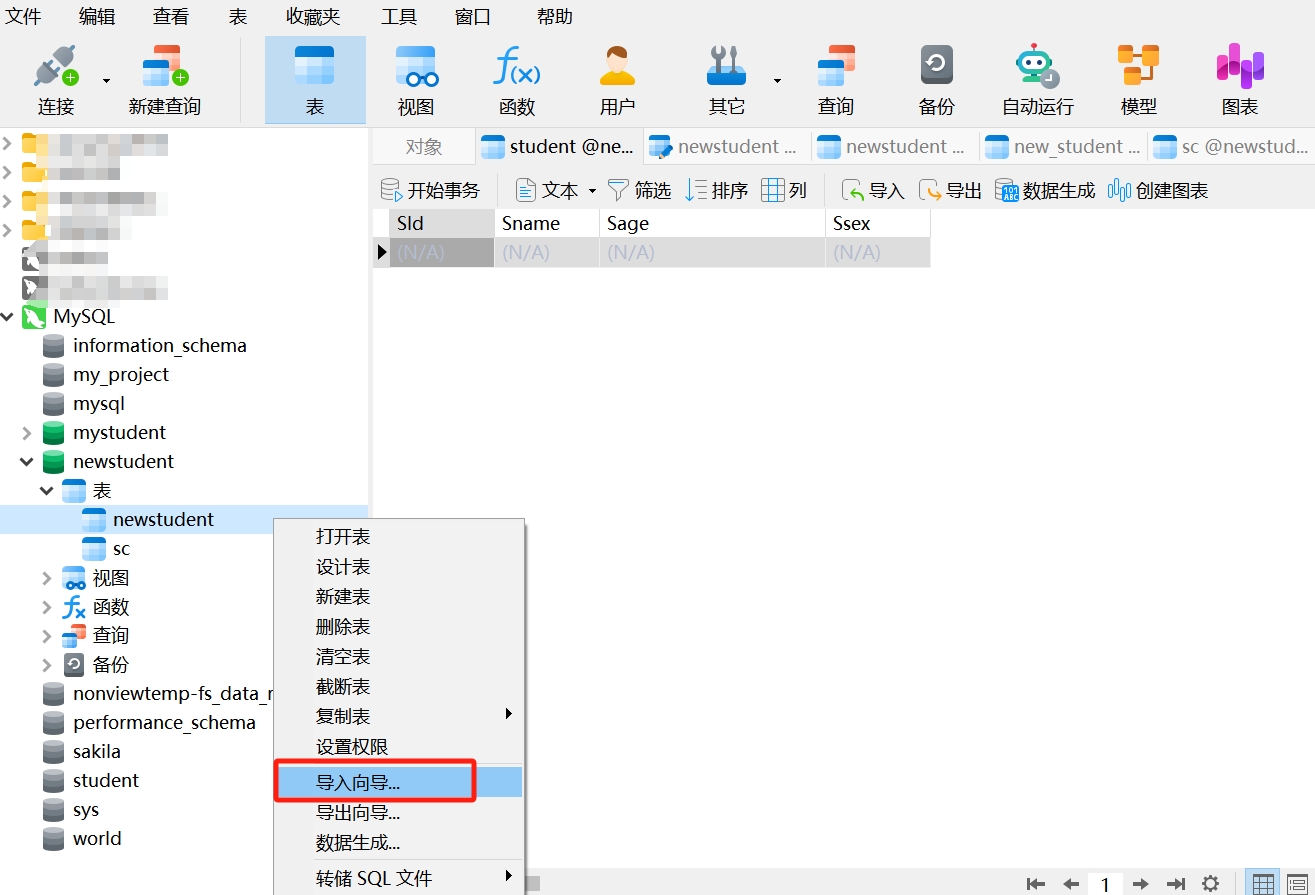
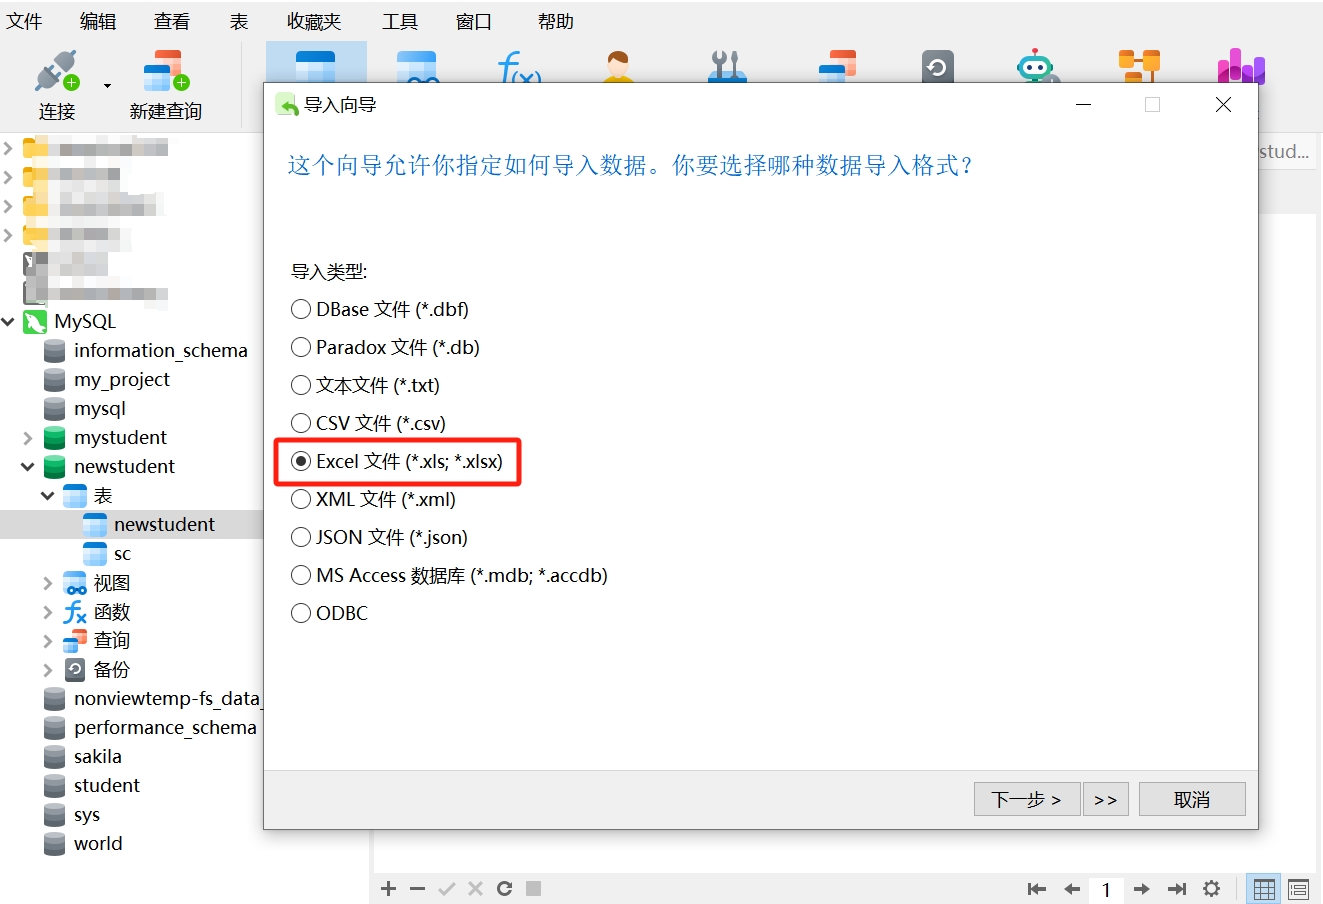
- Right-click and select "Import Wizard," then choose the import type as "Excel File."
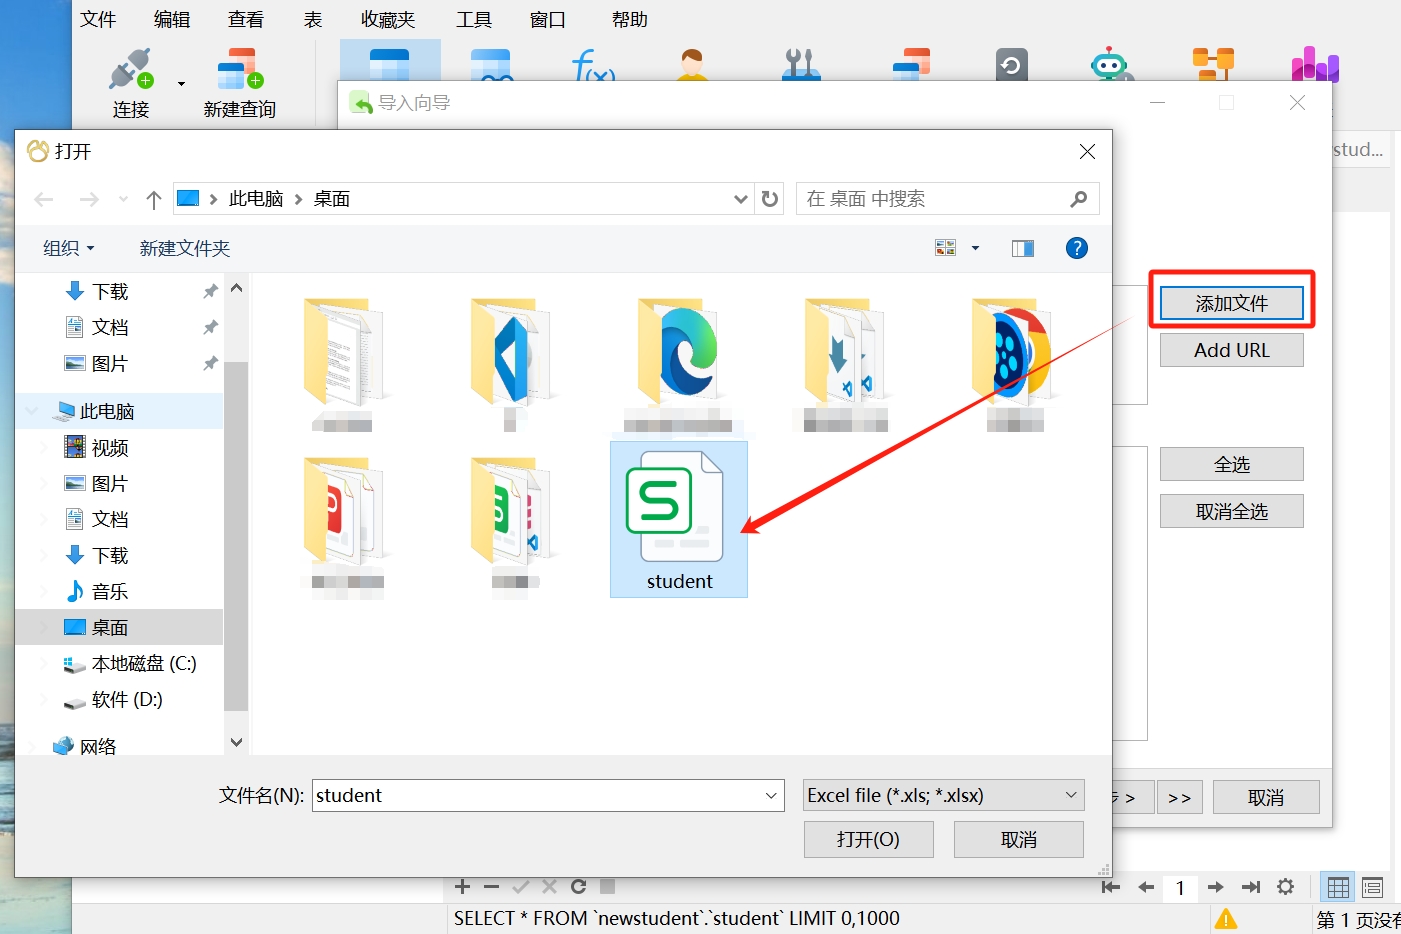
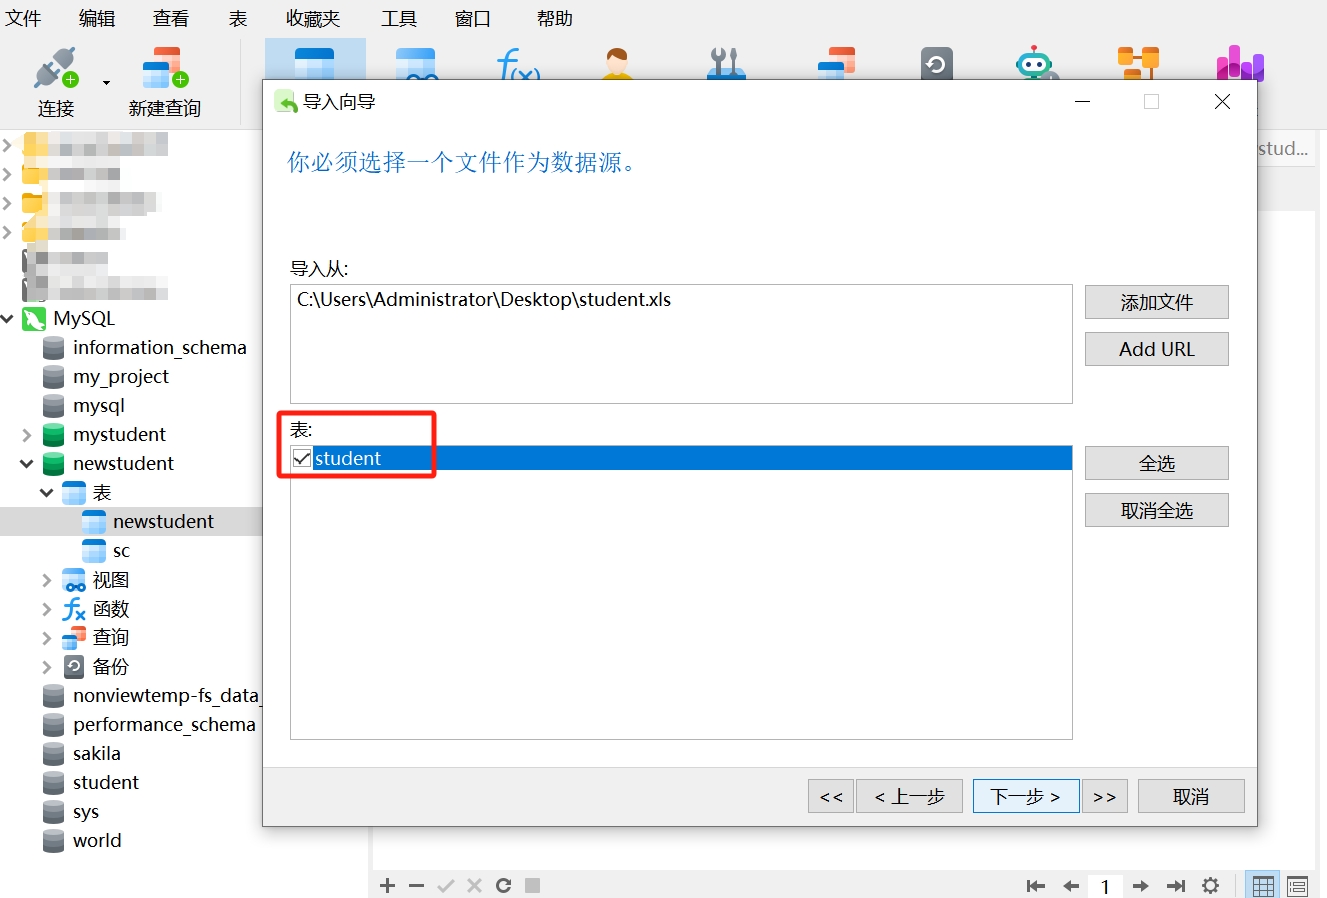
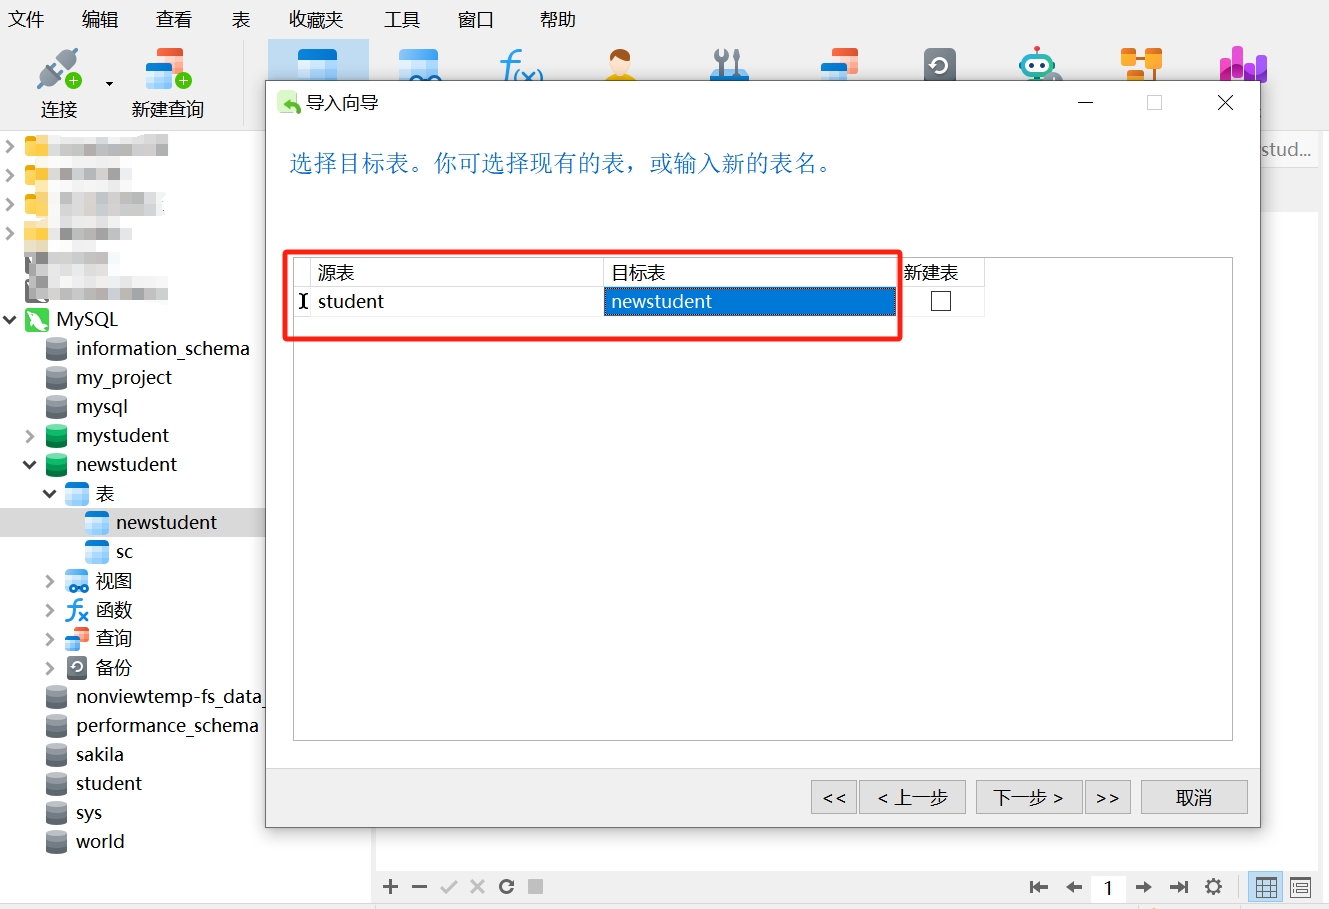
- Click "Next," first select "Add File," choose the Excel file "student" to import, and then click "Open"; select "student" as the data source.
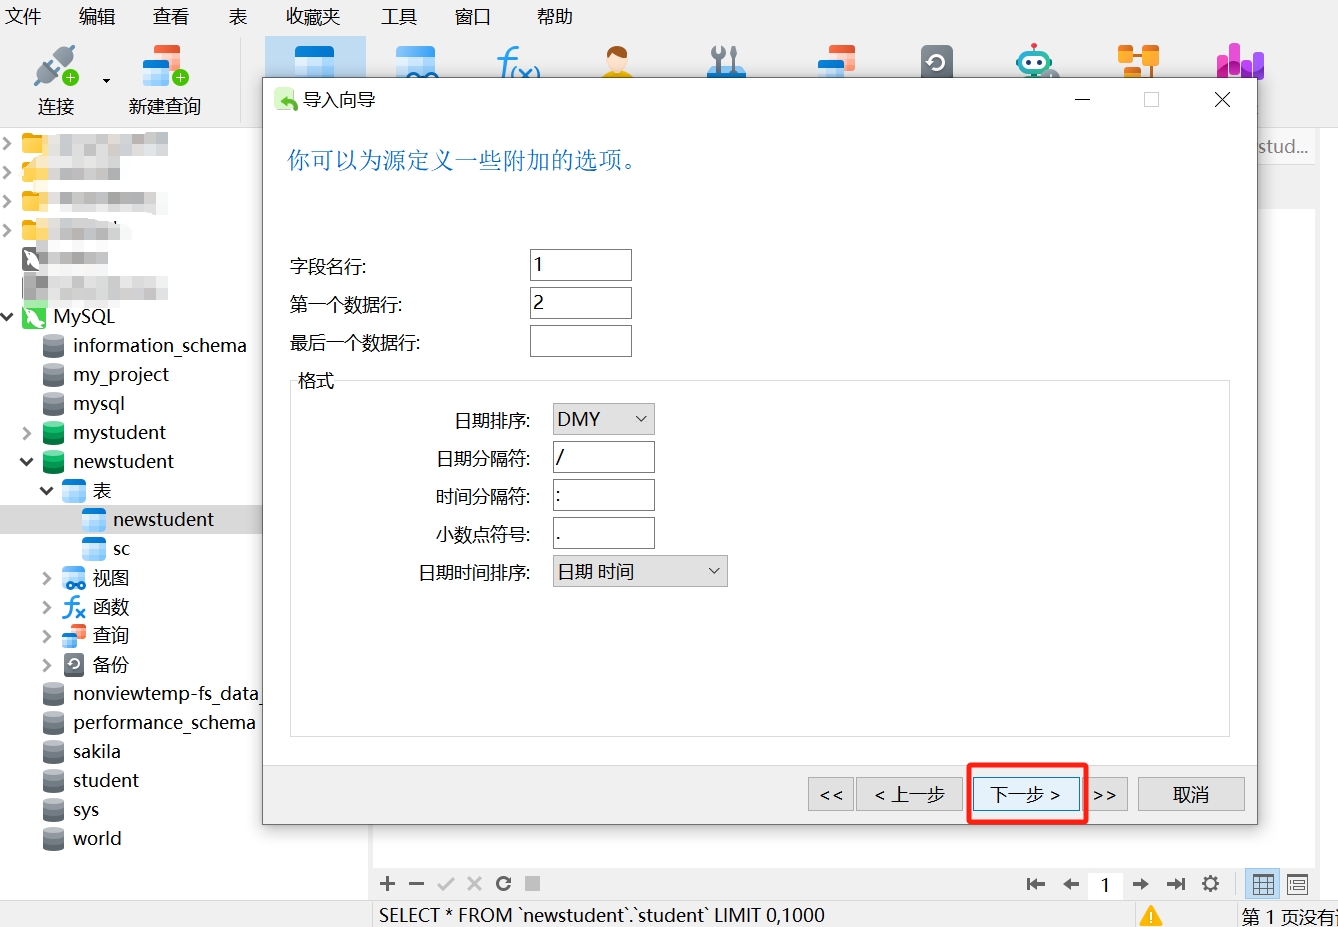
- Continue clicking "Next."
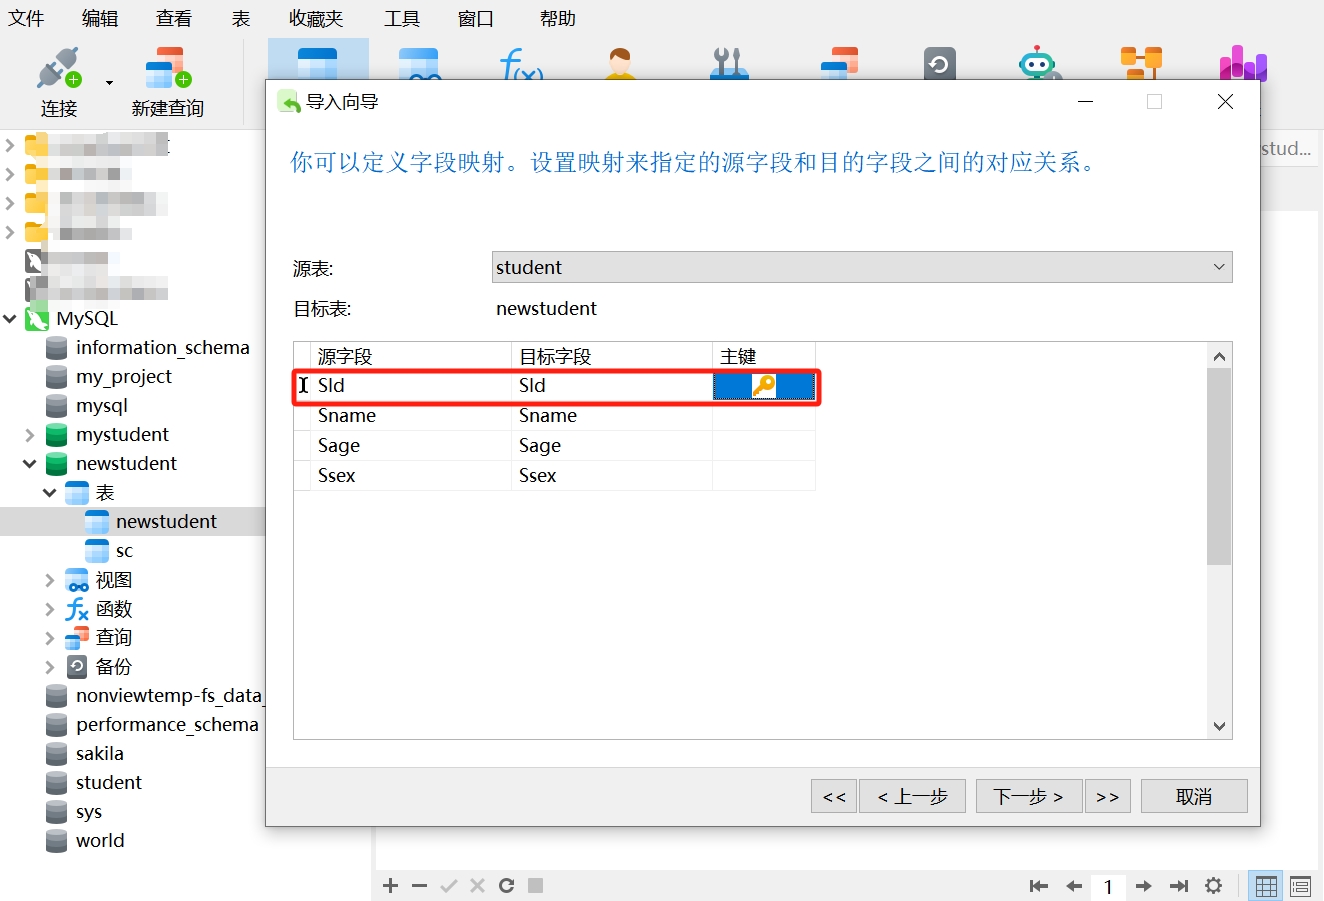
- Here, confirm the correspondence between source fields and destination fields, selecting SId as the primary key.
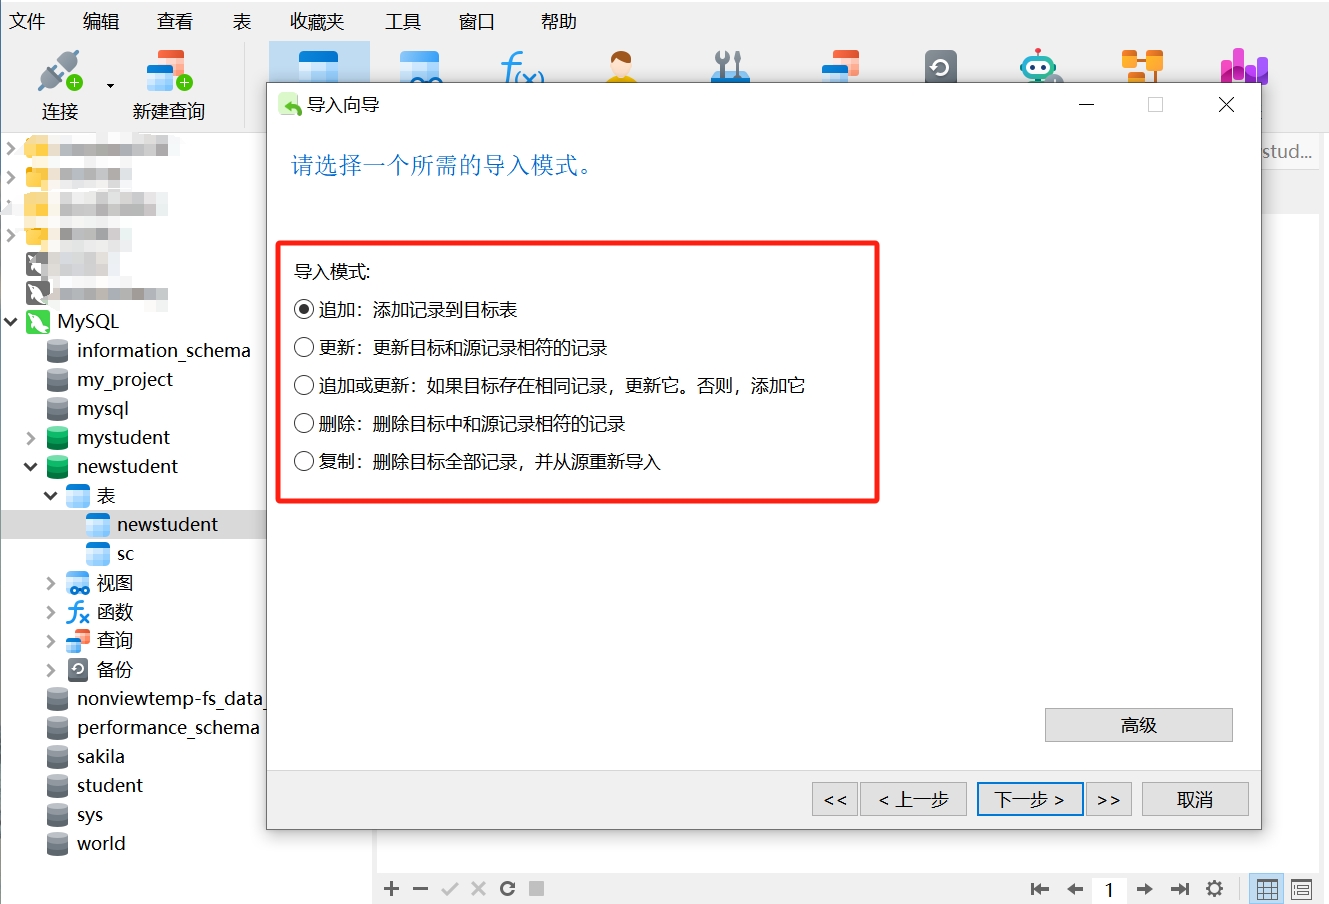
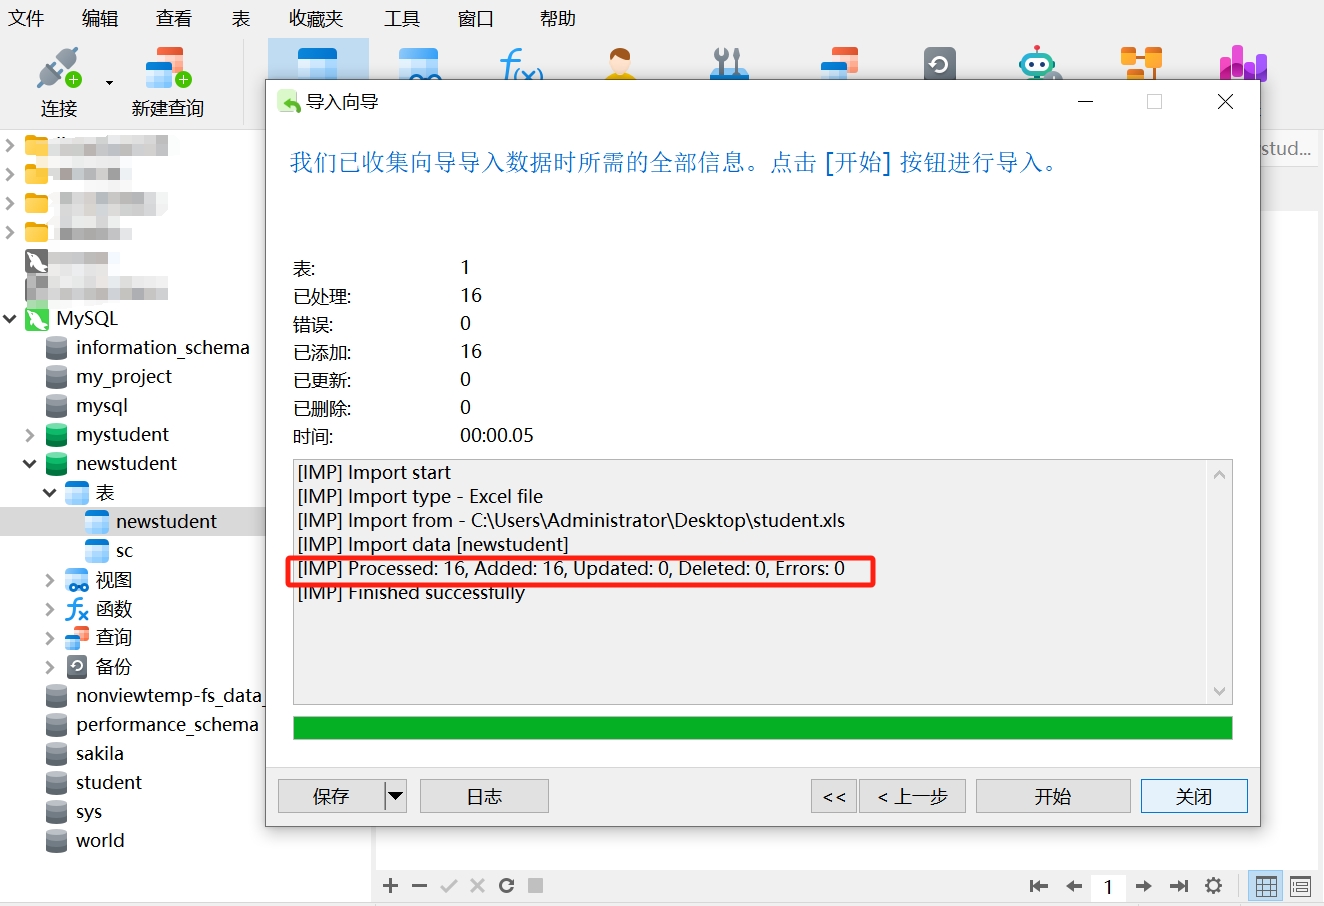
- Choose the import mode; here we will import the Excel data into an empty table, so select "Append." If there is data in the target table, be cautious in your selection to avoid overwriting or deleting data.
- After clicking the "Start" button, the data import is successful. We can see that 16 records have been added.
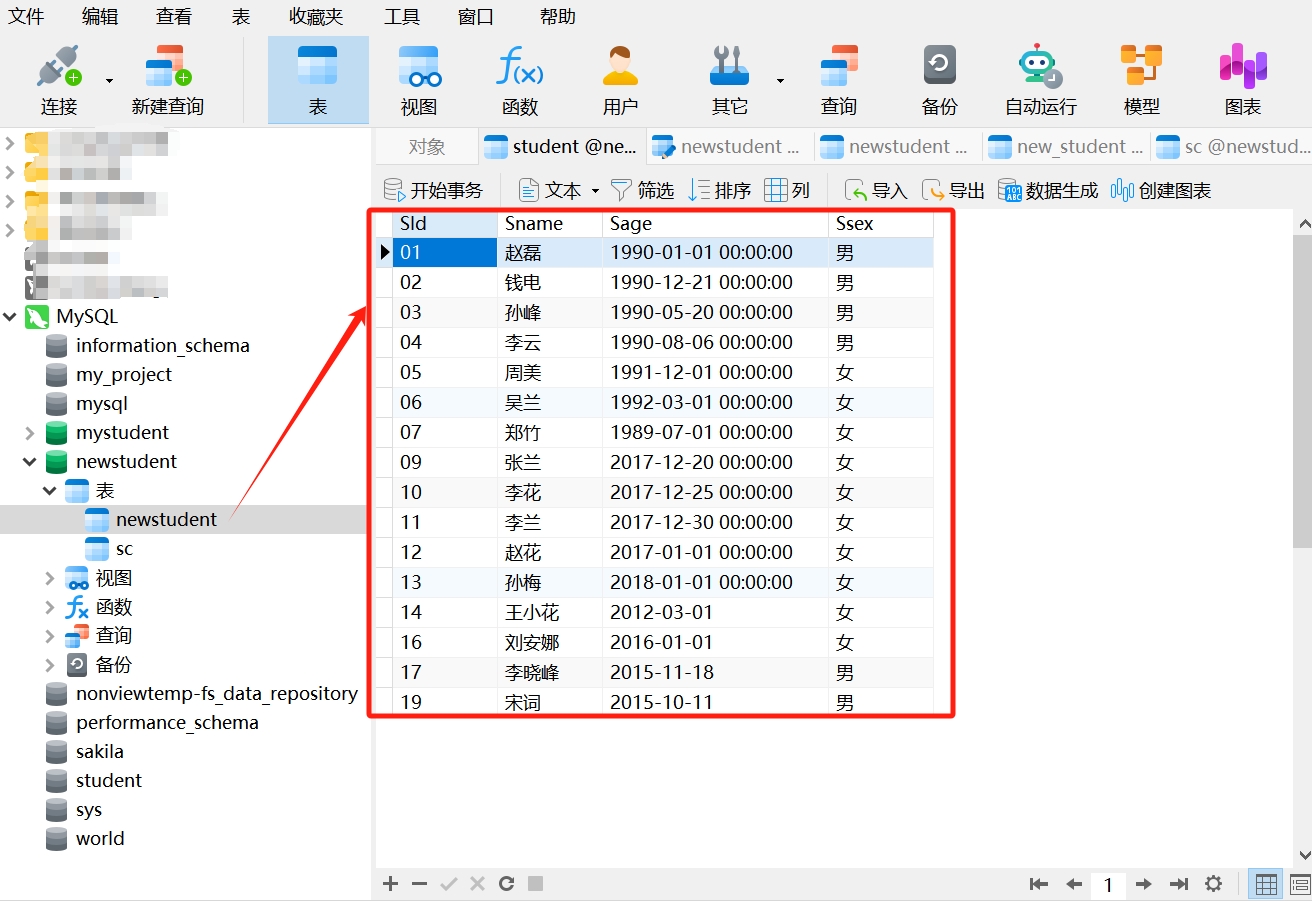
- Refresh the data table "newstudent," and you will see that the data import was successful and is consistent with the data in Excel.
In the process of exporting and importing data, the key is to choose the appropriate tool; we generally use Navicat or SQL statements. Always back up data before operations, ensuring the save path is correct to avoid overwriting other data and causing errors. These steps are common and important operations in data management, and it is essential to ensure the integrity, accuracy, and security of the data.