JianghuJS-Multi-Application Development
120021. Concept
Background of Multi-Application Development Needs
The demand for multi-application development primarily arises from business diversity, user differences, platform variety, and the need for team collaboration. Adopting a multi-application development strategy helps better meet these diverse requirements. From a development perspective, the background of multi-application development mainly includes the following aspects:
Technology Stack Adaptability:
Different applications may require different technology stacks and development frameworks to meet specific needs and business scenarios.Modular and Component-Based Development:
Using a multi-application development model encourages modular and component-based development approaches, making the code easier to maintain, extend, and reuse.Team Division of Labor:
Multi-application development facilitates division of labor among teams, allowing each team to focus on the development of different applications, thereby improving development efficiency.Rapid Iteration:
Independent development and deployment of each application help achieve rapid iteration and release updates without affecting the normal operation of other applications.Parallel Development:
Different teams or developers can engage in parallel development on different applications, increasing the overall parallelism of the development process.Customized User Experience:
Applications can be customized for different user groups or business scenarios to provide a more optimized and personalized user experience.Freedom of Technology Selection:
Different applications can choose technology stacks that suit their own needs, providing greater freedom in technology selection.
The JianghuJS Intermediate enterprise template project is a valuable learning resource, especially suitable for learning the development and management of multi-application projects.
2. Initialize Enterprise
Introduction to the Enterprise Structure
The main structure of the enterprise includes a data repository, user management, and application management. In this structure, the enterprise is the top-level entity, followed by the data repository, user management, and application management. These three components together form the information management and technical support system of the enterprise. The enterprise gains data insights through the data repository, user management ensures secure access to data, and application management is responsible for effectively developing and maintaining business applications.
data_repository:
The data repository application synchronizes/collects tables from other databases for data synchronization and sharing.user_app_management:
User APP management application permissions.directory:
APP directory application.
Process of jianghu-init enterprise
Execute jianghu-init:
my-jh-project-multi is your project name, customizable
jianghu-init project --type=enterprise `my-jh-project-multi`- Fill in project information:
If there are default values for the following information, you can press Enter to use the default values.
? project name: `${Your Project Name}`
? project description: `${Your Project Description}`
? project author: `${Your Project Author}`
? prefix of database: `${The Database Name You Want to Initialize}`
? cookie security keys: `${Your Project's Cookie Key}`
? Database IP: `${Your Project's Database IP}`
? Database Port: `${Your Project's Database Port}`
? Database Account: `${Your Project's Database Account}`
? Database Password: `${Your Project's Database Password}`- Wait for initialization to complete.
✔ Switching directory to data_repository
    - [mysql importer] 68.45% Completed
    - [mysql importer] 100% Completed
✔ Initialization of `basic database tables and data` completed.

✔ Switching directory to user_app_management
    - [mysql importer] 68.45% Completed
    - [mysql importer] 100% Completed
✔ Initialization of `basic database tables and data` completed.

✔ Switching directory to directory
    - [mysql importer] 68.45% Completed
    - [mysql importer] 100% Completed
✔ Initialization of `basic database tables and data` completed.

✔ usage:
      - cd /xxx/my-jh-project-multi
      - ls
      - cd your_app
      - npm install
      - npm start / npm run dev

✔ jianghu init project is success
Once you see jianghu init project is success, your project is initialized!
3. Install Dependencies
- Package Installation for Multi-Applications
Enter the command to complete the installation:
$ cd my-jh-project-multi
$ npm --prefix=data_repository install
$ npm --prefix=user_app_management install
$ npm --prefix=directory install
4. Start the Project
Starting Multi-Applications
Enter the enterprise project directory:
$ cd my-jh-project-multi- Start data_repository:
$ npm --prefix=data_repository run devOpen the browser and visit http://127.0.0.1:7005, username admin password 123456.
- Start user_app_management:
$ npm --prefix=user_app_management run devOpen the browser and visit http://127.0.0.1:7006, username admin password 123456.
- Start directory:
$ npm --prefix=directory run devOpen the browser and visit http://127.0.0.1:7007, username admin password 123456.
5. Function Introduction
- data_repository (Data Warehouse)
data_repository (data repository) typically refers to a centralized place for storing, managing, and organizing data, which can be a database system or data warehouse. In Enterprise, the functions of data_repository include:
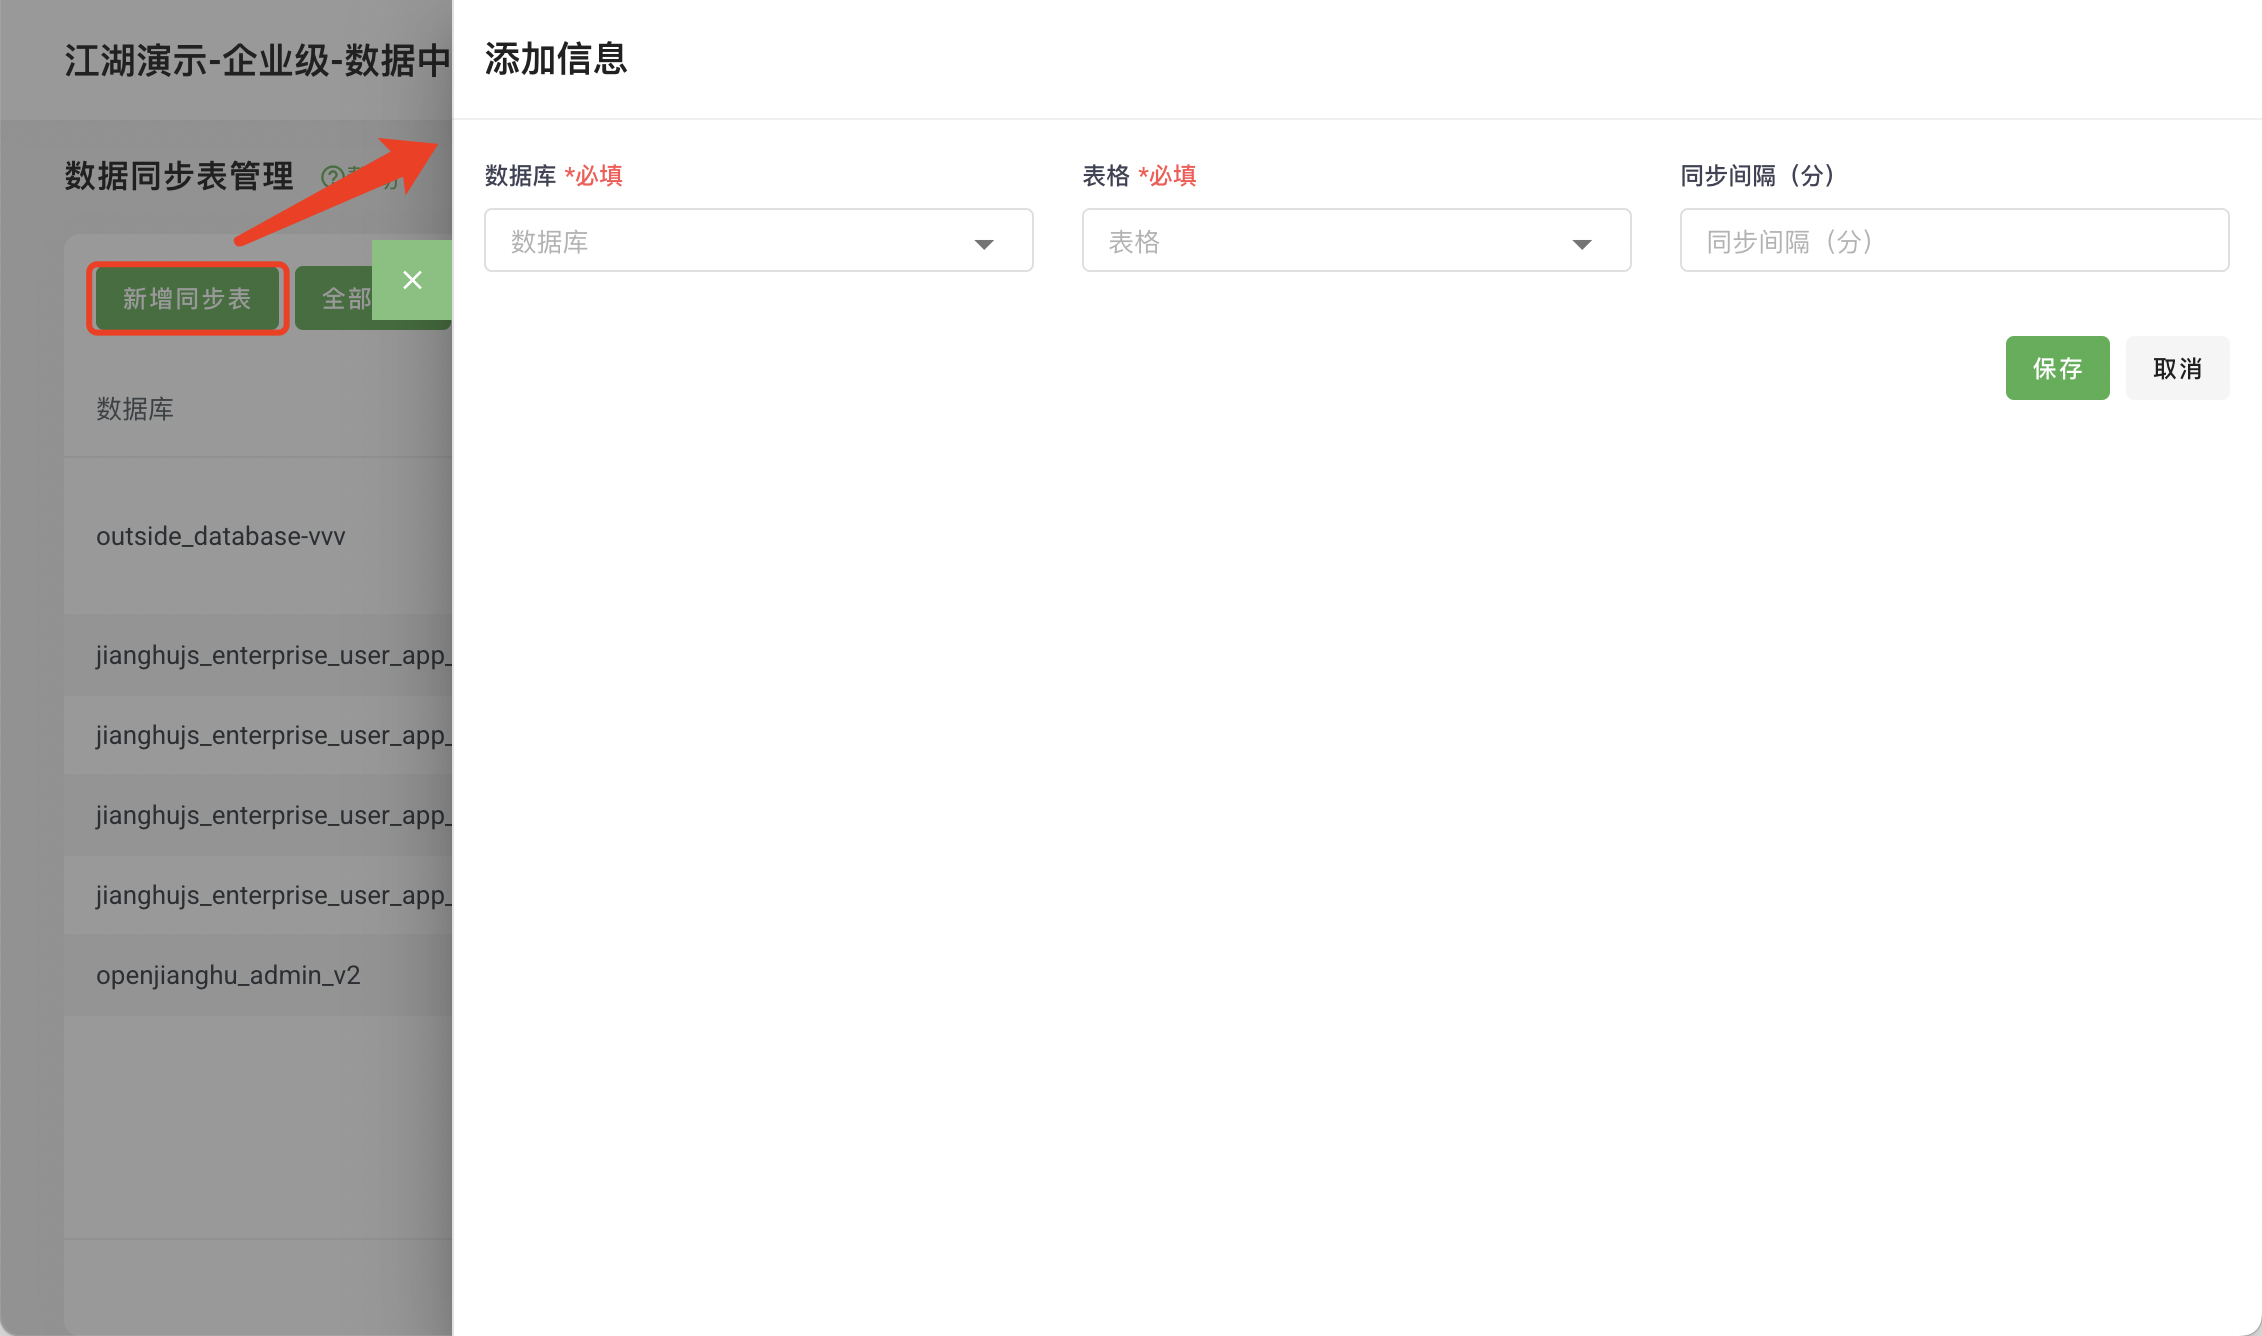
Add Synchronization Configuration:
- Click
Add Synchronization - Select the
databaseto synchronize to data_repository - Select the
data tableto synchronize - Select the
time intervalfor synchronization
- Click
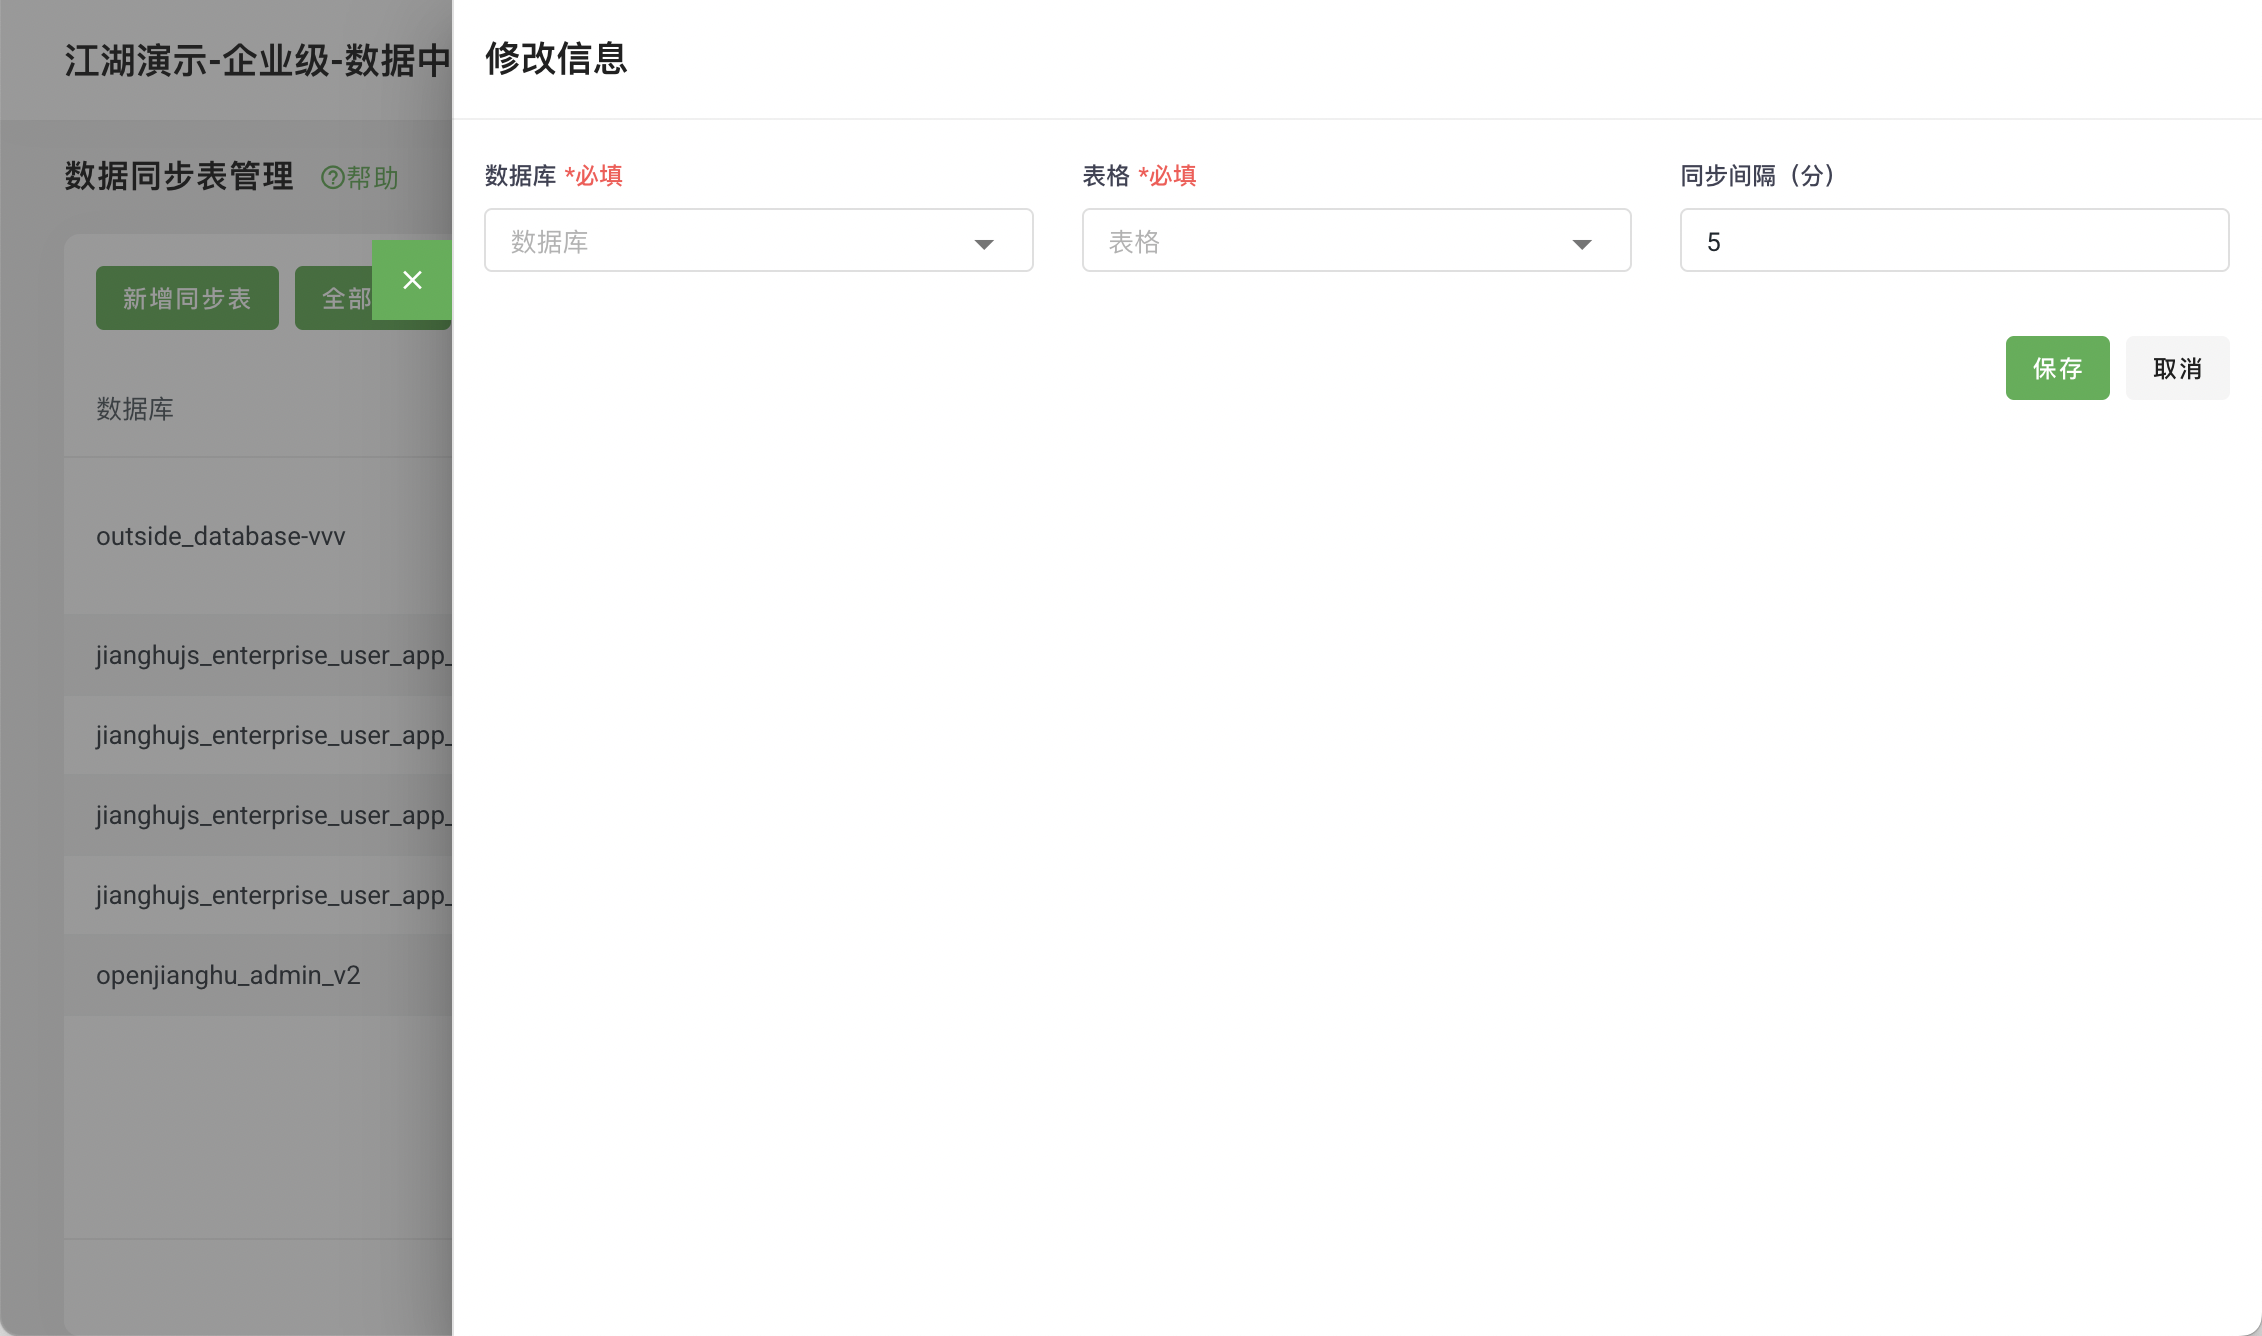
Edit Synchronization Configuration:
- Click the
Editbutton on each row - Select the
databaseto synchronize to data_repository - Select the
data tableto synchronize - Select the
time intervalfor synchronization
- Click the
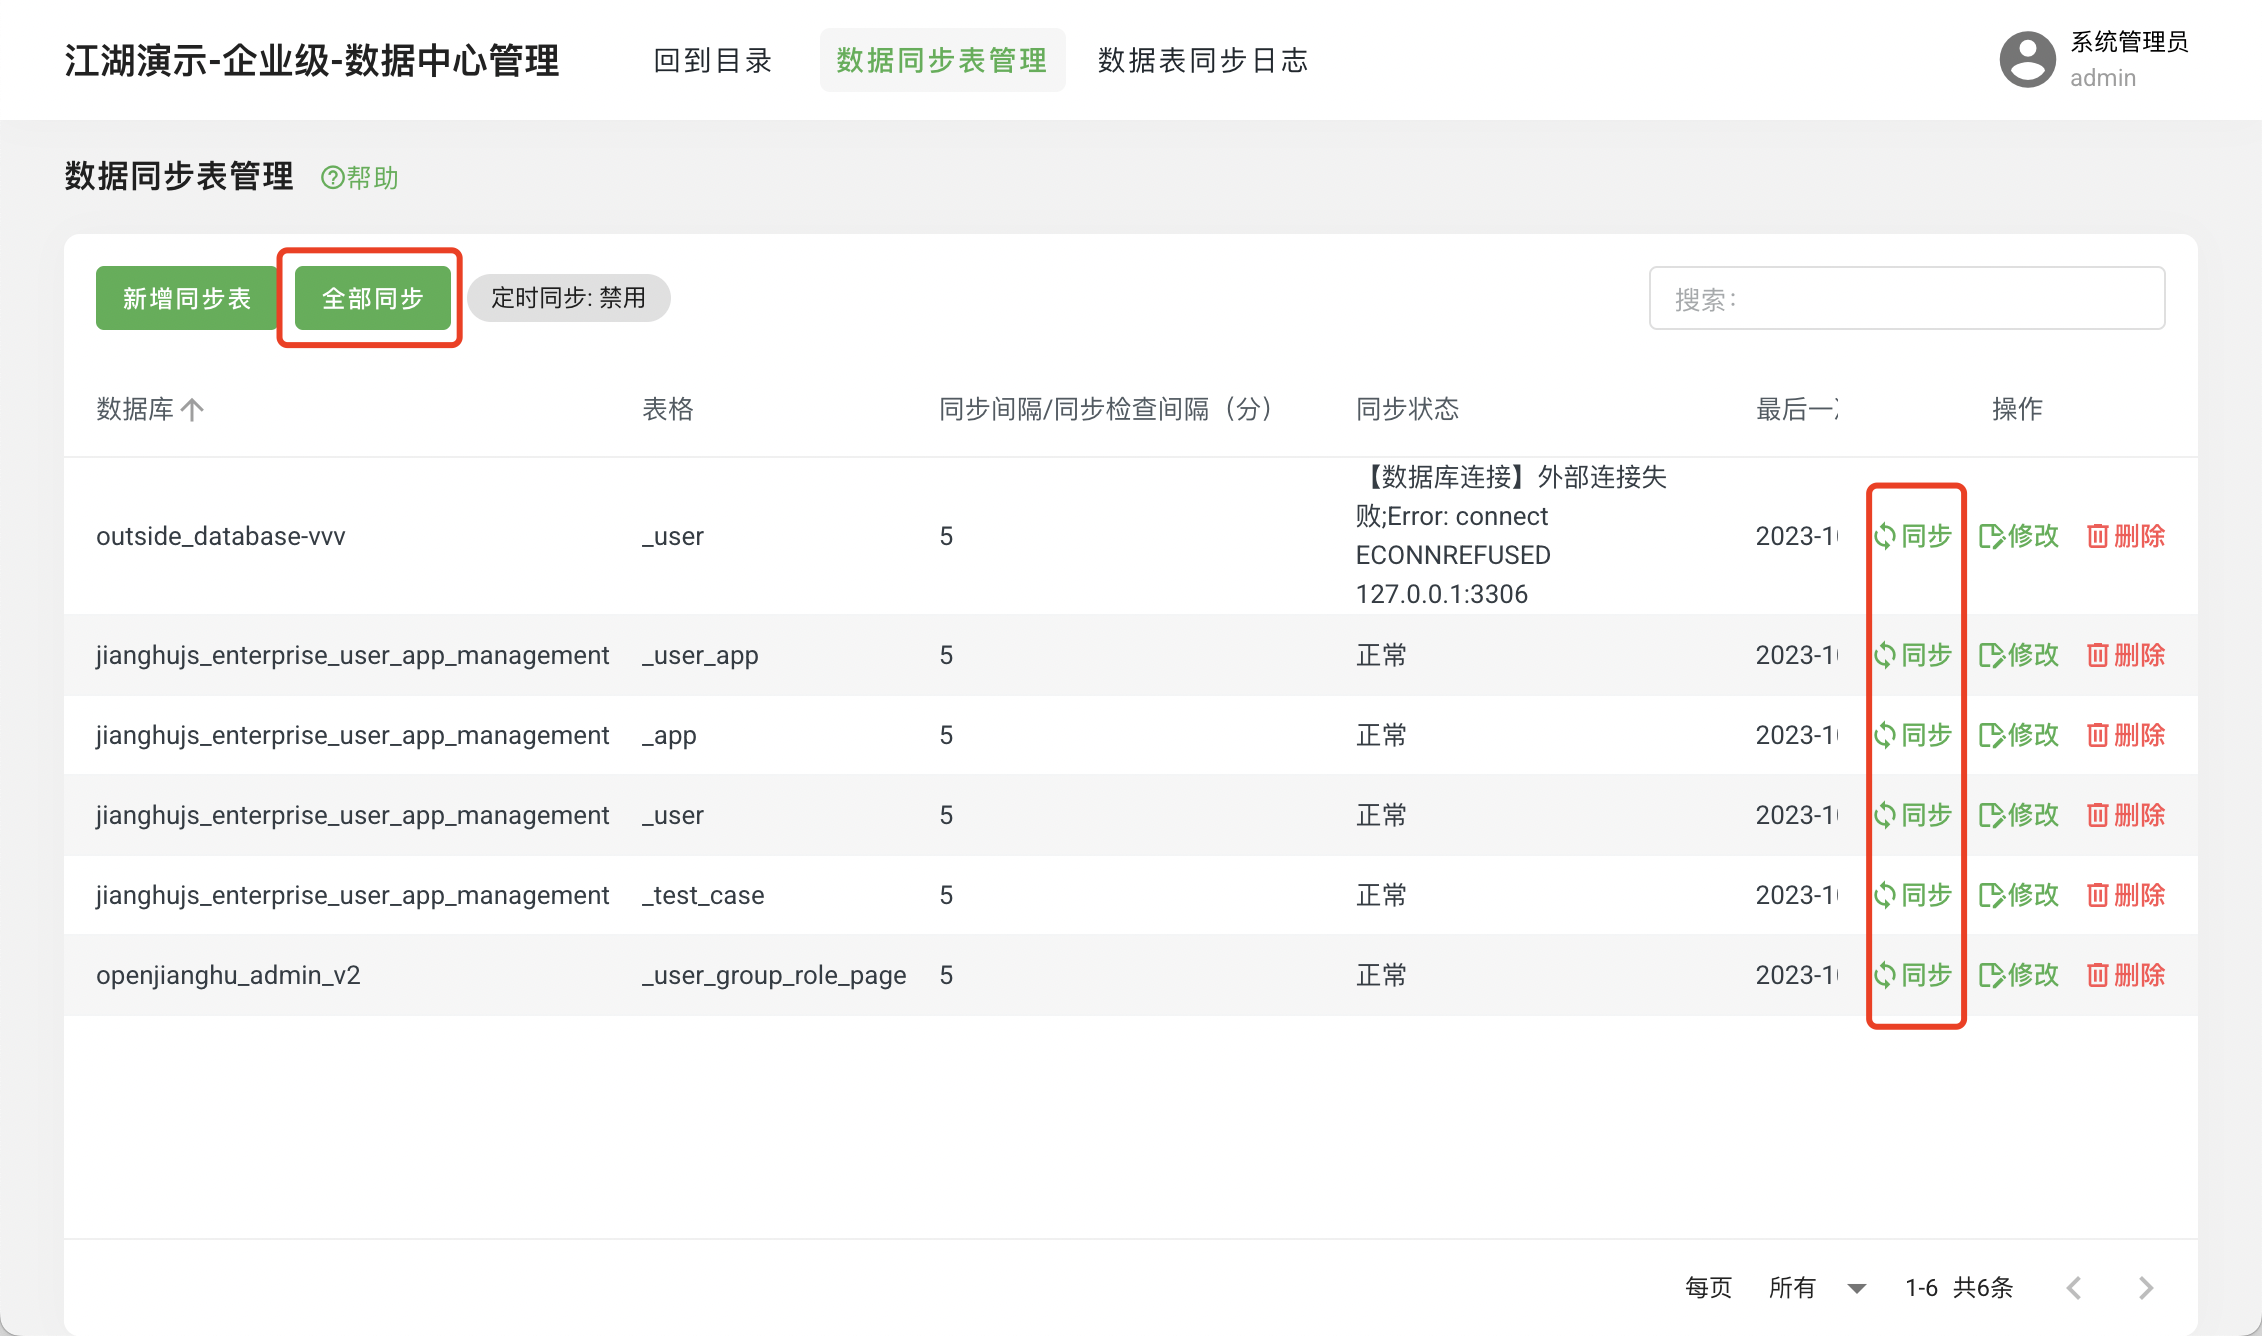
- Manual Synchronization
- Click the
All - Manual Synchronizationbutton to trigger batch synchronization - Click the
Synchronizebutton on each row for individual synchronization
- Click the
- Automatic Synchronization
- Default
Disabled
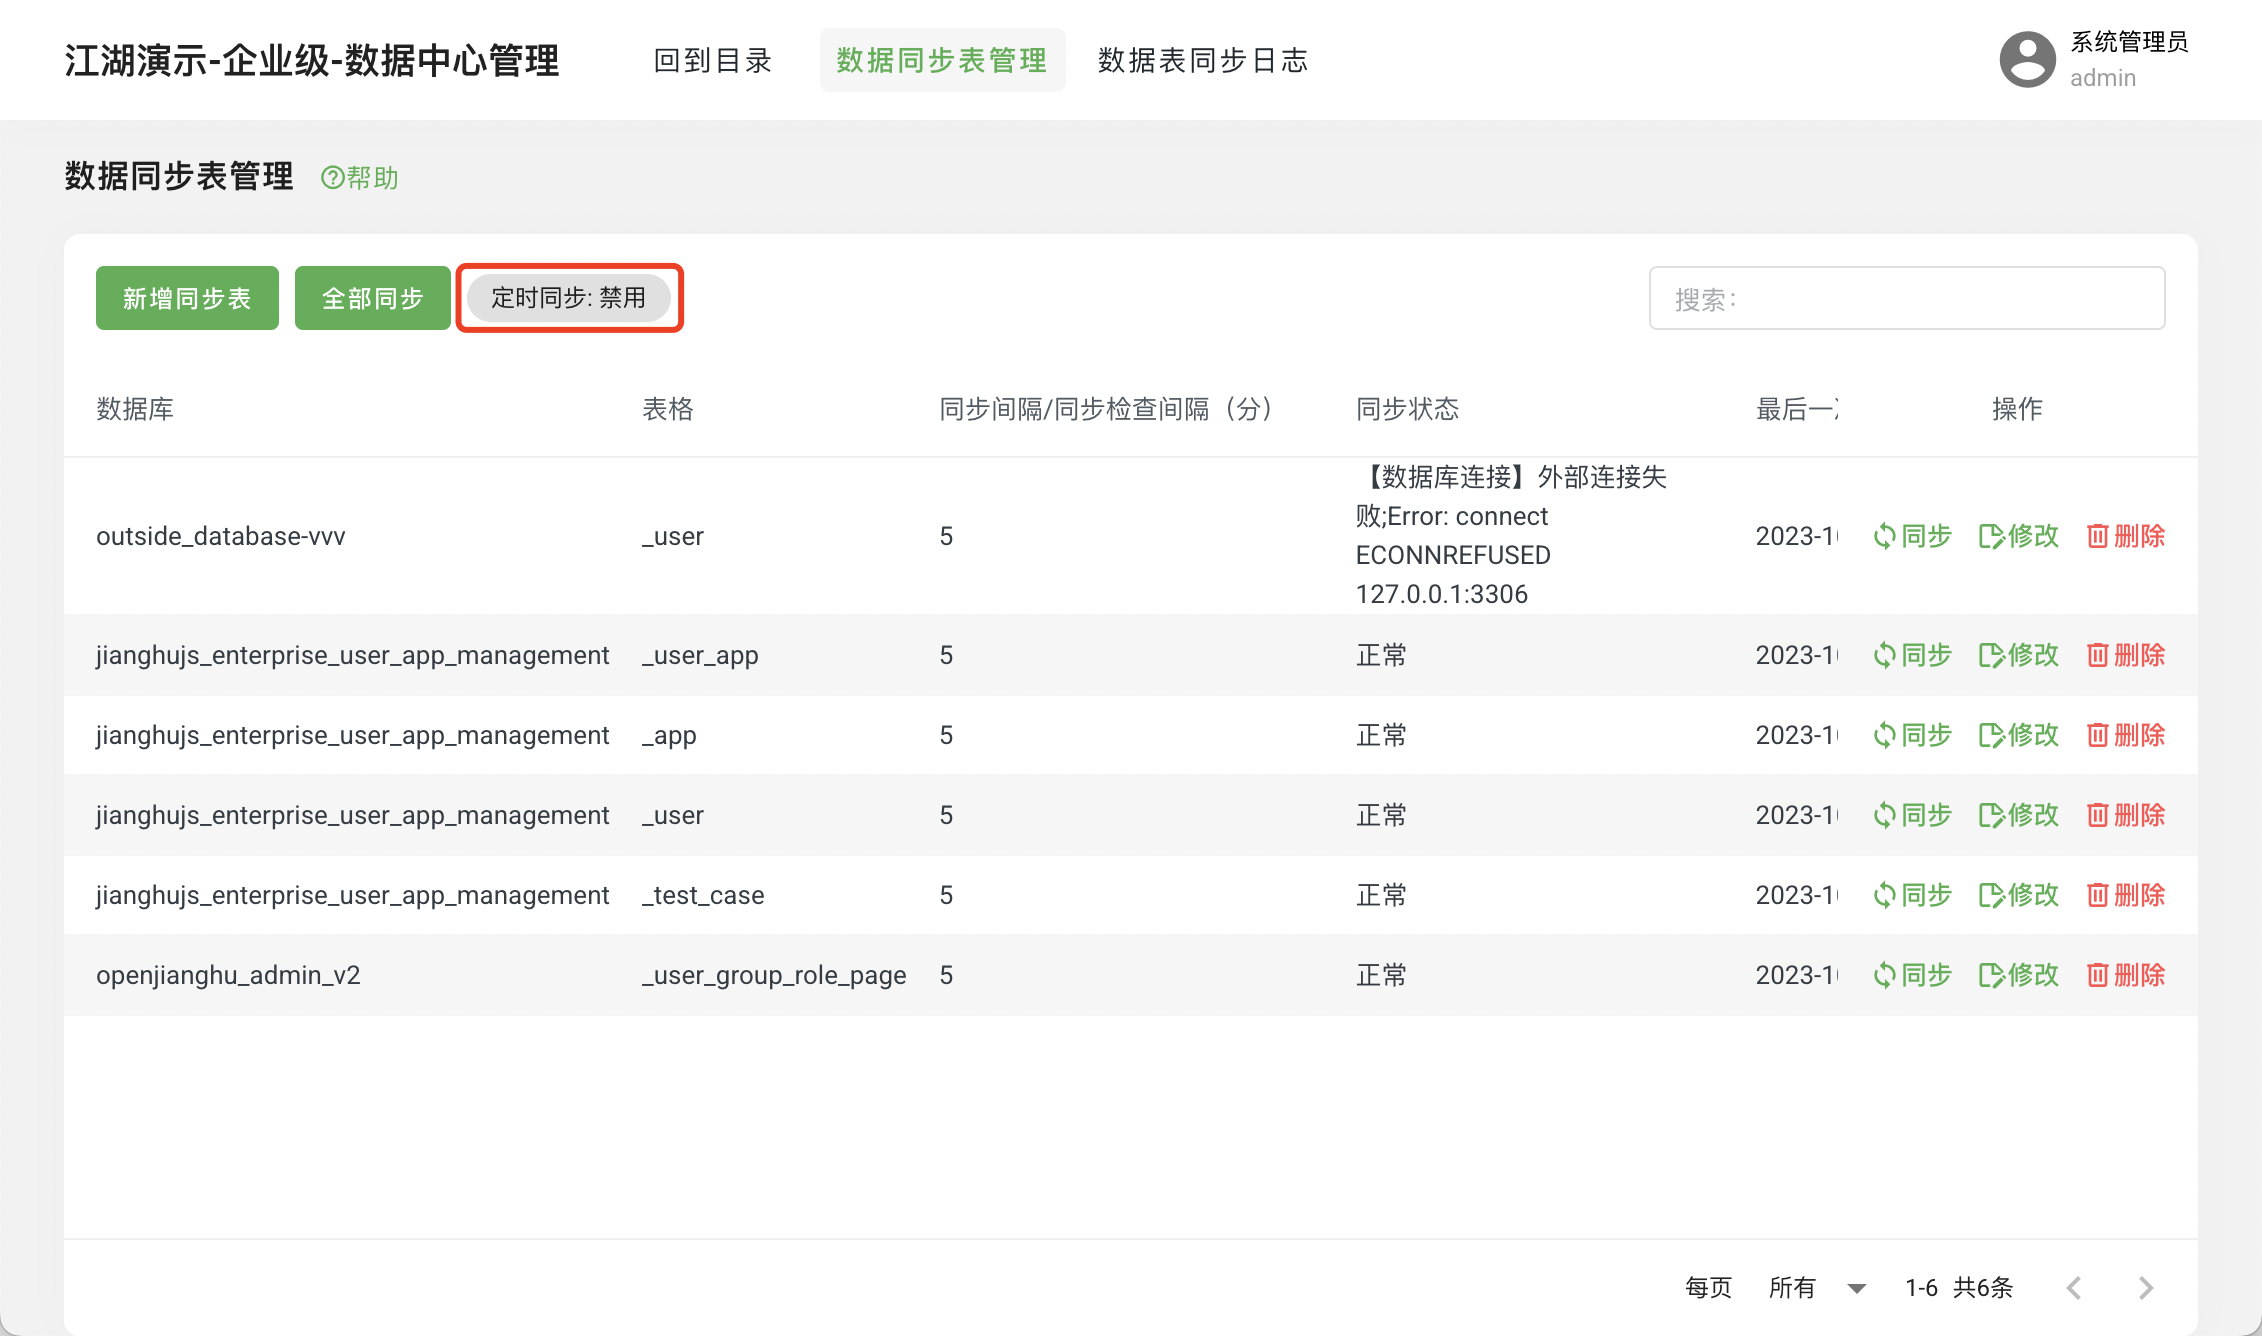
Enable
Modify data_repository/config/config.local.js
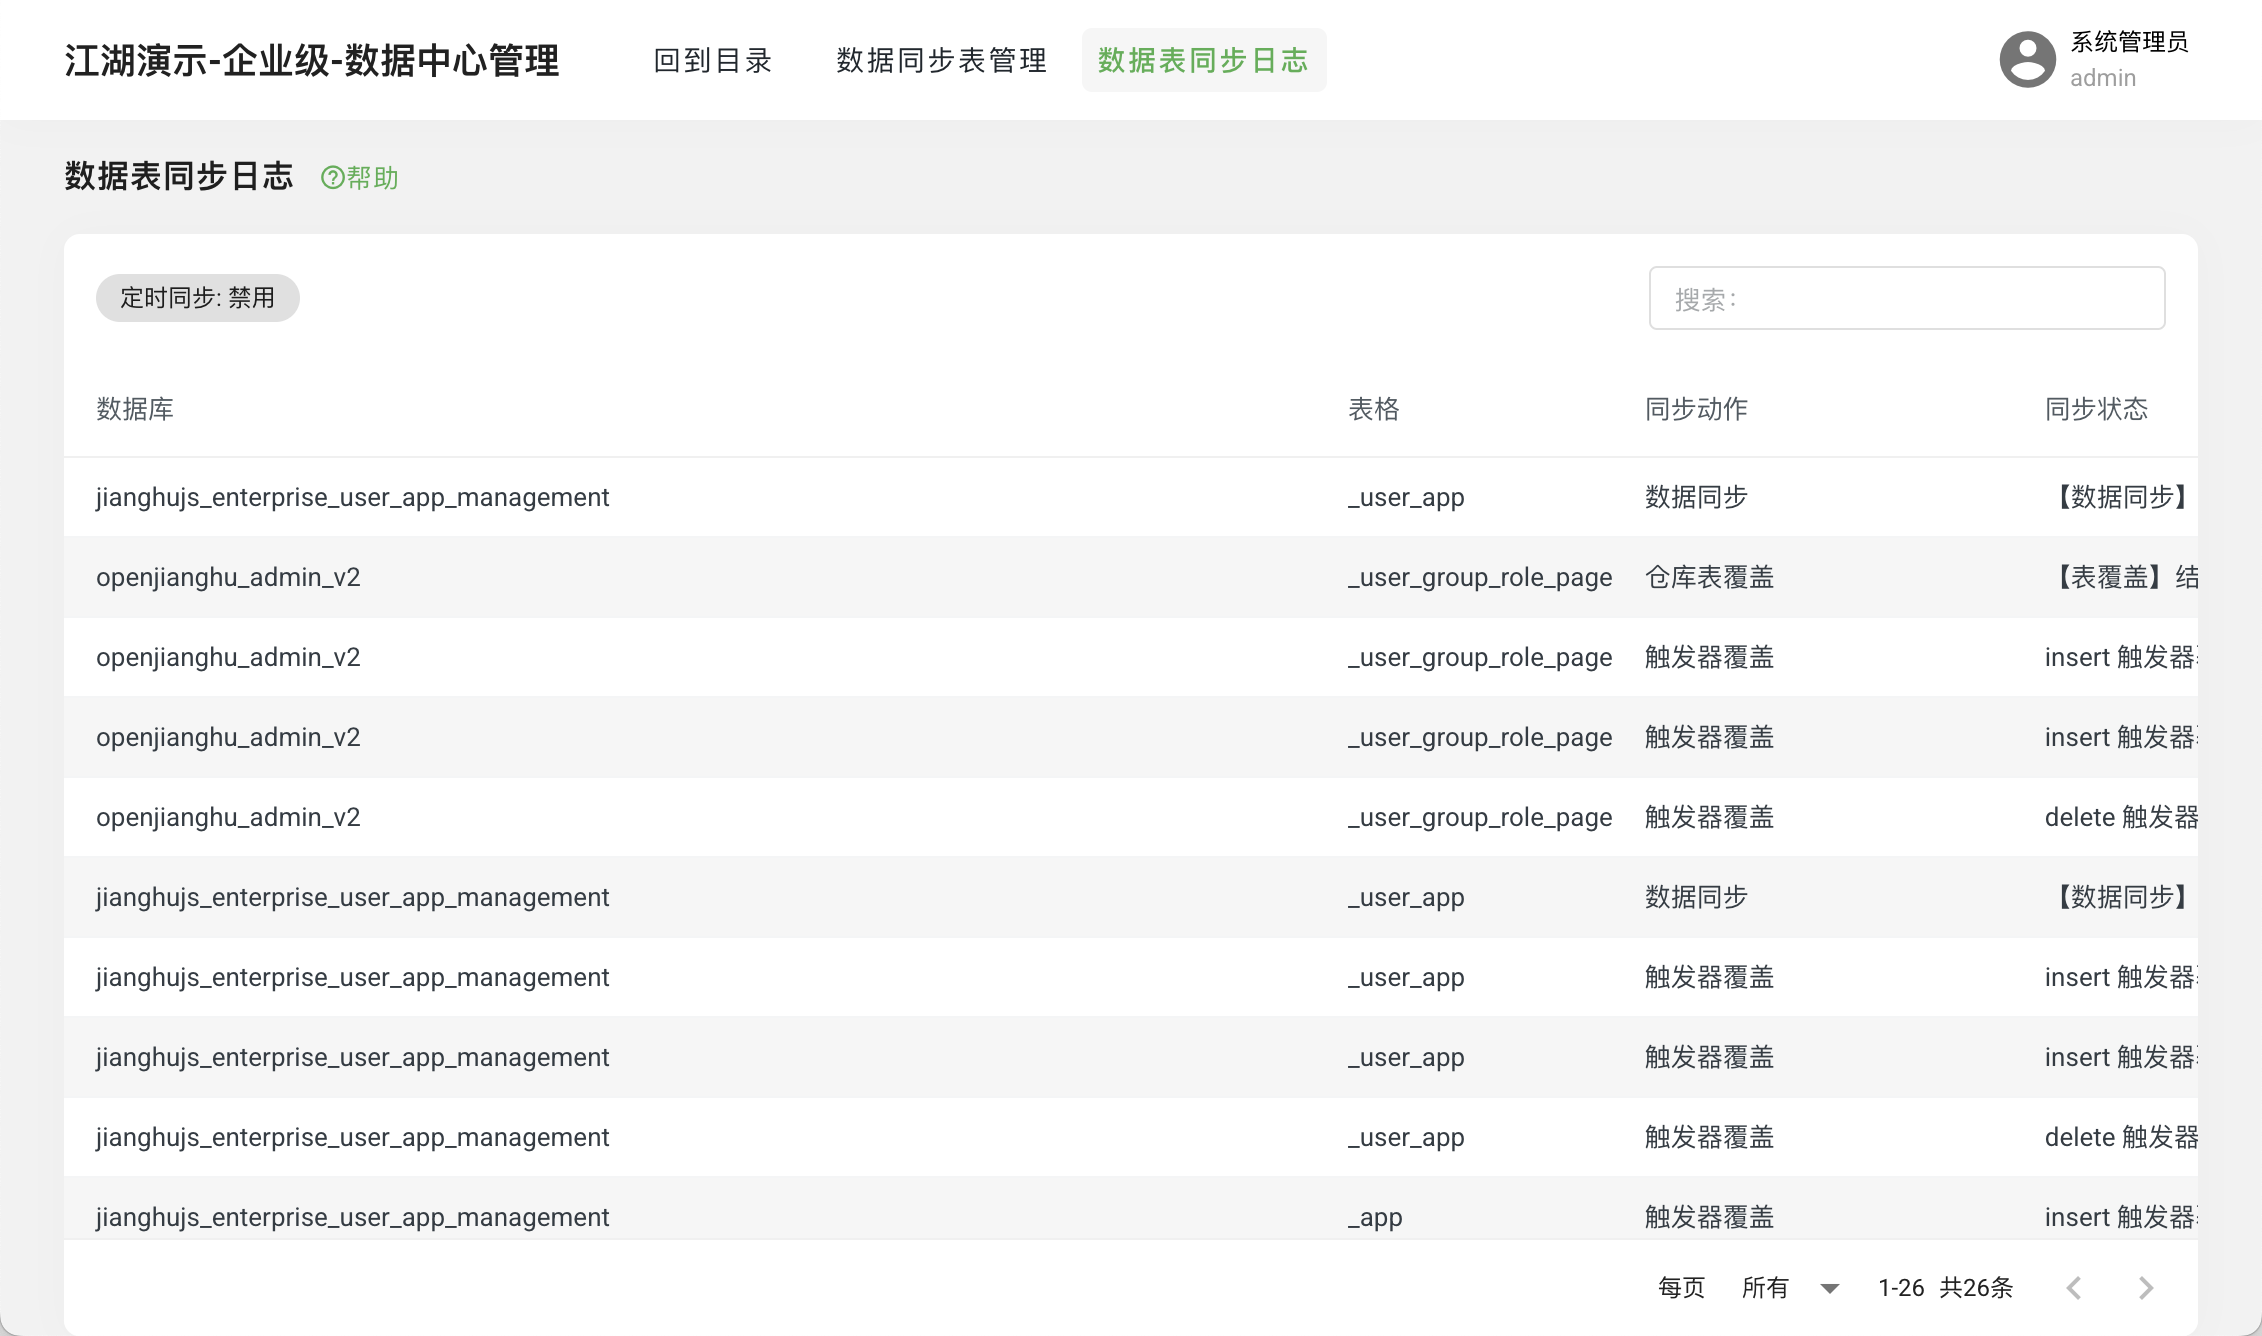
dataSyncStatus: 'Enabled' // Whether to enable synchronization, enable/disable- View Synchronization Logs
Check whether the data table synchronization was successful and the reasons for failure.
- user_app_management (User APP Permission Management)
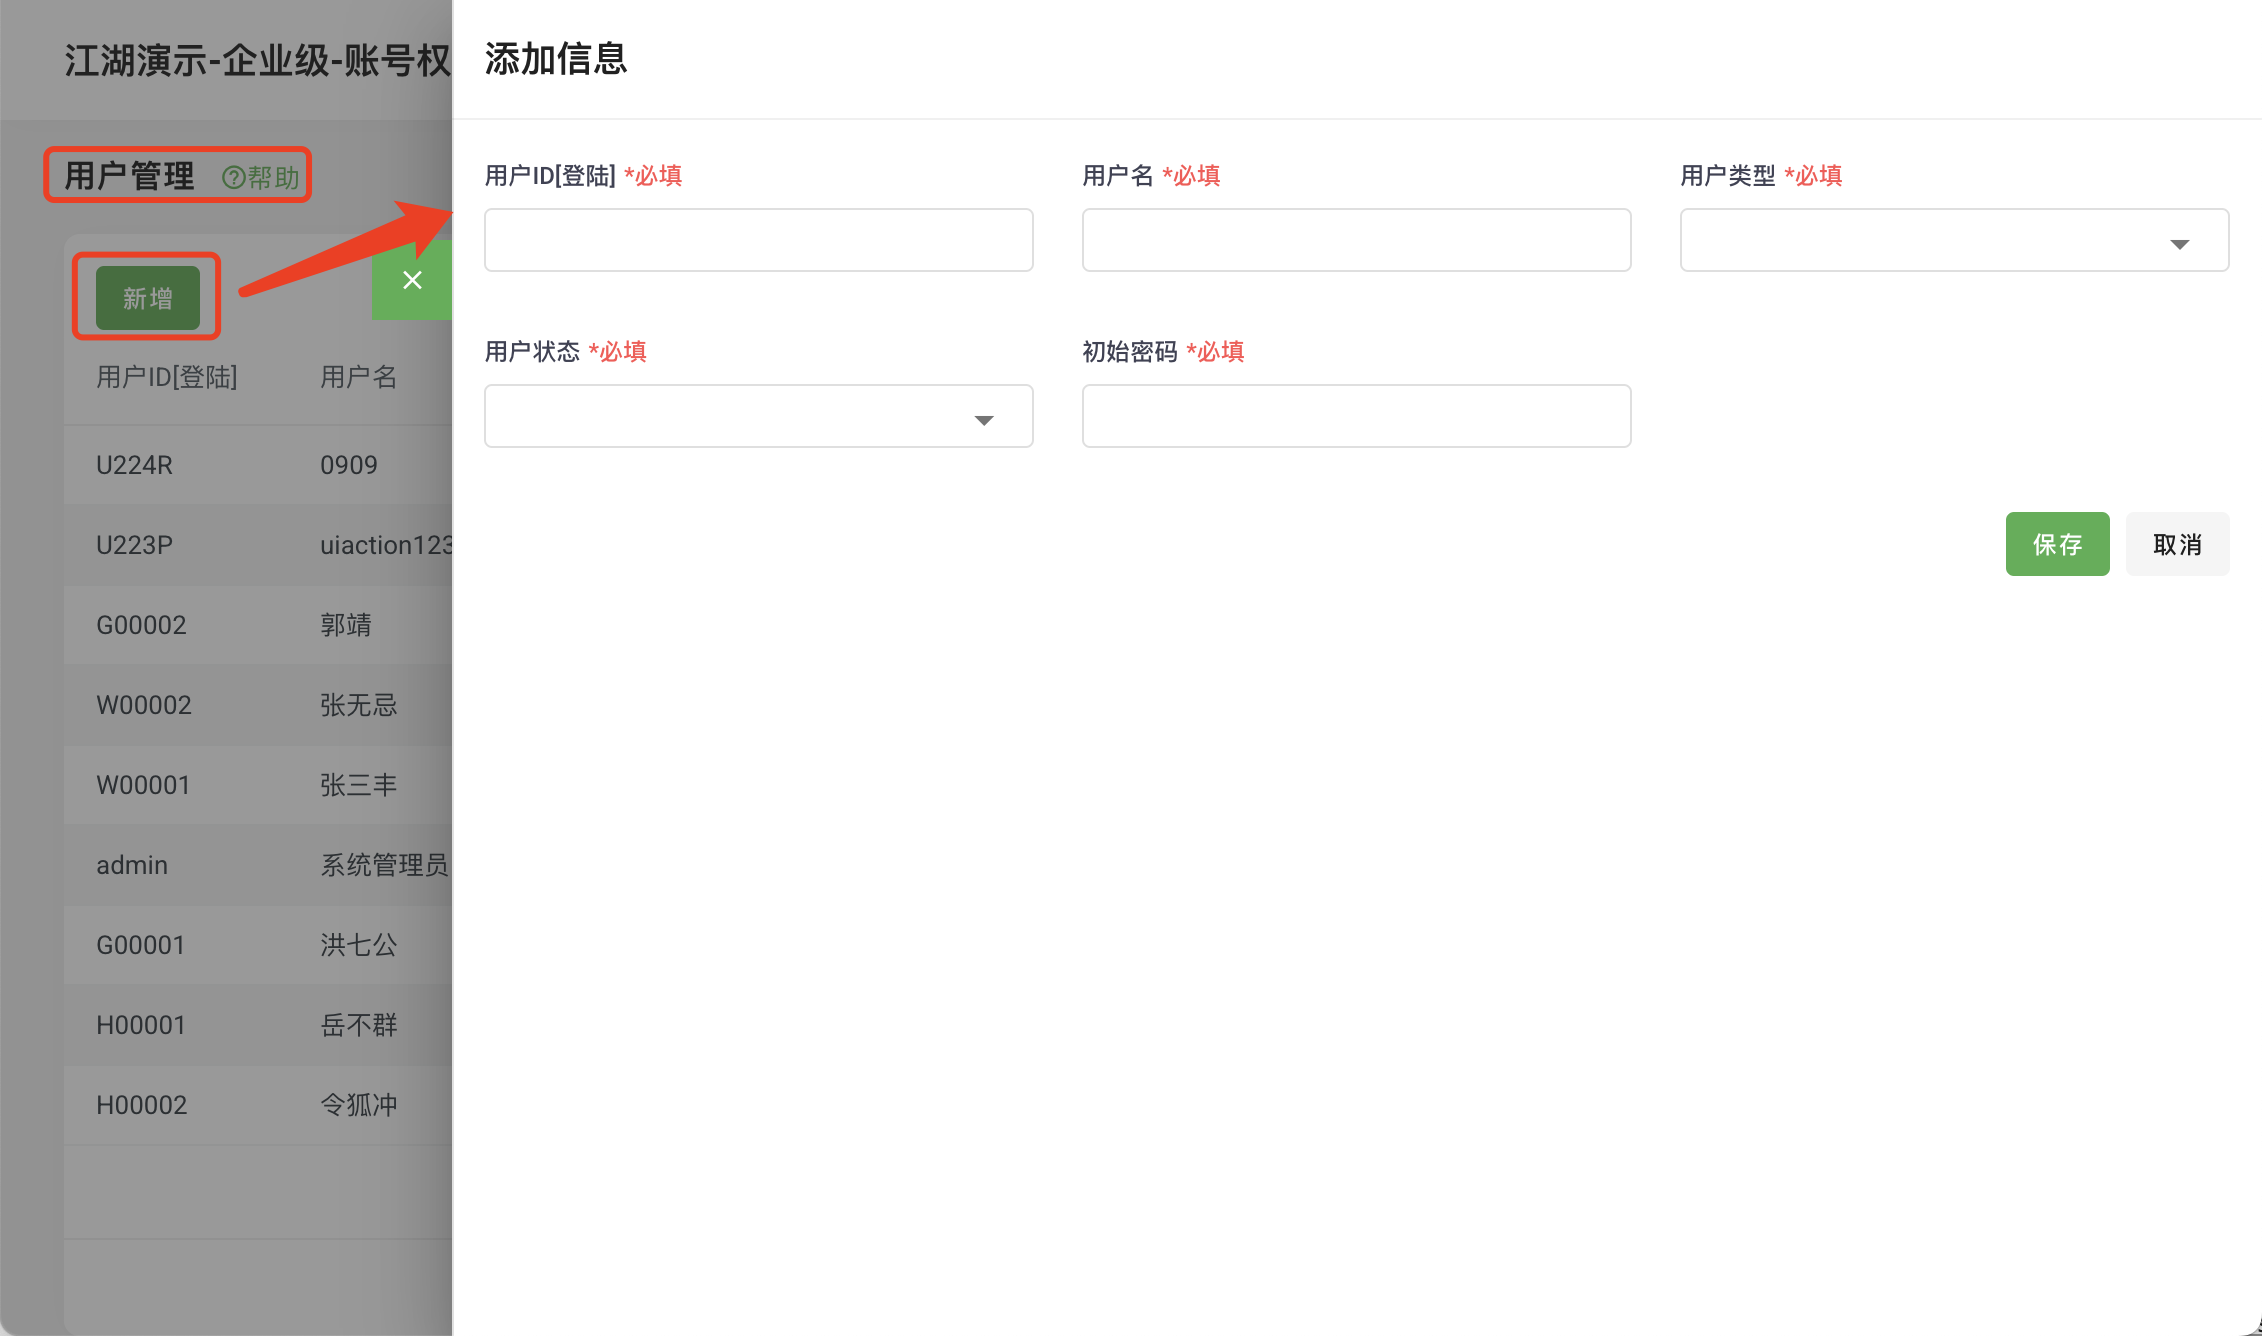
- Add User
Used to add a unified user for multi-application projects:
- Enter the
User Managementpage - Click
Add
- Enter the
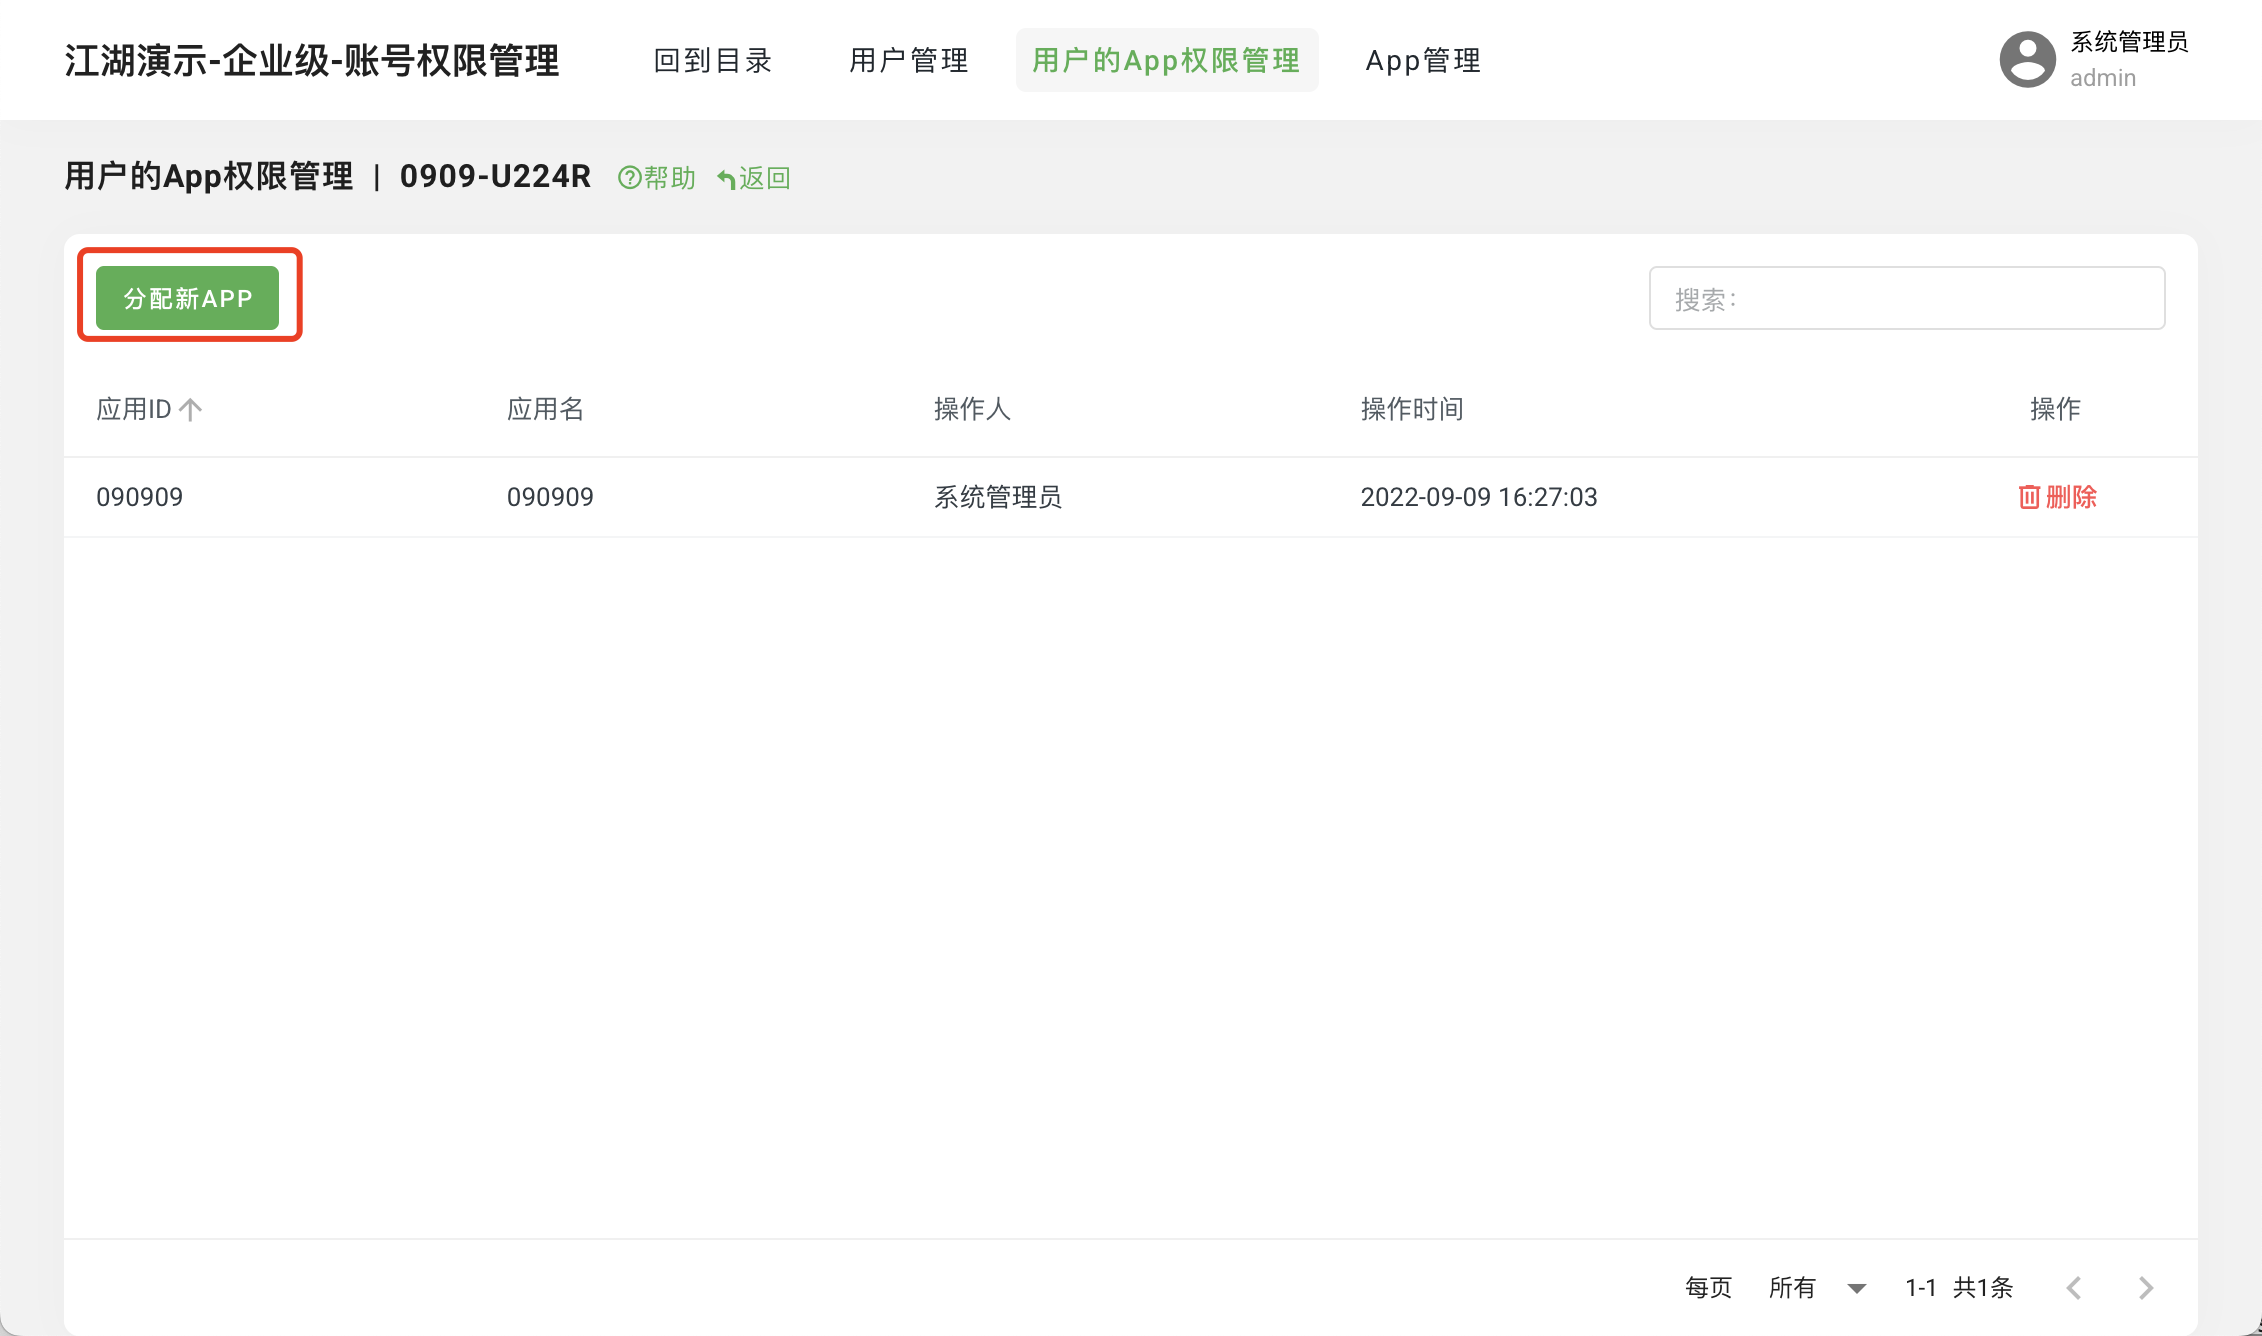
- User APP Management
Add APP permissions for multiple users:
- Enter the
User Managementpage - Click
APP Management - Click
Assign New APP
- Enter the
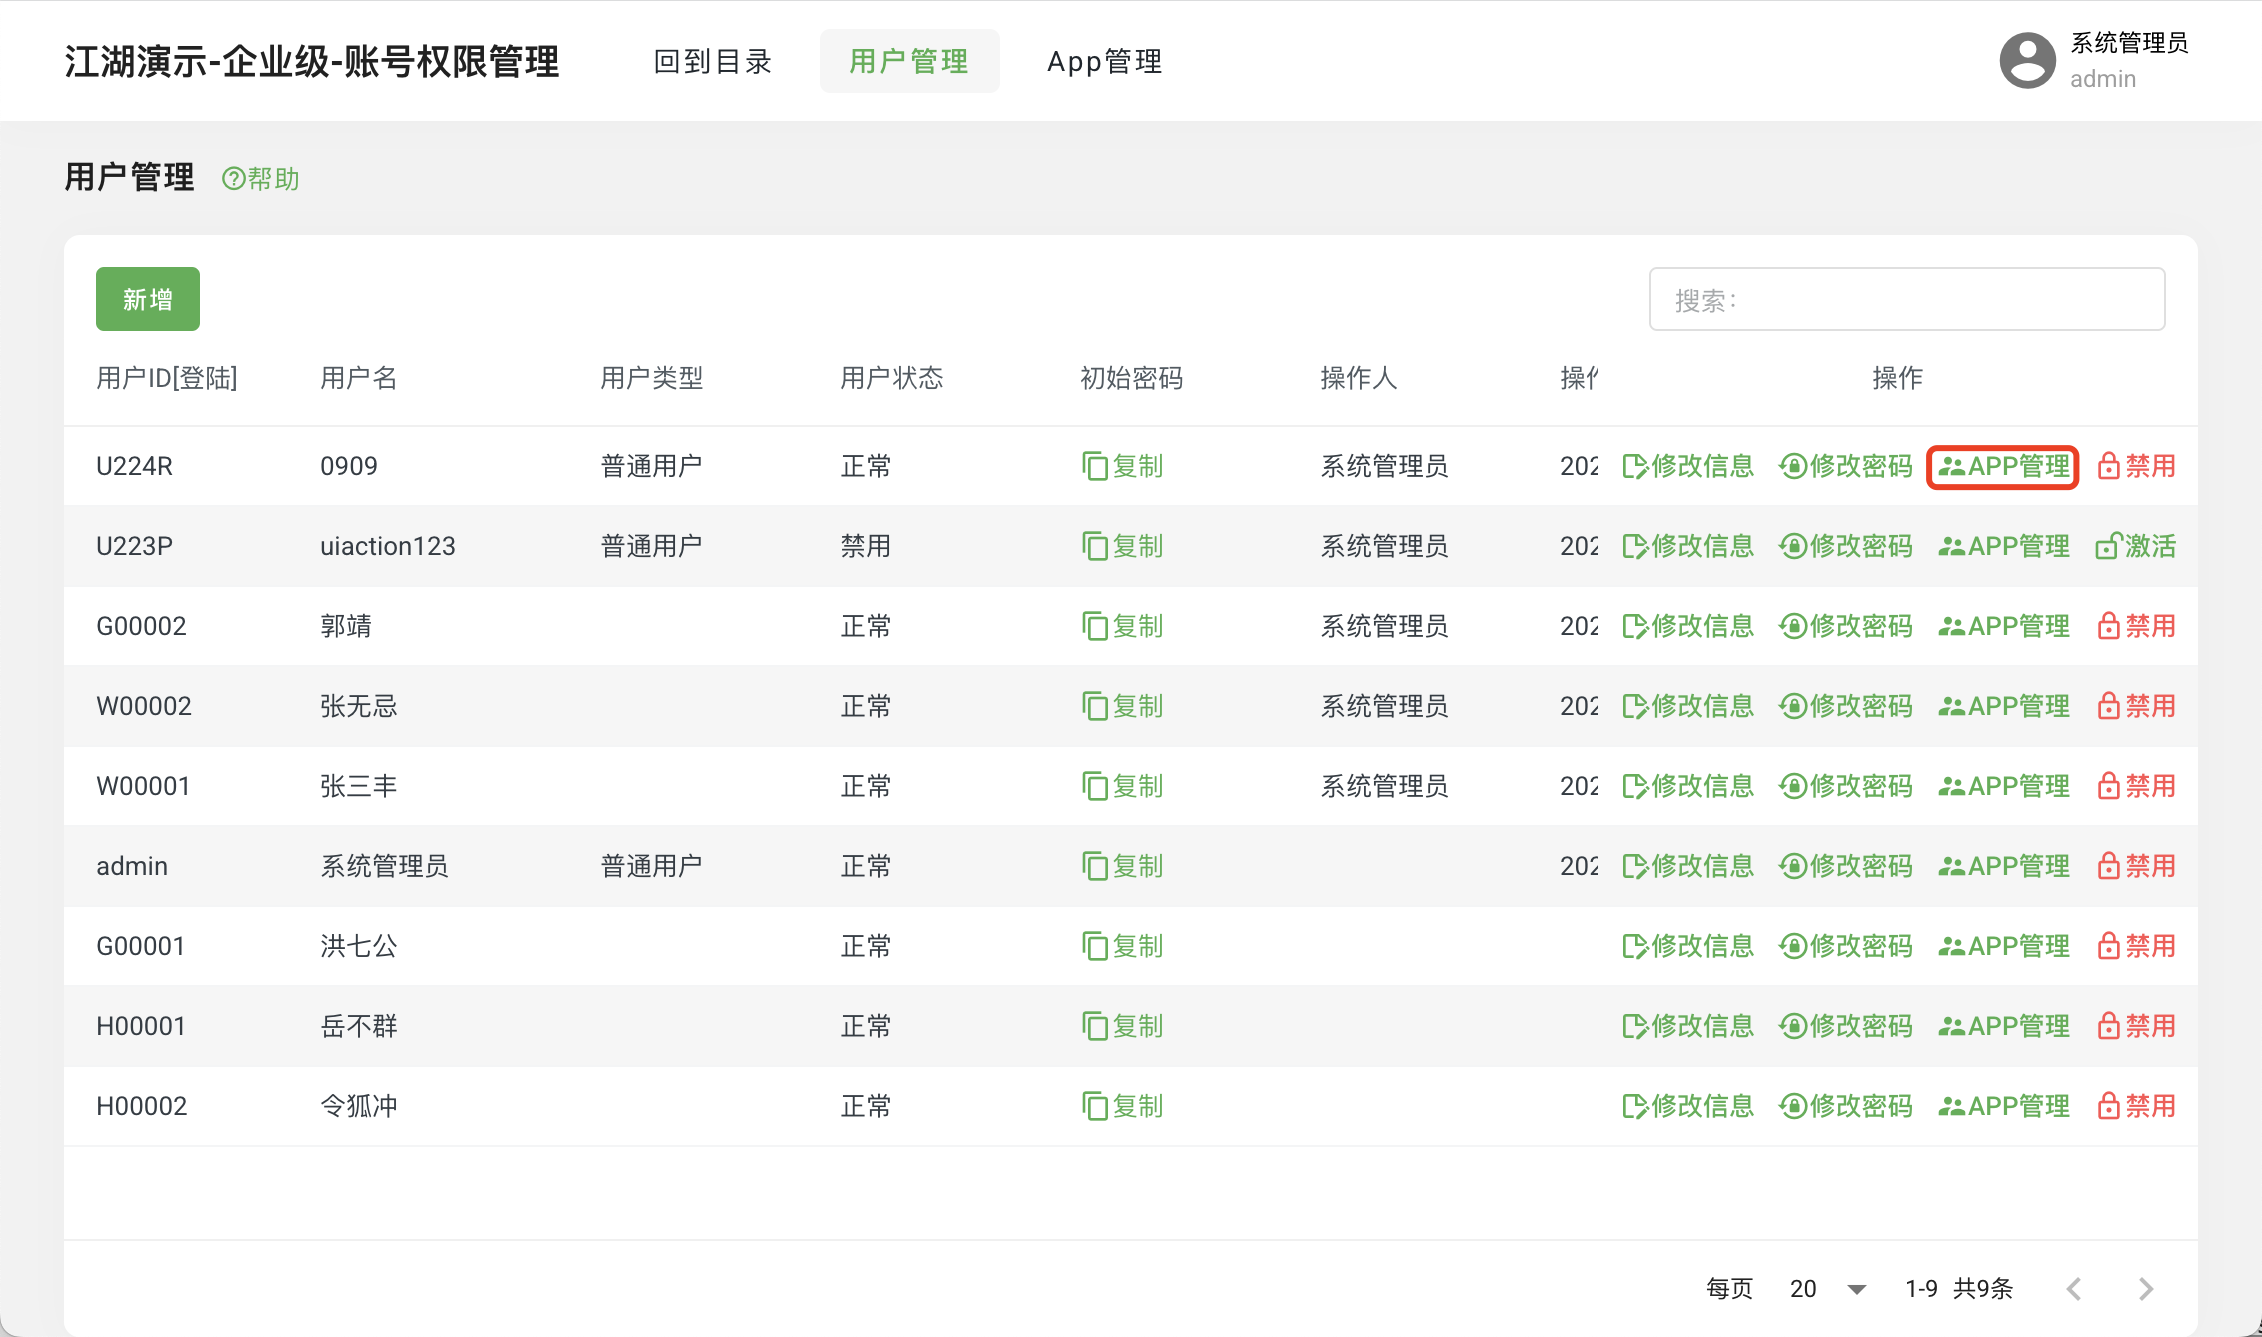
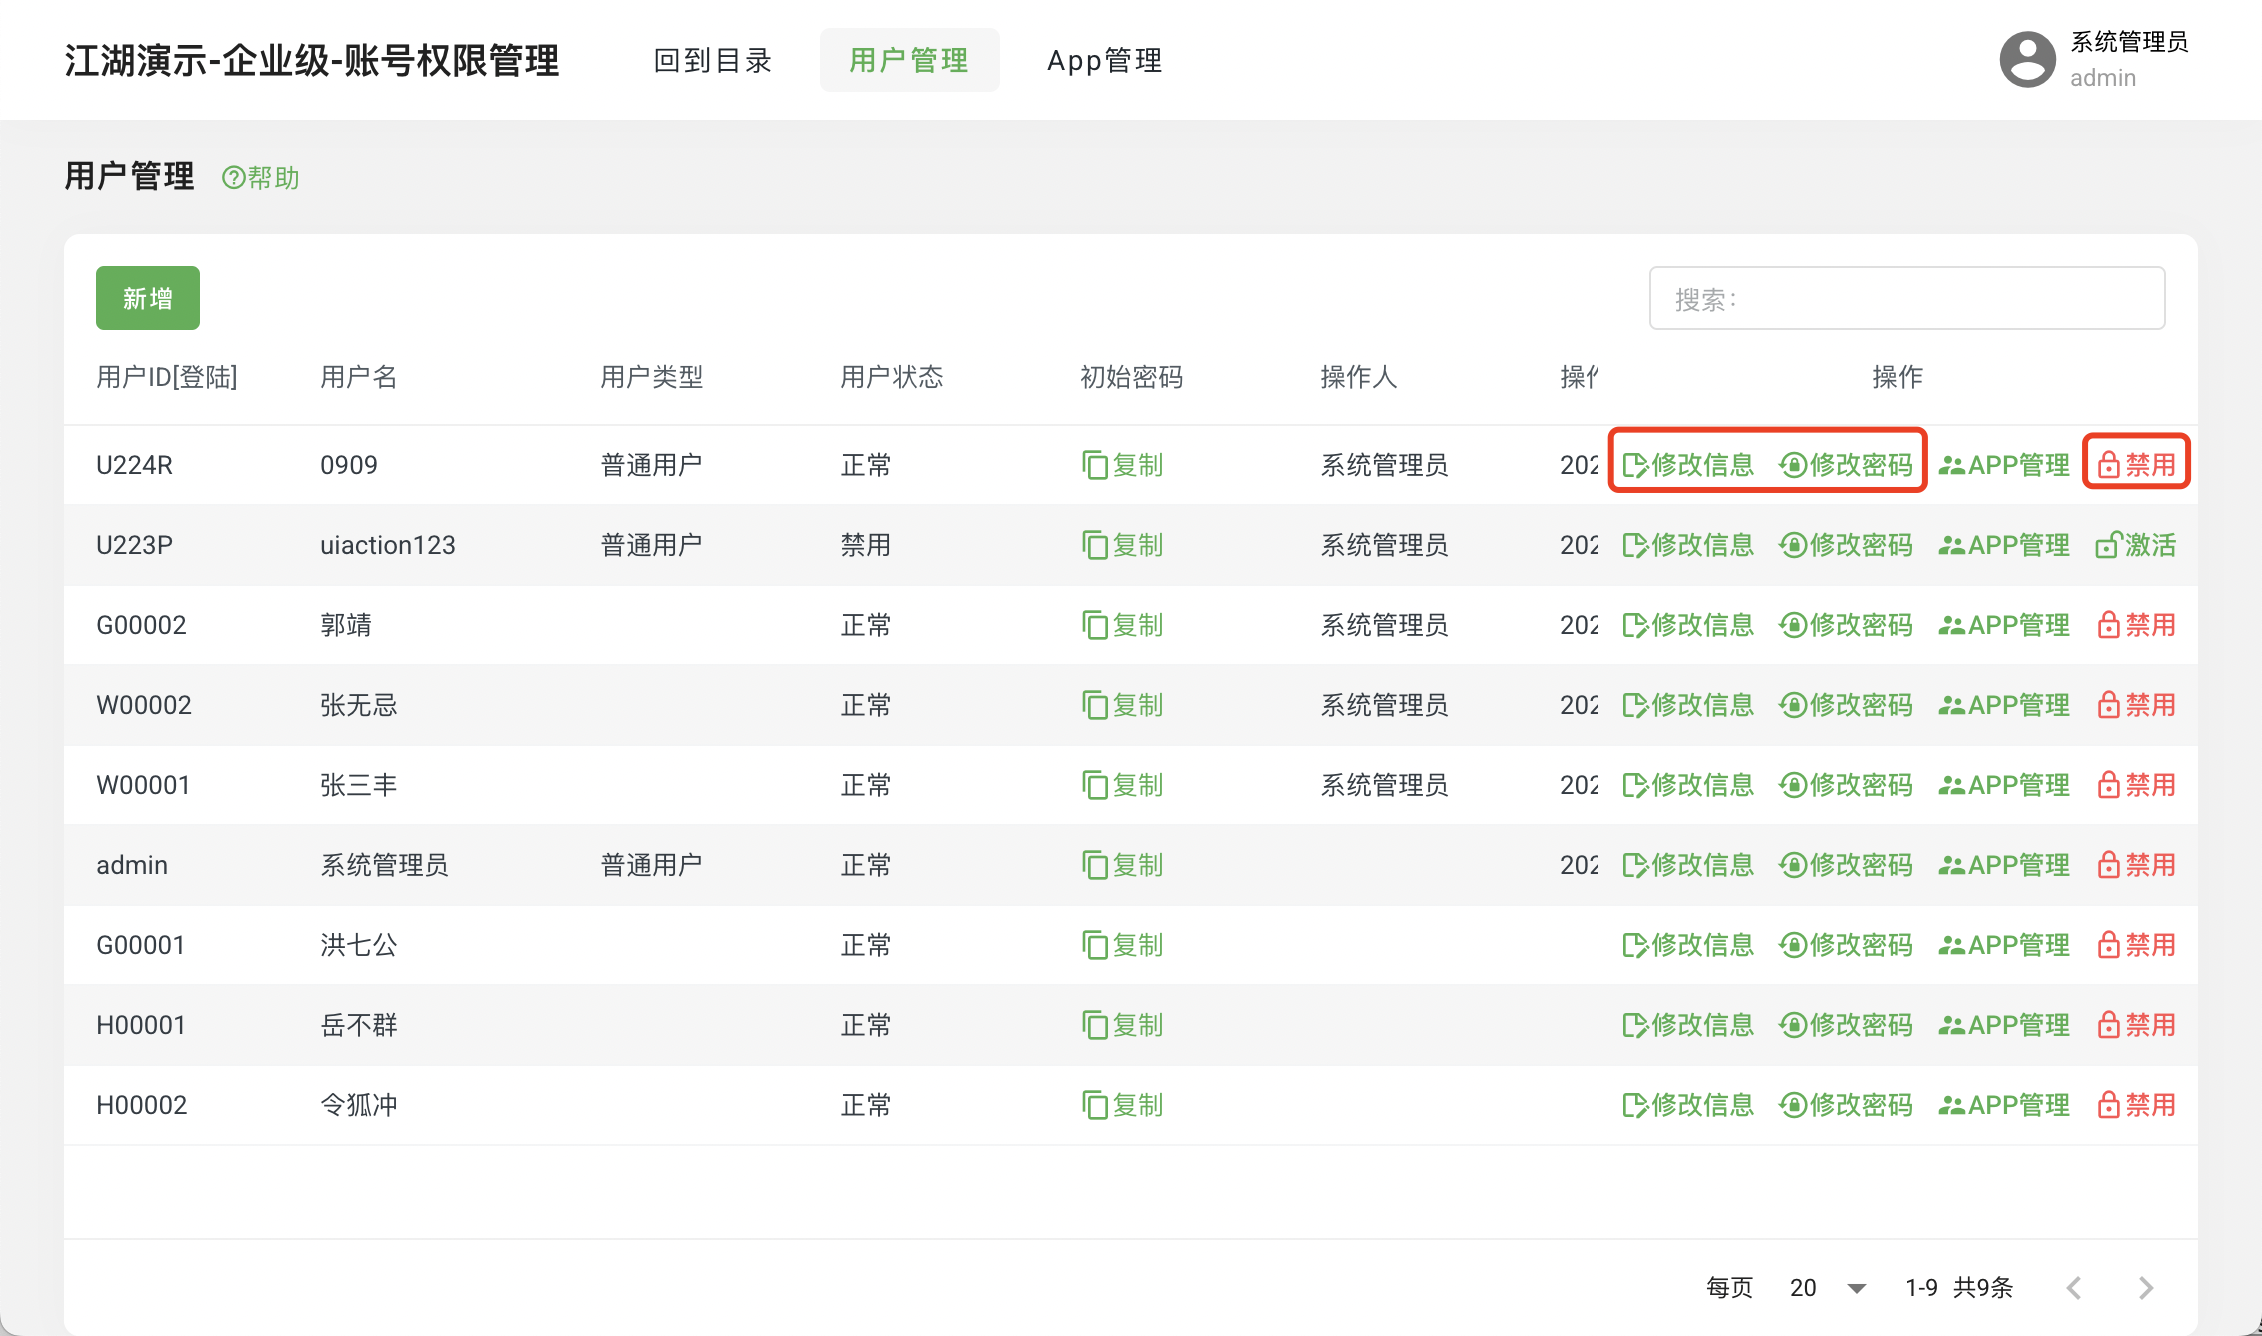
User Operations
- Enter the
User Managementpage - Click
Operations
- Enter the
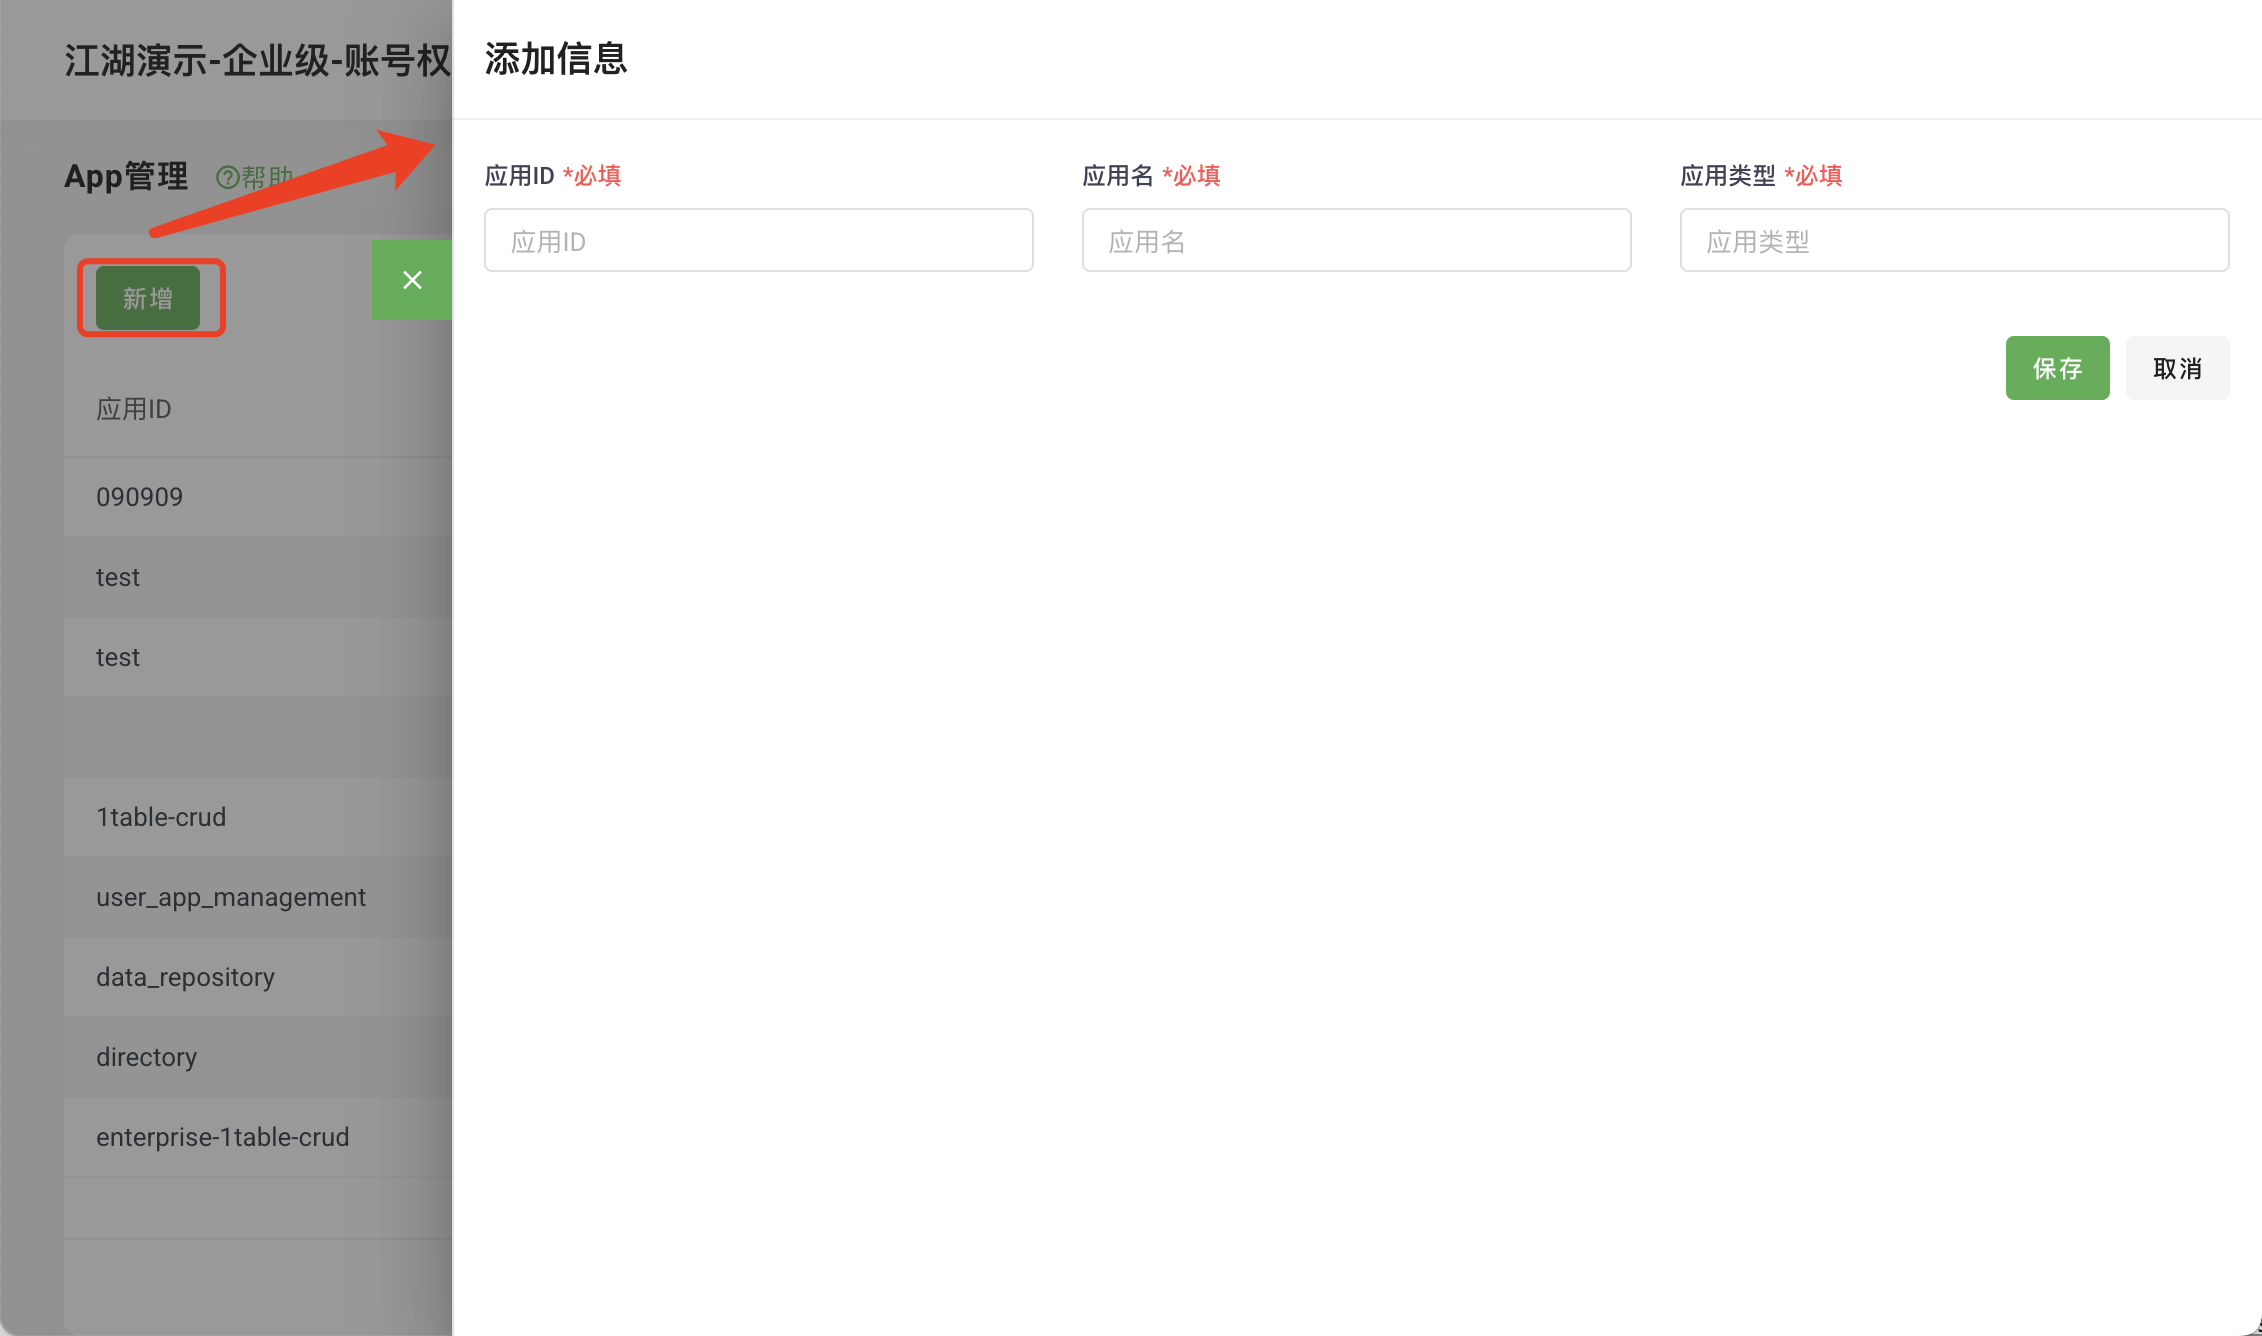
Add APP
Used to add APP for multi-application projects:
Enter the
APP ManagementpageClick
Add
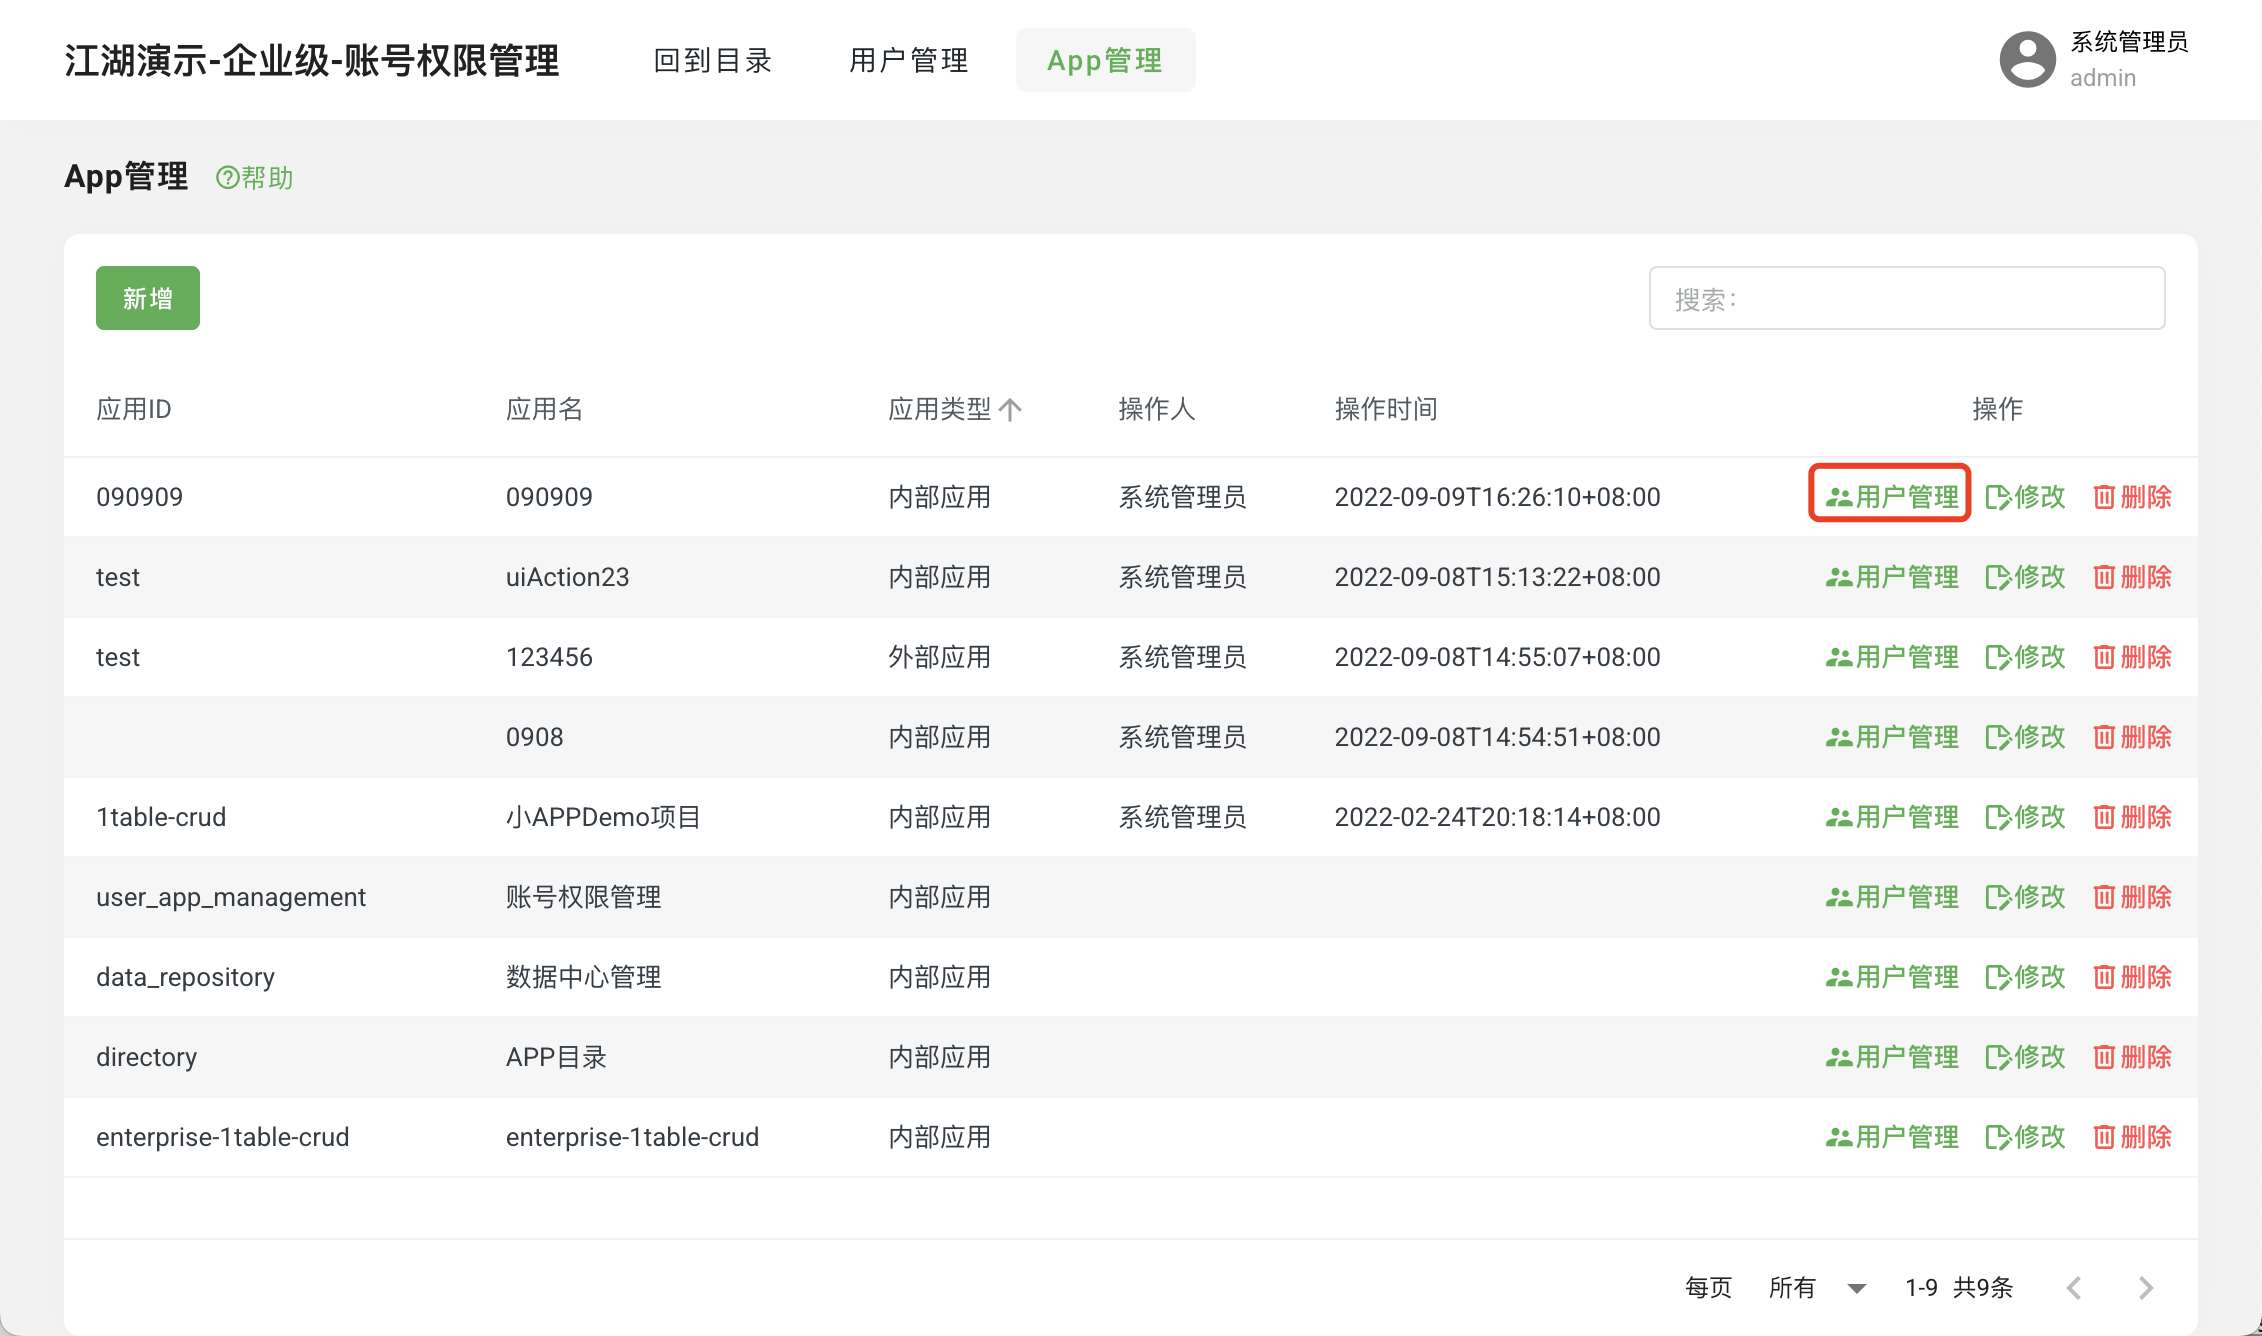
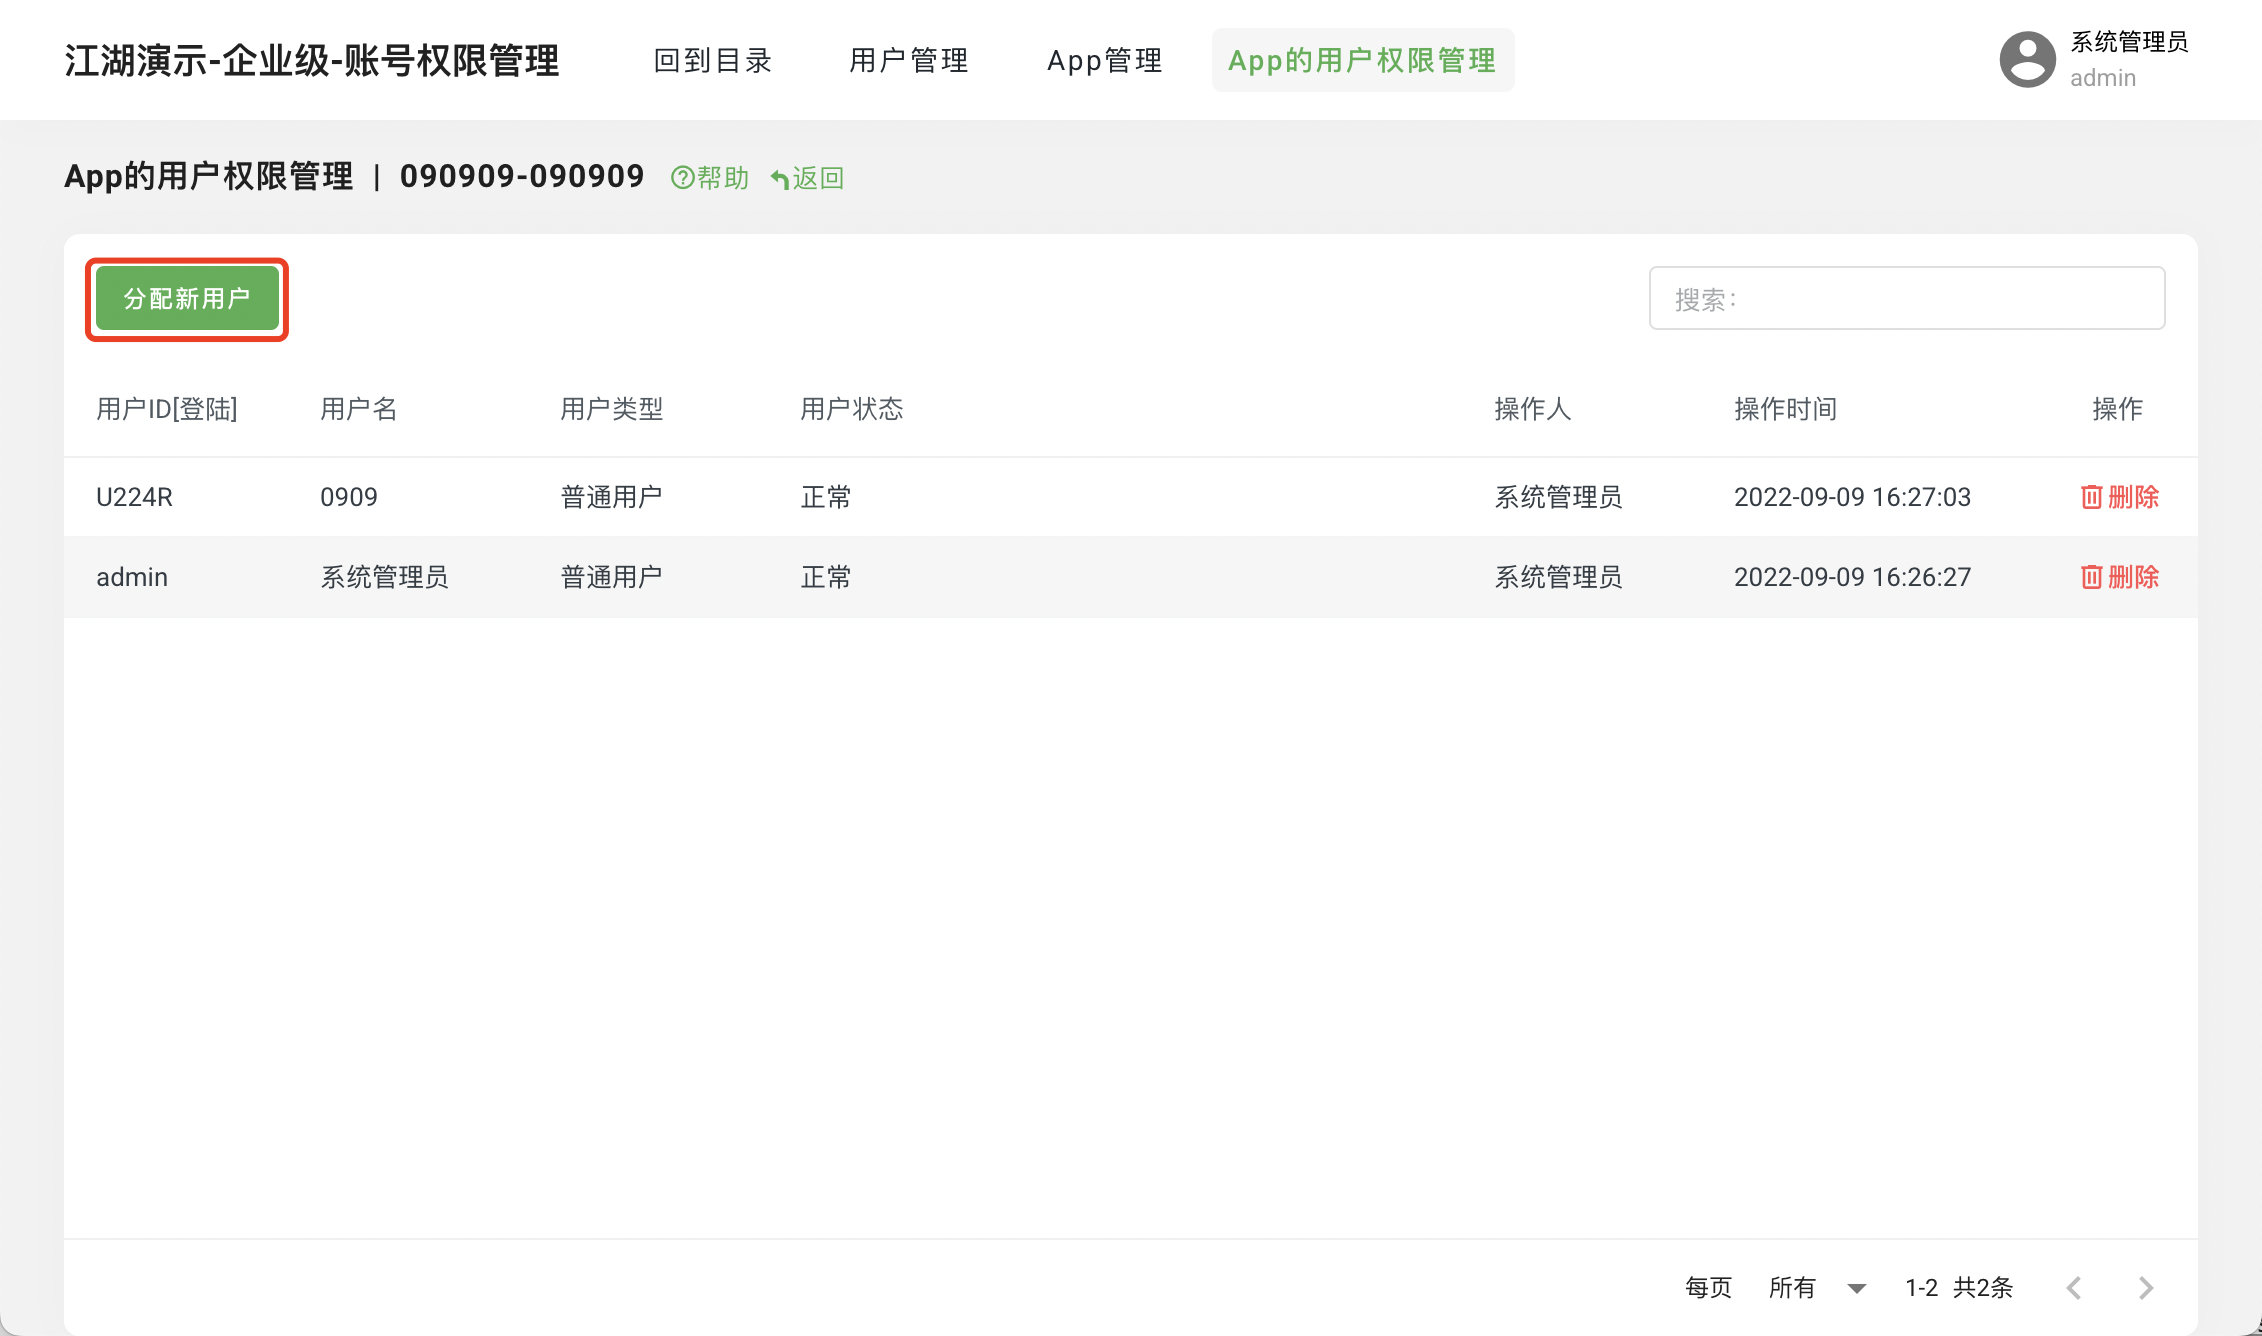
APP User Management
Assign users to multiple APPs:
Enter the
APP ManagementpageClick
User ManagementClick
Assign New User
APP Operations
- Enter the
APP Managementpage - Click
Operations
- Enter the

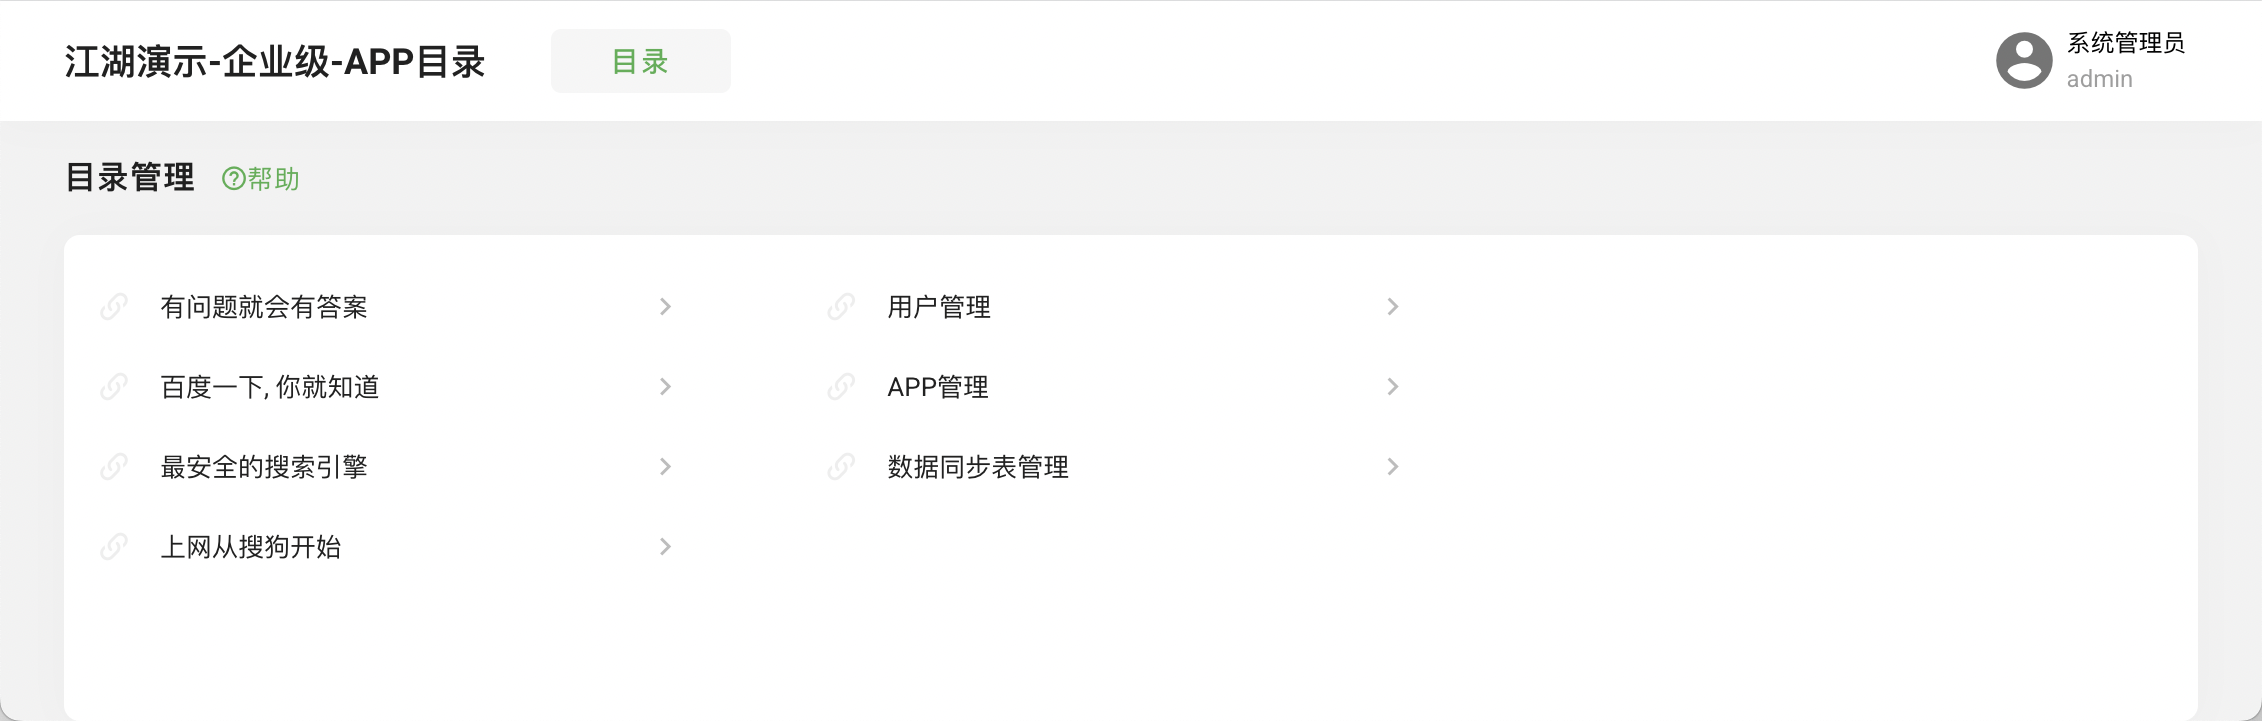
- directory (Directory Management)
- Quick Access
Provide quick access to applications:
- Enter the
Directorypage - Click the shortcut to access
- Enter the
- Create Application
- Create Project
- Enter the multi-application project directory:
$ cd my-jh-project-multi- Initialize Application
$ jianghu-init project --type=1table-crud-enterprise new-1table-crud

    ✔ Switching directory to new-1table-crud
         [mysql importer] 94.45% Completed
         [mysql importer] 100% Completed
    ✔ Initialization of `basic database tables and data` completed.
    ✔ usage:
          - cd /xxx/my-jh-project-multi/new-1table-crud
          - npm install
          - npm start / npm run dev
✔ jianghu init project is success- Add APP Login Permissions
By default, no users can log in to the newly created application; login permissions need to be configured in the user management center.
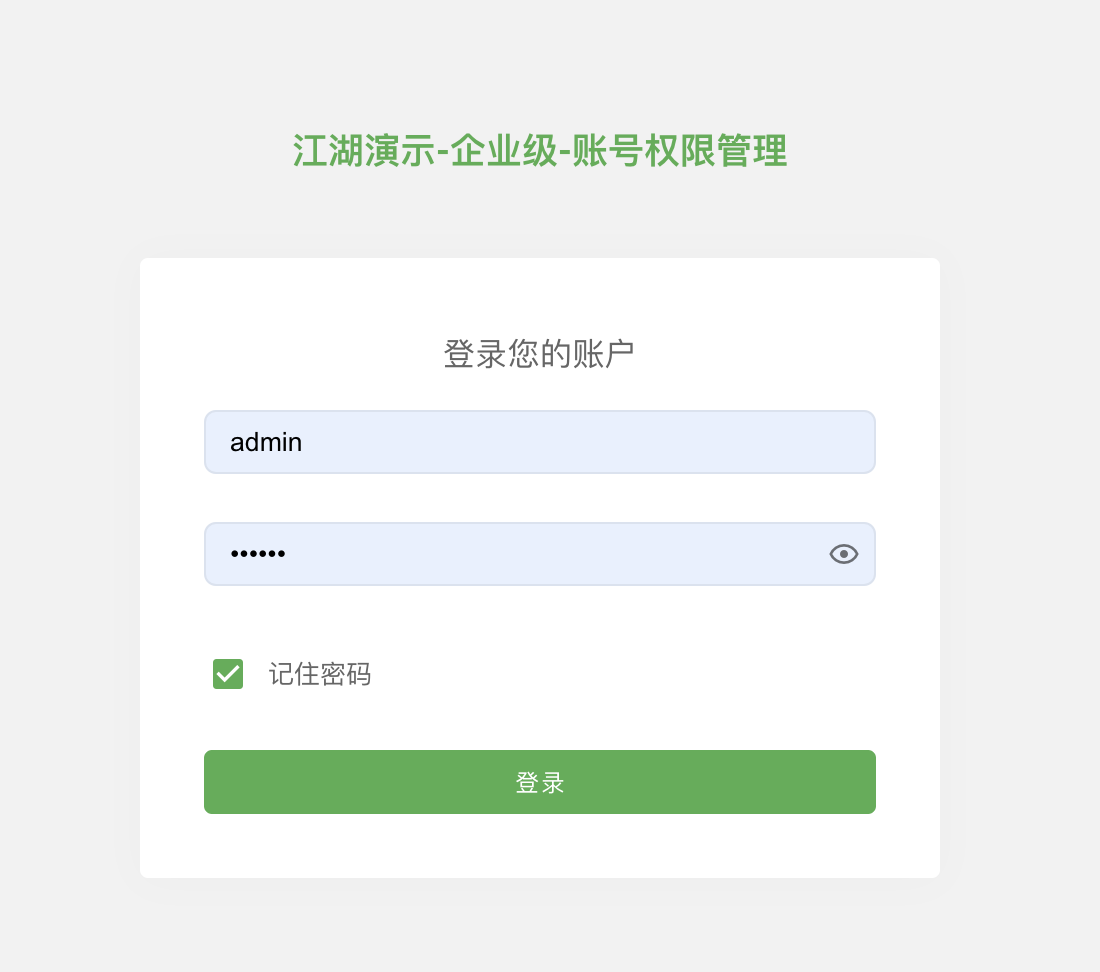
- Log in to User Management Project
- Log in to the
User Managementproject:
Open the browser and visit http://127.0.0.1:7006, username admin password 123456.Click Login.
- Add APP
- Enter the
APP Managementpage - Click
Add APP, enter APP information- Application ID: Obtain from
${app_path}/config/config.default.jsin appId - Application Name: APP name
- Application Type: Use "internal"
- Application ID: Obtain from
- Click
Save - Enter the
APP Managementpage - Click
User Management - Click
Assign New User - Select the user to be authorized
- Click
Save Selected.
- Start Project
- Enter the project directory:
$ cd my-jh-project-multi/new-1table-crud- Install project dependencies:
$ npm install- Start the project:
$ npm run dev- Login:
Open the browser and visit http://127.0.0.1:7008
Log in with the authorized user!