jianghu-init Exploration
120021. Introduction to jianghu-init
- What is jianghu-init and what problems does it solve?
jianghu-init is a command-line tool provided by the JianghuJS framework that allows developers to quickly generate a project framework that conforms to JianghuJS standards. It addresses the following main issues:
Quick project initialization:
With a simple command, developers can quickly initialize a JianghuJS project without manually creating project structures and configuration files.Standardized project structure:
jianghu-init provides a standardized project structure, ensuring consistency across projects, which is beneficial for team collaboration and project maintenance.Default configuration options:
It offers several default configuration options, reducing configuration complexity while retaining flexibility, allowing developers to customize configurations as needed.Integrated front-end and back-end configuration:
The automatically generated project framework integrates Vuetify front-end page templates and back-end database configurations, enabling developers to quickly set up a complete application.Reduced learning curve:
New developers can quickly obtain a standard development environment through jianghu-init, lowering the learning curve and improving project maintainability.The directory structure of a JianghuJS project is as follows:
├── config                                                # egg config
│   ├── config.default.js                            # default config
│   ├── config.local.js                               # config used during npm run dev
│   ├── config.prod.js                               # config used during npm run start
│   ├── config.unittest.js                           # config used during npm run test
│   └── plugin.js                                      # egg plugin configuration
├── app
│   ├── common                                       # Common tools and static methods for the project
│   ├── constant                                       # Constants
│   │   ├── constant.js
│   │   └── error.js
│   ├── controller                                     # Exposed interfaces
│   ├── public                                          # Static resource directory
│   ├── schedule                                      # Scheduled tasks; refer to https://www.eggjs.org/en/basics/schedule
│   ├── service                                         # Application protocol service directory
│   └── view                                            # Directory for storing pages
├── app.js                                                # Custom initialization work at startup
├── jsconfig.json
├── package.json
├── sql                                                    # SQL files
│   └── init.sql
└── upload
Usage of jianghu-init
Basic Environment
Operating System: Windows/macOS/Linux
Runtime Environment: Node.js v16.x
Database Environment: Mysql5.7+Development Tools
Development Tool: Vscode
Database Development Tool: NavicatInstalling jianghu-init
# Uninstall/remove old version of jianghu-init
$ npm uninstall -g jianghu-init
$ npm uninstall -g @jianghujs/jianghu-init
# Install the latest version of jianghu-init
$ npm install -g @jianghujs/jianghu-init
# Check version
$ npm list @jianghujs/jianghu-init -g
Running jianghu-init
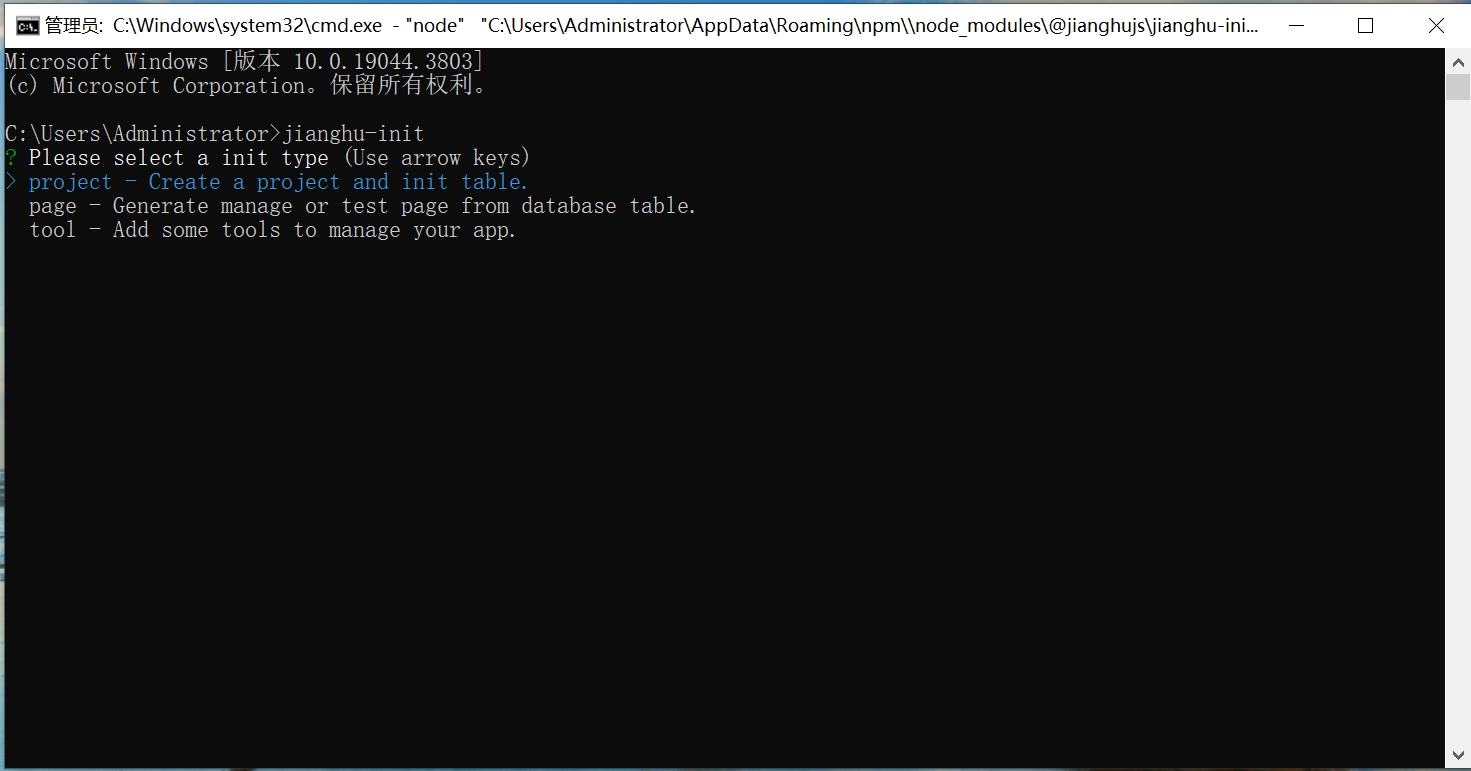
- Open cmd, enter the jianghu-init command, and select the type of project you want to create.
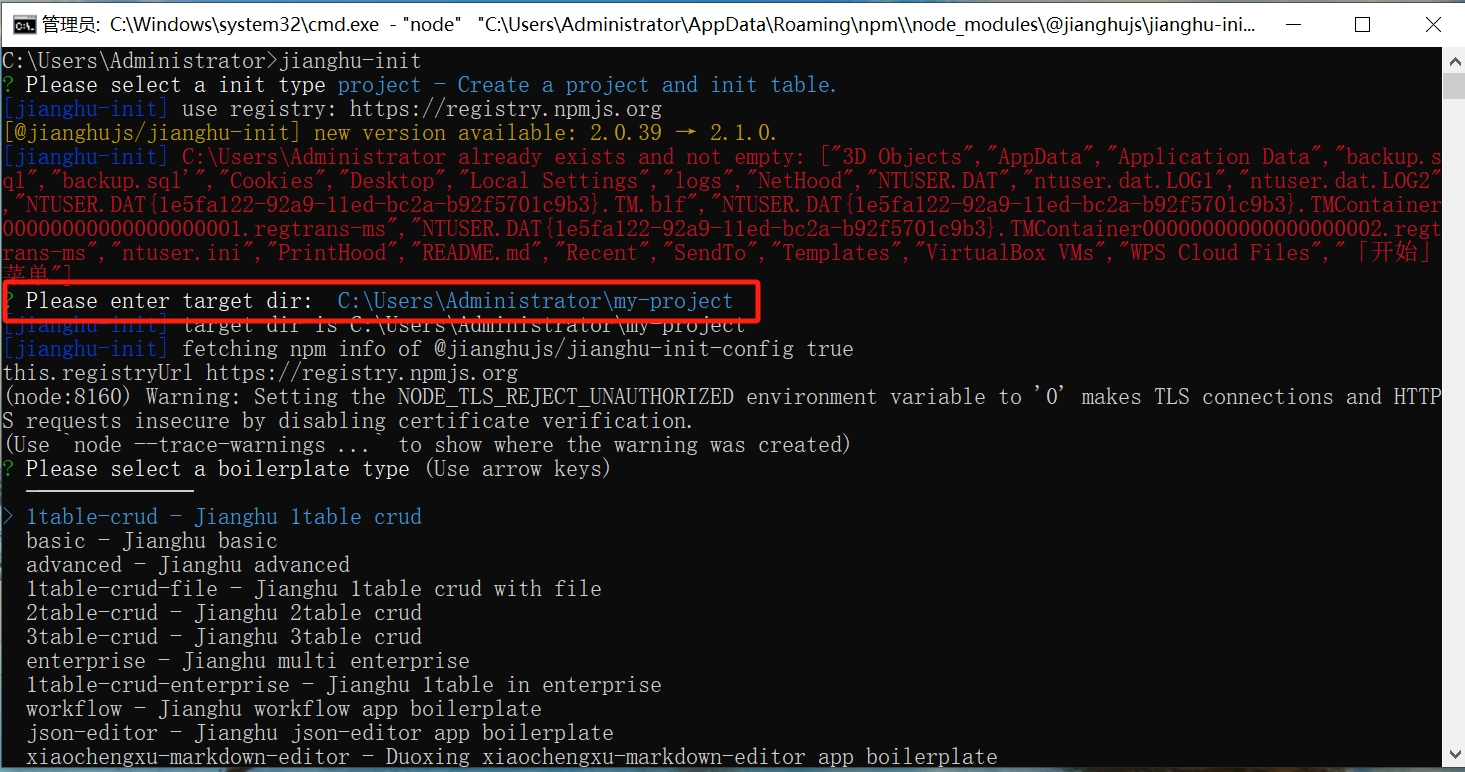
- After selection, enter the name of the project you want to create and specify the path.
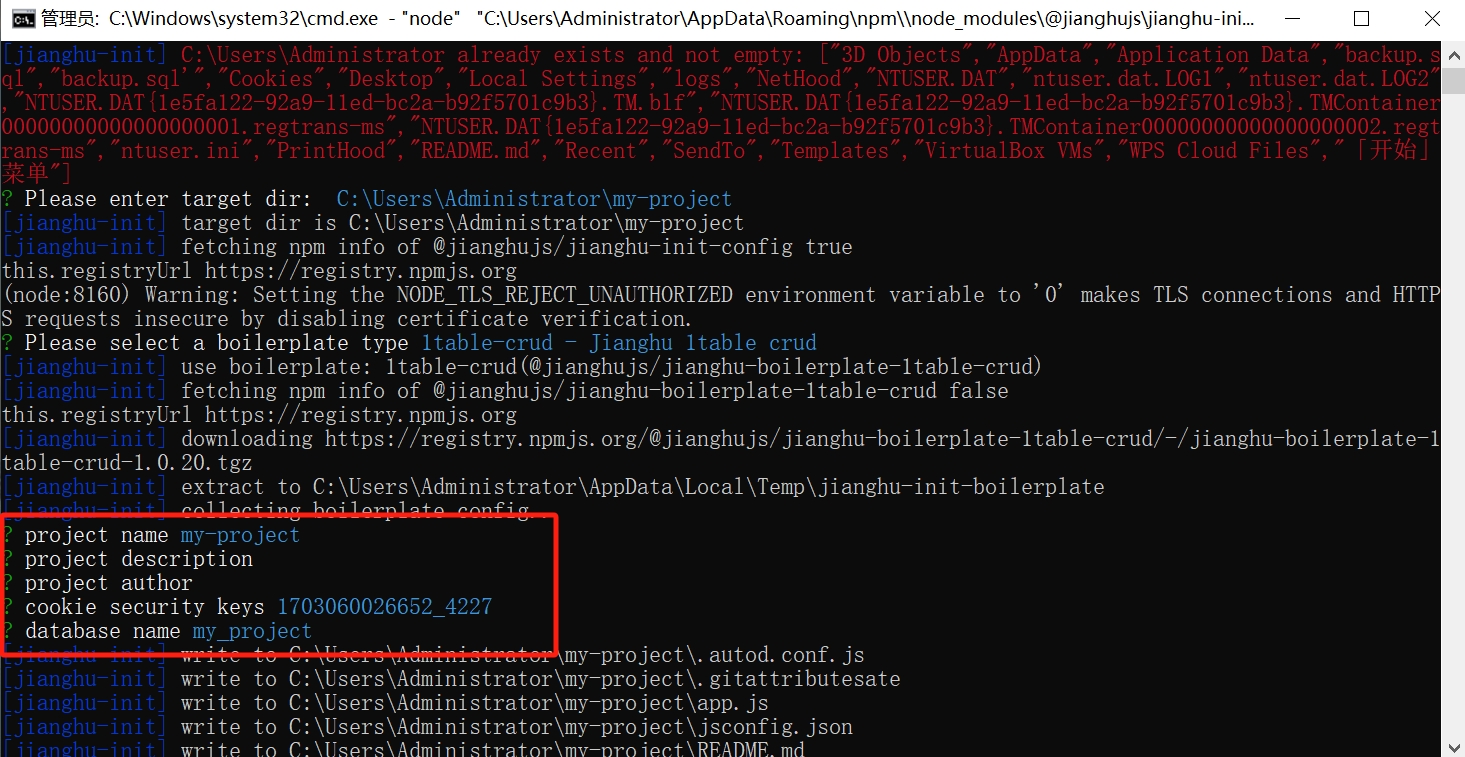
- Confirm the project name and data name.
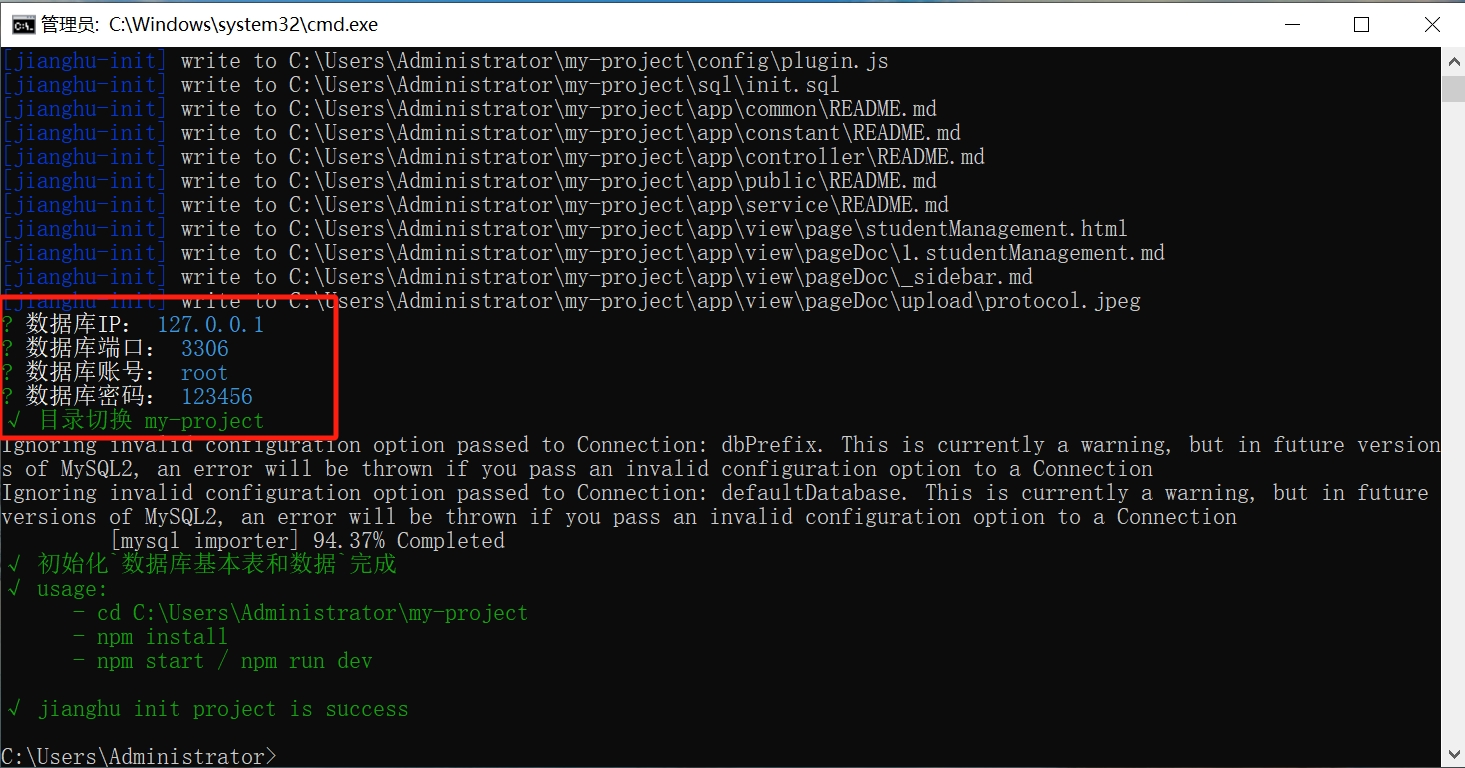
- Confirm the database information and successfully create the project.
- Locate your newly created project my-project, open it with vscode, run the terminal, and install dependencies.
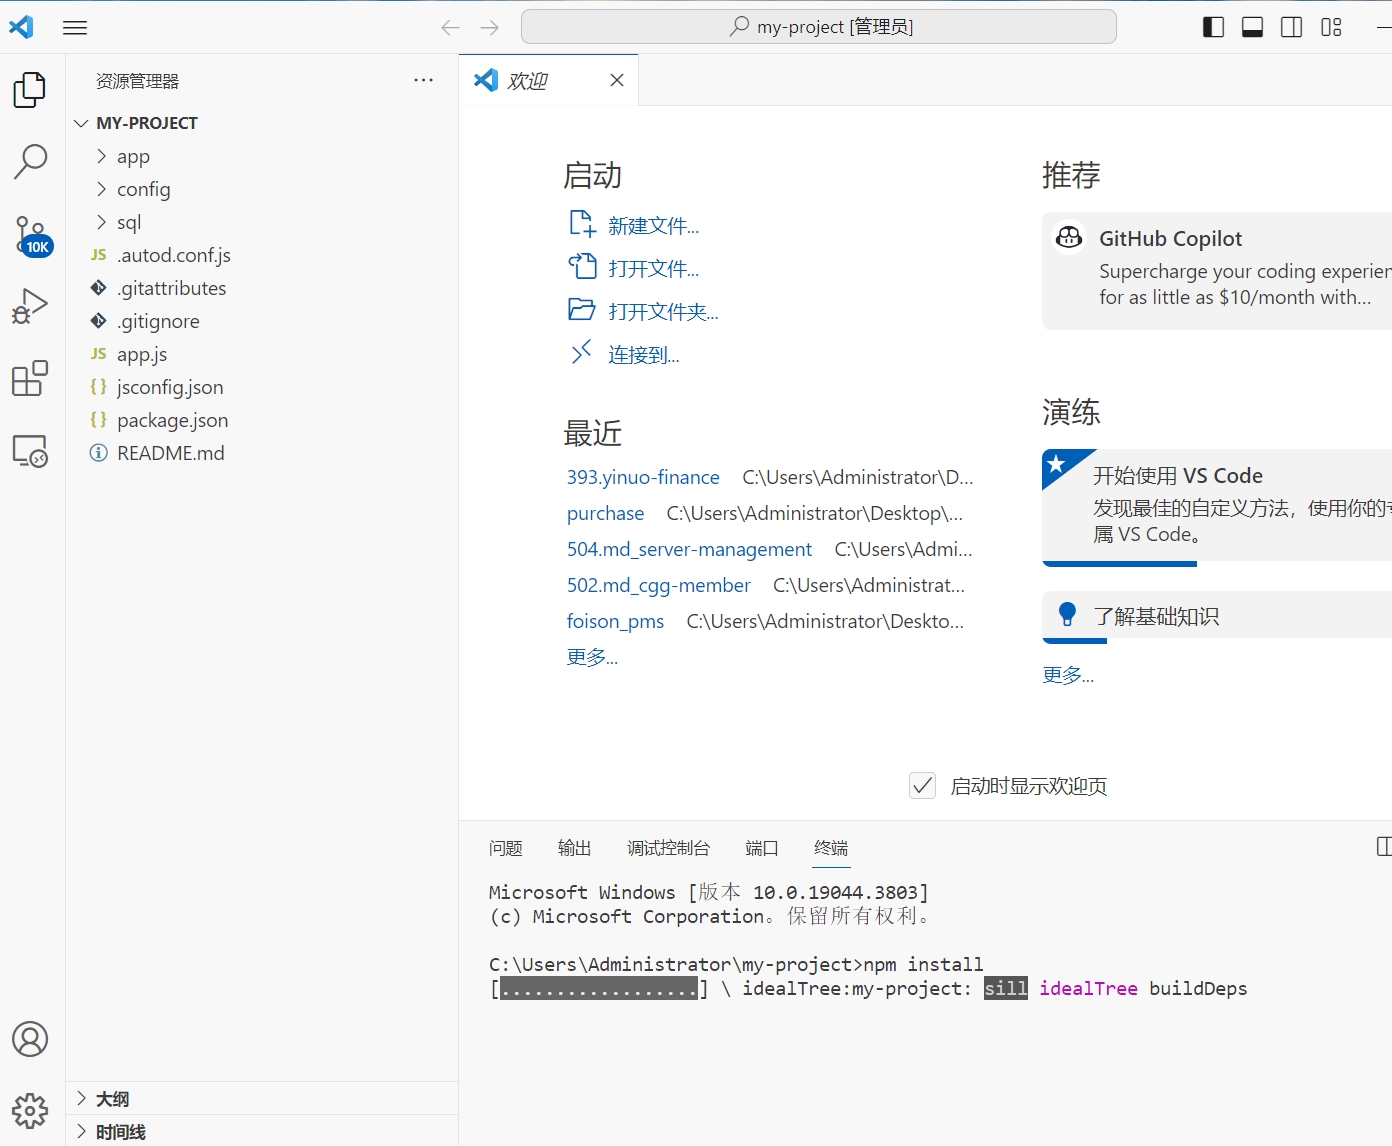
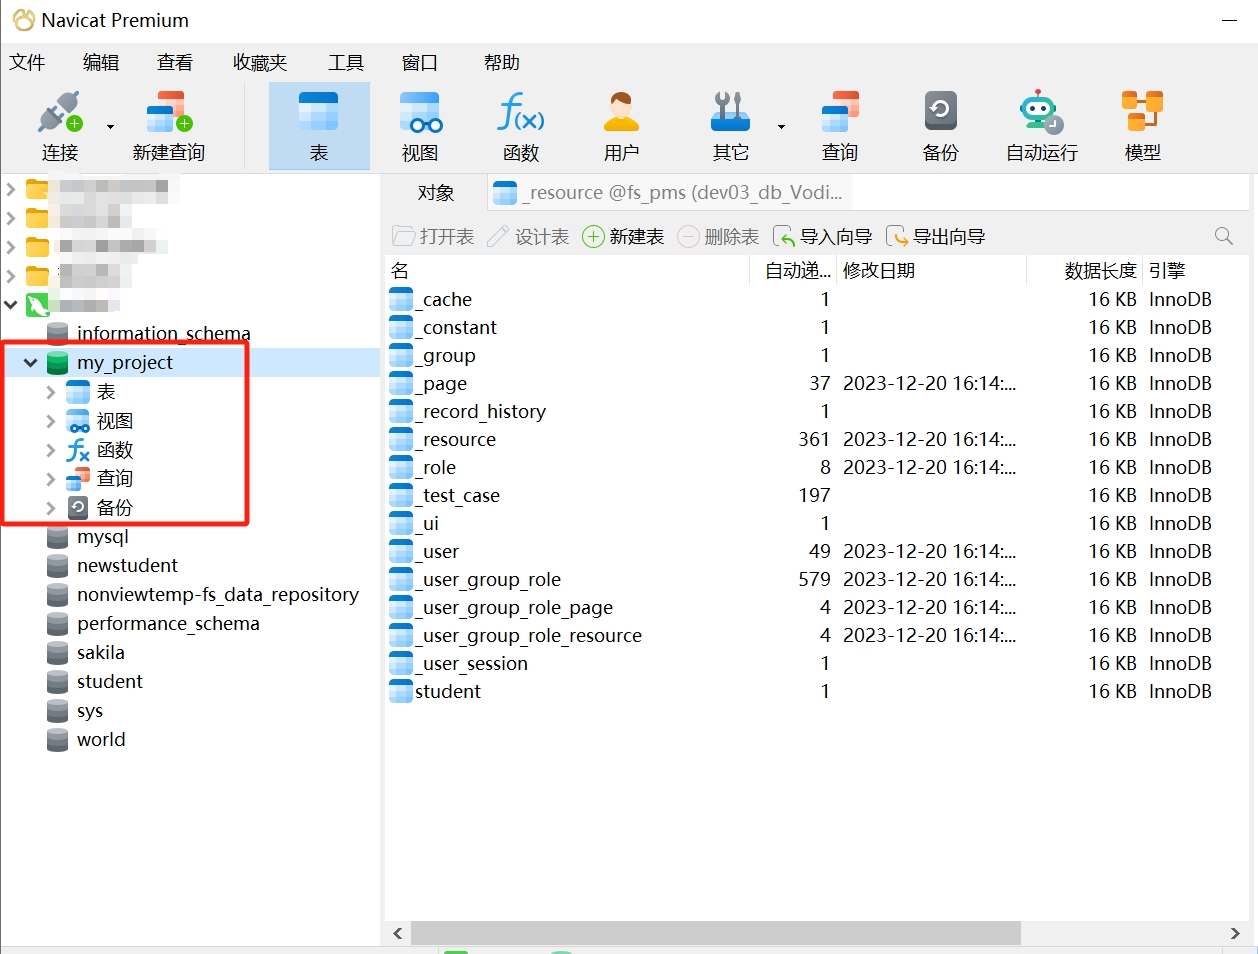
- Confirm in Navicat that the project's database already exists.
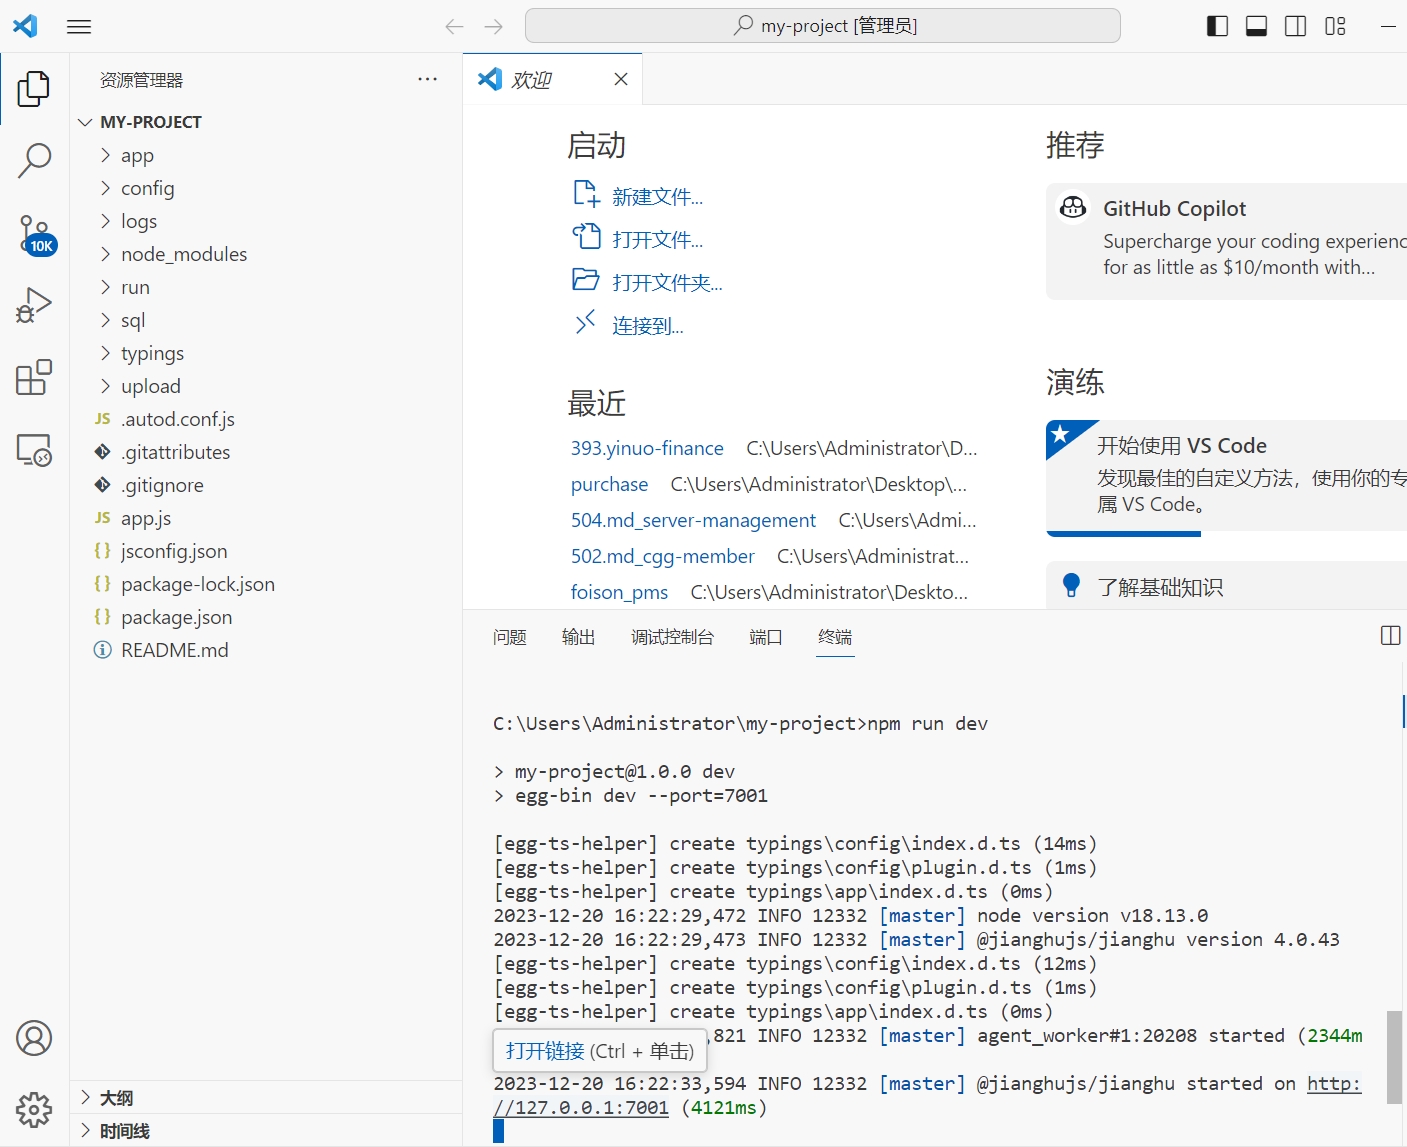
- After installing the dependencies, start the project and access it in the browser at http://127.0.0.1:7001.
- Enter username admin and password 123456.
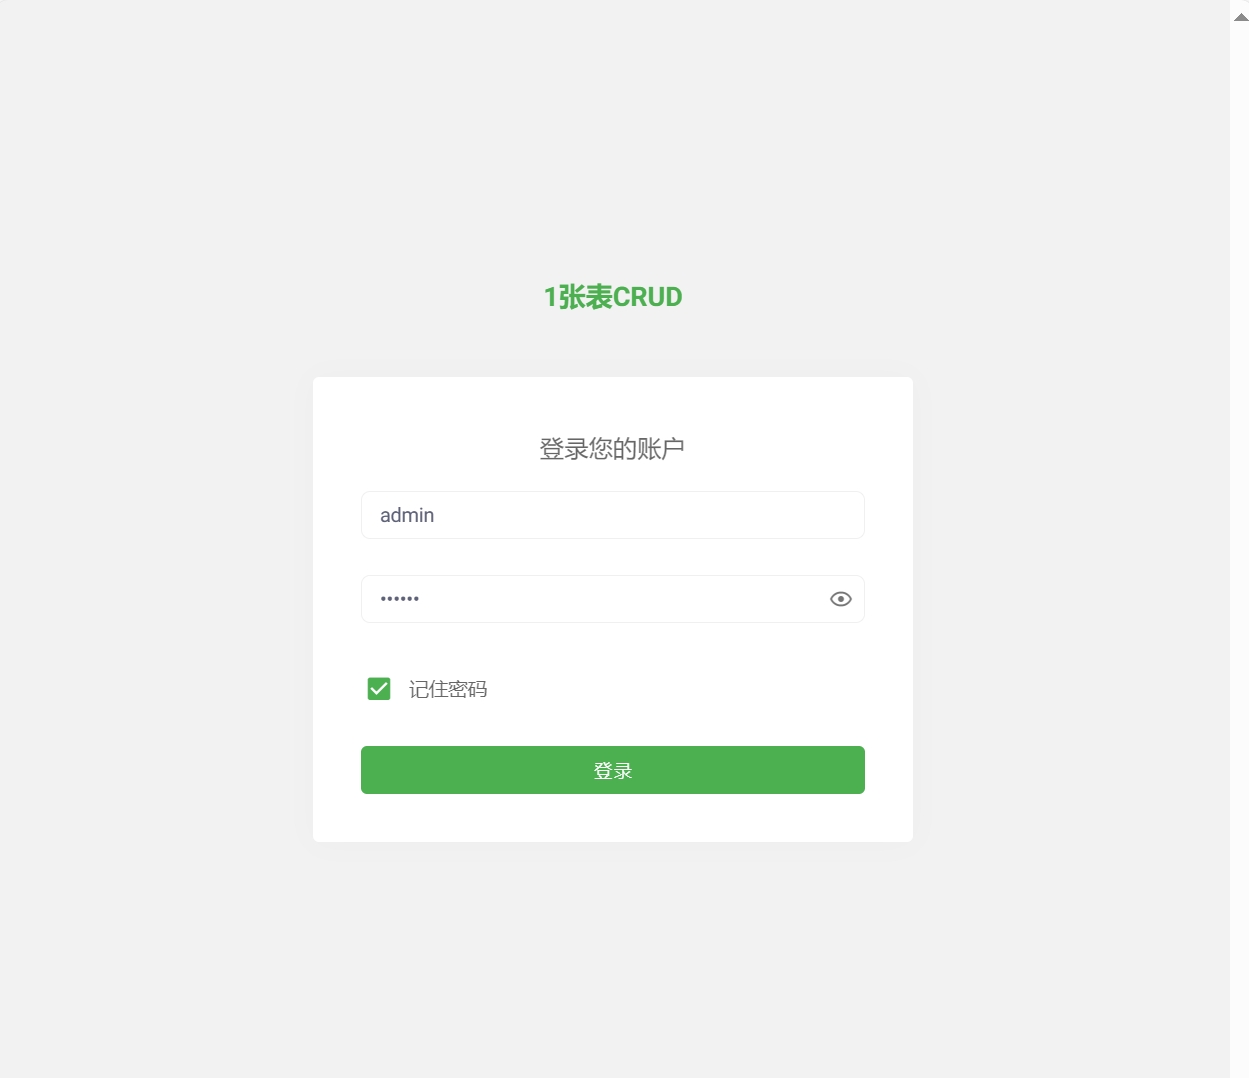
- Login successful, you can now develop on this project!

2. Case Study: JianghuJS - Server-Side Rendering
jianghujs-server-render
Introduction
server-render mainly demonstrates how to mount data to the ctx context and render data using the template engine nunjucks. In a front-end and back-end separated project structure, requests are typically made to call APIs to obtain the required data, which is then rendered to the page. However, the server-render mode does not initiate a request to fetch data; instead, it renders the template on the server and returns the page to the front end. Server-side rendering can improve the initial page load speed and SEO optimization, and is generally used for websites that require SEO and content.
- Browser Demo
- Username: admin
- Password: 123456
Project Overview
The server-render project includes the following pages:
- Article Management
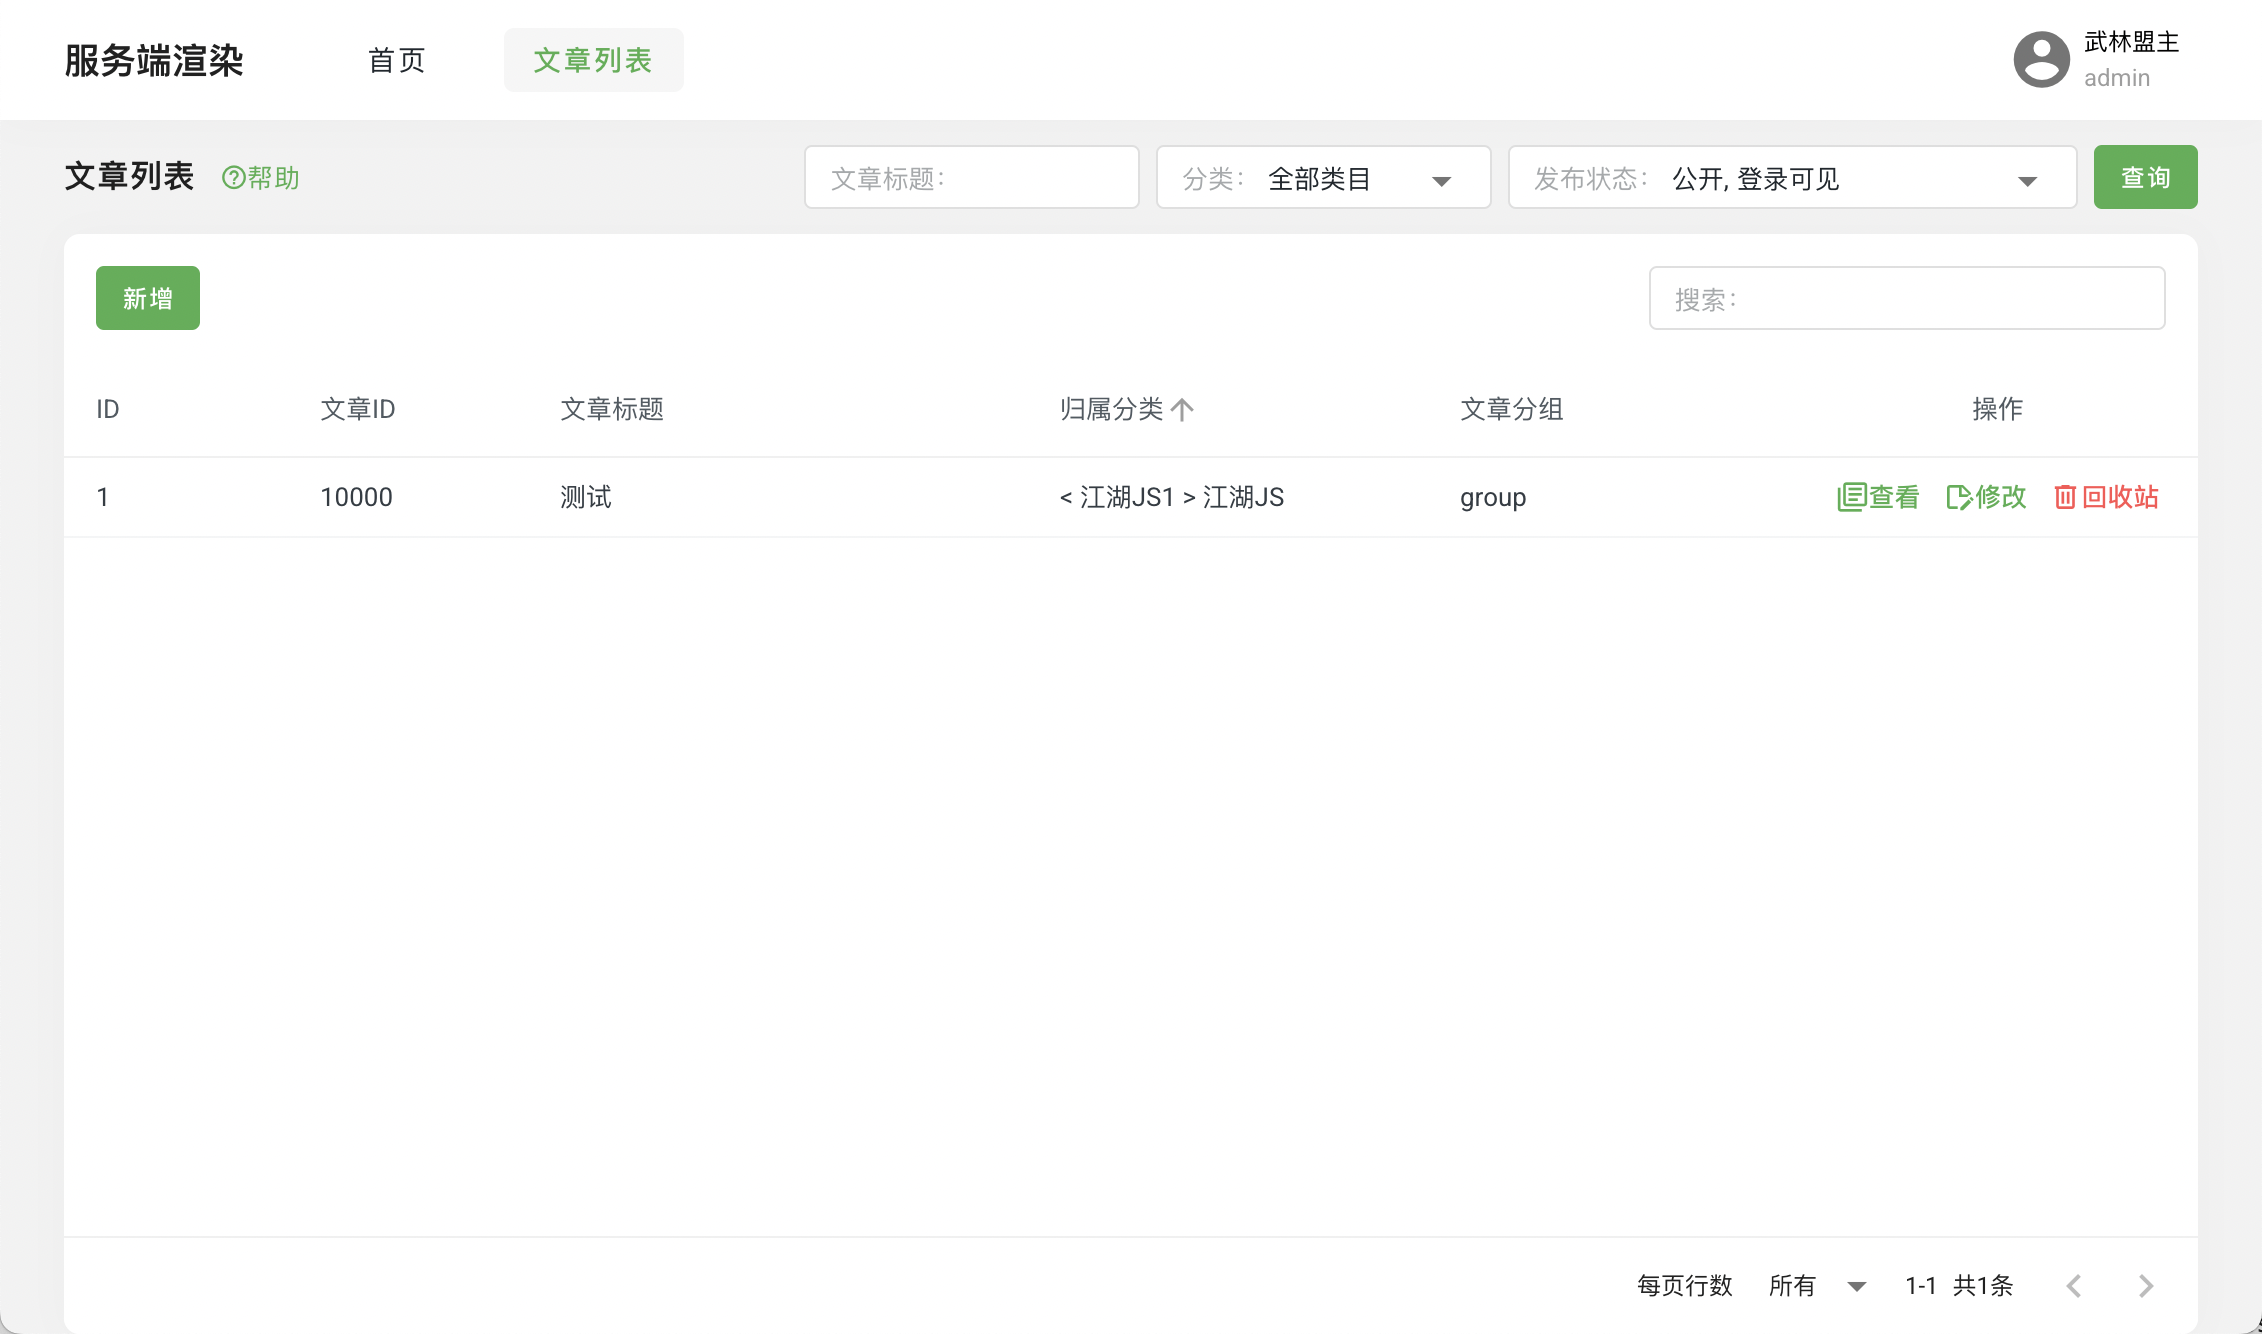
- Server-Side Rendering

This article mainly uses the jianghujs-server-render/app/view/page/home.html in the project directory as an example to explain the implementation of server-side rendering. For courses related to article management, please refer to the Template - Advanced - SEO course.
- Implementation of Server-Side Rendering
- Bind the service method under the pageHook field in the _page table and define the variable names to be used in the template.
// Under the pageHook of home, we bind two service methods
{
  "beforeHook":[
    // When the page is rendered, the test method in njk service will be called
    {"service": "njk", "serviceFunc": "test"},
    // When the page is rendered, the getCategoryListAndArticleList method in article service will be called, and the data will be bound to the categoryList variable
    {"templateVar": "categoryList", "service": "article", "serviceFunc": "getCategoryListAndArticleList"}
  ]
}- Implement the methods defined under the pageHook field in the _page table in the service.
// Implementing the test method in njk service
class NjkService extends Service {

  async test() {
    this.ctx.seo = this.ctx.seo || {}
    this.ctx.seo.article = {
      string: 'Server-Side Rendering Demo',
    };
  }
}

module.exports = NjkService;

// Implementing the getCategoryListAndArticleList method in article service
class ArticleService extends Service {

  async getCategoryListAndArticleList() {
    const {ctx, app} = this;
    const {jianghuKnex} = app;

    let categoryList = await jianghuKnex(tableEnum.view01_category).select('categoryId', 'categoryName');

    return categoryList;

  }
}

module.exports = ArticleService;- Use the data returned from the service in home.html.
// Using the data defined in the ctx context in njk service
<div><$ ctx.seo.article.string $></div>

// Using the data returned from article service, which is bound to the categoryList variable
{% for item in categoryList %}
  <div><$ item.categoryName $></div>
{% endfor %}
3. Case Study: JianghuJS - Page Two-Factor Authentication
- Purpose of Page Two-Factor Authentication
By setting a password (passcode) on the page, the security of the page is enhanced. When users access a page that has a password set, they need to enter the correct password to access the page normally; otherwise, access is denied. After entering the correct password, users do not need to enter the password again for a certain period, which can be adjusted by modifying the configuration on the page.
Configuring Two-Factor Authentication for the Page
Database Modification
- Structural Modification: Add a column
passcodein the_pagetable of the database, with a data type ofVARCHAR(255).
ALTER TABLE `_page` ADD COLUMN `passcode` varchar(255) NULL COMMENT 'Page two-factor authentication; passcode ' AFTER `sort`;- Configure the password for the page: In the
_pagetable, find the page to which you want to add a password, enter the password in thepasscodefield, and save it.
Note: If the
passcodefield is empty, it is equivalent to the page not having a password set.
- Adding Components to the Page
Add component file:
Create/app/view/component/pagePasscodeValidation.htmlin the project folder.Include the component in the page:
In the project folder/app/page/password.html, include thepagePasscodeValidationcomponent.{% include 'component/pagePasscodeValidation.html' %}In the HTML part of the page, add the following component:
<page-passcode-validation validation-duration-hour="1"></page-passcode-validation>Here,
validation-duration-houris the validity period of the current password authentication, calculated in hours. Modifying this value will adjust the validity period of the password authentication.Storage & Validation Logic
Setting validation time cache
let pageValidationObj = {}
try {
  const pageValidationObjStr = localStorage.getItem(`${window.appInfo.appId}_page_validation_obj`);
  pageValidationObj = JSON.parse(pageValidationObjStr || '{}');
} catch (error) {
  console.error("[cachePageValidation]", "json data exception");
}
pageValidationObj[pageId] = value;
localStorage.setItem(`${window.appInfo.appId}_page_validation_obj`, JSON.stringify(pageValidationObj));
Validating authentication information
if (this.passcodeOfUser !== this.passcodeOfServer) {
  window.vtoast.fail({message: 'Page authentication failed'});
}
if (this.passcodeOfUser === this.passcodeOfServer) {
  this.cachePageValidation({
    pageId: this.pageId,
    value: {
      pageId: this.pageId,
      date: dayjs(),
      success: true,
    }
  });
  this.isPageValidationDialogShown = false;
}